
The “Points of Sale” refer to the physical devices you have on-site and differ from “Point of Sale Profiles.” Those profiles instead control the behavior of the targeted point of sale.
*Note: Customer display configuration is no longer available on this screen and has its own section under the Settings tab. If you can not locate it there, you will need to Edit Menu Entries.
You may access all points of sales by navigating to Sales > Point of Sales.
Your points of sale should already be set up for you by your KORONA POS support team. In the event you wish to make any changes to your point of sale, click on one of the desired POS and select Edit.
The Edit Point Of Sales page should launch. Under the Defaults box, your options are as follows:
- Organizational Unit: Or the organizational unit the POS will pull data from
- Warehouse: Warehouse associated with the organizational unit
- Default Customer Group: In the case of special group events and prices, the customer group may be targeted to a specific POS at all times
- Default Payment Method: This is the payment method the POS will automatically assume unless otherwise chosen.
- Table Overview (for restaurant use): You may choose a table layout to show on the main POS screen for table selection
- POS Profile: This can be set up under Settings > Point of Sale Profiles. This profile will control how the POS behaves on its own and when paired with other devices
- TIP Account: You may choose an account that the tips for cashiers will deposit into
- Entry Gate (for ticketing use): This helps to designate a main gate for the POS
- POS Balance Revenue Account: Once a POS balance is performed, this will be the account that receives revenue deposits
- Contra Account: Account with a credit balance mainly used for accumulated depreciation purposes
- Use Alternative Sectors: In the event some products are tax-free. You may use a different tax sector for those items
- Container Mode: Designates whether the Point of Sale acts in container mode by default or not
Receipts
Under Receipt Info Text, You may select any available info text or create something new. To learn how to do so, please visit our Info Text manual page.
On the right side of the page, under the Authentication box, is your specific terminal Identification and Secret. This section will give a status as to whether this POS is coupled or not.
Finally, beneath the Receipt box, you will find the Print Header and Footer. You may enter a text that will appear at the top and/or bottom of the receipt.
By selecting the “…more” drop-down menu, you may select the POS Profiles to be taken to that page or view a Point of Sale report.
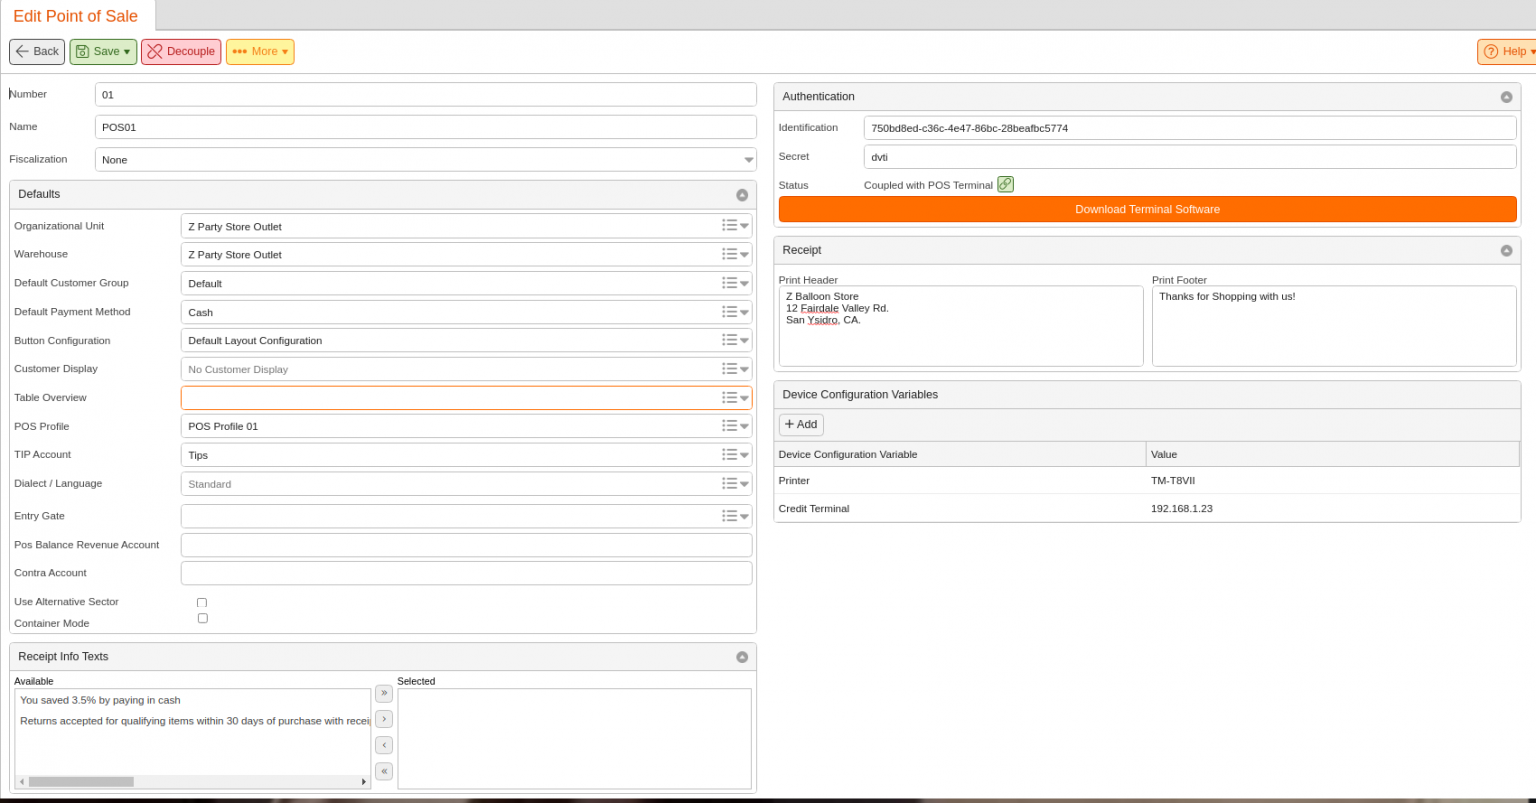
POS-Specific Variables
It was previously possible to store the device configurations in a single POS profile, also with POS-specific parameters, for several POS systems (e.g. IP addresses for card terminals or IDs for each POS for payment providers). If the number of registers is larger, this quickly becomes confusing in the POS profile.
Therefore, the device configuration variables were introduced. In the POS profile, you assign the variable on the relevant device to the relevant key. You also specify a default value.
In the configuration of the point of sale (Sales > Points of sale), you can specify an individual value for the variable for each POS. If you do not enter a value, the terminal uses the default value specified in the terminal profile.
If you use a POS profile for each POS, you do not need any device configuration variables.
For more information on adding devices to the point of sale and understanding Device Configuration Variables, you can refer to our manual page.