
Customer Groups can be linked to Promotions and Price Rules, allowing you to set up employee discounts, senior discounts, student discounts, and more.
To learn how to create a customer group promotion/discount, see this page.
The creation of Customer Groups via the back office is relatively simple. Start by navigating to Settings > Customer Groups.
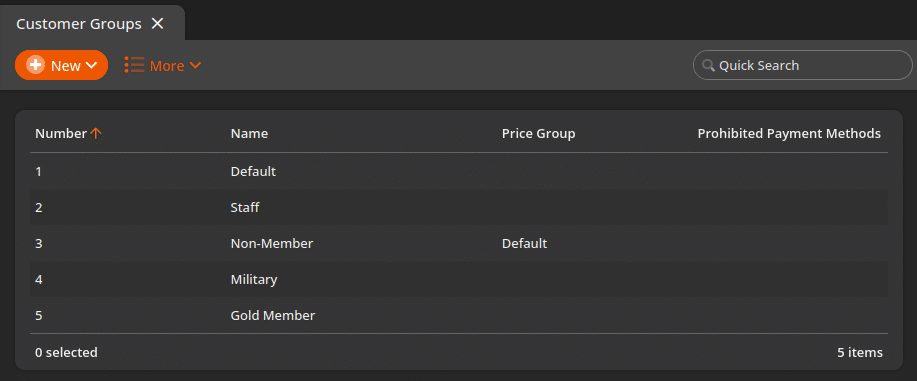
Use the +New button to add additional customer groups. You can assign a Number, Name, and Price Group to the new customer group.
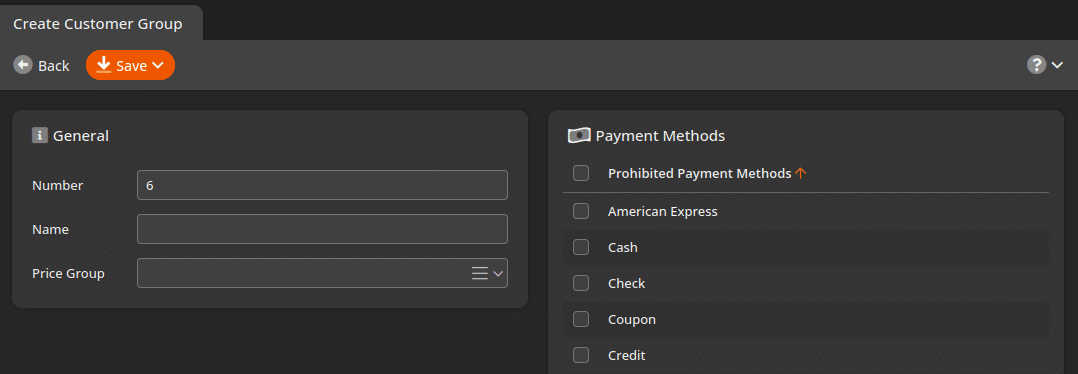
You also have the option to block certain payment methods for the customer group by selecting Prohibited Payment Methods checkbox. This means they may not pay with a blocked payment method after setting this customer group on the receipt during checkout.
This will apply the customer group to the open receipt, and the group name should appear at the top of the receipt.
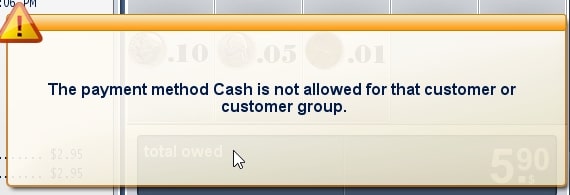
If the customer tries to pay with a blocked payment method for the customer group, the cashier will be shown the statement displayed in the screenshot below.
You can create a button with the type Customer Group to add a specific customer group to a receipt at the press of a button. If you need any assistance creating or adding buttons, you can reference our Creating Buttons manual page.