The POS profiles control how a certain point of sale device will function and connect to other devices.
To access the POS Profiles, please navigate to Settings > POS Profile.
The Number field will auto-generate. Fill in the Name field.
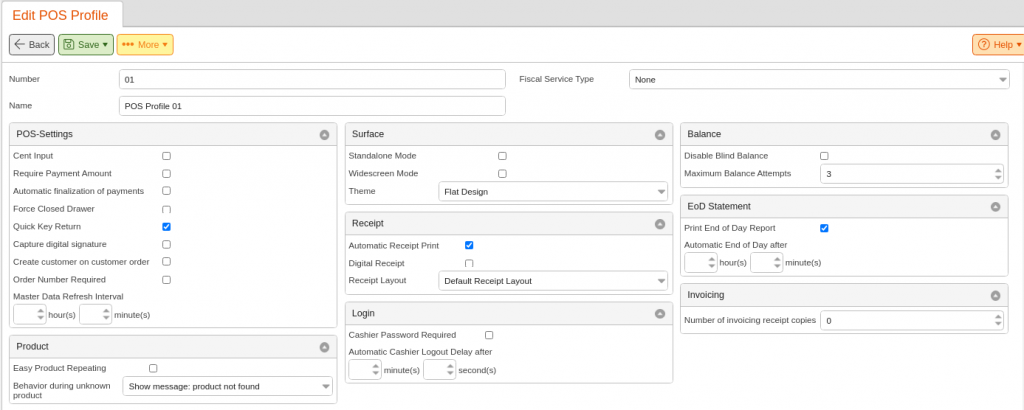
POS Settings
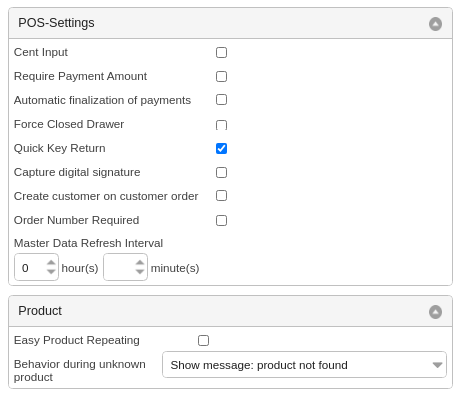
Cent Input: Automatically inputs cent amounts so no mistakes are made in prices.
Require Payment Amount: This will require an amount to be put in on the total screen.
Automatic Finalization of Payments: Closes out the current receipt automatically after the customer has paid in full or more than needed.
Force Closed Drawer: Prompts to close cash drawers after a transaction. *Note: This is only compatible with certain devices.
Quick Key Return: Allows for a return to the main page after a function has been carried out.
Capture Digital Signature: Requires the customer to put a signature in the customer display before processing a transaction.
Create Customer on Customer Order: Creates a new customer if one is not already assigned to the receipt at the time of creating a customer order.
Order Number Required: This is mainly used for restaurants, and it requires a table number input before a transaction can be carried out.
Master Data Refresh Interval: The POS will automatically Retrieve Master Data at the time interval set.
Product
Easy Product Repeating: After the most recent product has been scanned, you can press enter to repeat that same code.
Behavior During Unknown Product: There are three options from the drop-down. External System Call can be used to manage unknown products externally. You are able to send those scanned products outside of KORONA using an External System Call. This will expand what you can do with the information, but will likely need a third-party developer to help put it together.
Open form: extended product handling will open a page to allow you to assign the unknown product code to a product on the POS. To finalize these changes, you will need to go to the cloud, click the bell on the top right, select the product code recommendations notification, and then choose what to do with those codes.
Show message: product not found simply alerts the cashier that the product code does not exist.
Surface
Standalone Mode: Widens the screen of the KORONA client running at the POS for a better visual and also disallows the closing of the KORONA [- client.
Widescreen Mode: Allows for a 4×9 Button layout at the POS.
Theme: Changes the design of the POS.
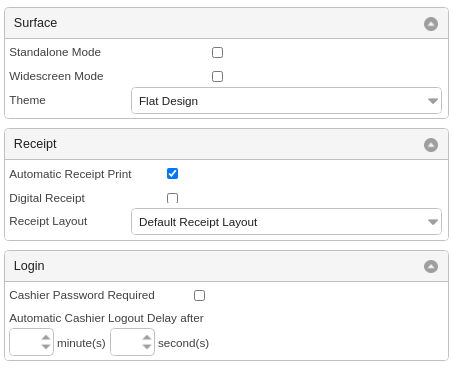
Receipt
Automatic Receipt Print: Prints the receipt automatically after every transaction.
Digital Receipt: Selecting this option gives the customer the ability to receive a receipt via email.
Receipt Layout: Select the receipt layout for your POS. If one is not available for selection, you will need to create one. For more information on how to do so, please navigate to our Receipt Layout manual page.
Login
Cashier Password Required: Prompts for a login code.
Automatic Cashier Logout Delay in seconds: If no action is carried out by the cashier within a certain time frame, the POS will automatically log them out.
Balance
Disable Blind Balance: Once a cashier balance is carried out this will not notify the cashier of the expected balance amount.
Maximum Balance Attempts: Shows how many attempts a cashier gets to enter a cash amount during a cashier/POS balance.
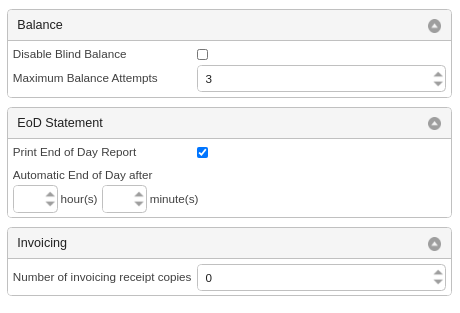
EOD Statement
Print End-of-Day Report: This automatically prints out an end-of-day statement once a cashier balance or POS balance has been carried out
Automatic end of day: Runs an automatic POS balance report at the specific time selected
Invoicing
Number of invoice receipt copies: The number of invoicing receipt copies the system will print
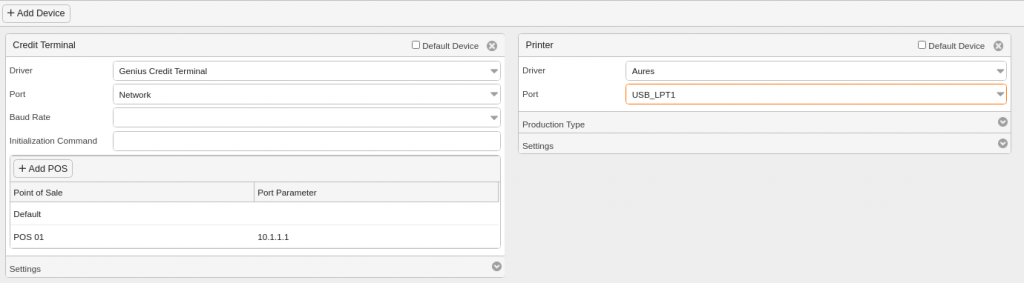
Devices
Devices is an area where you can configure the hardware or connected peripheral devices you are using with the particular point of sale this POS profile is assigned to.
By clicking +Add Device, a pop-up box will appear. You may select the type of device and the device brand you wish to connect. This would be for things like Printers, Payment Terminals, and Cash Drawers.
For more information on specifically configuring devices, please refer to our Adding Devices manual page.
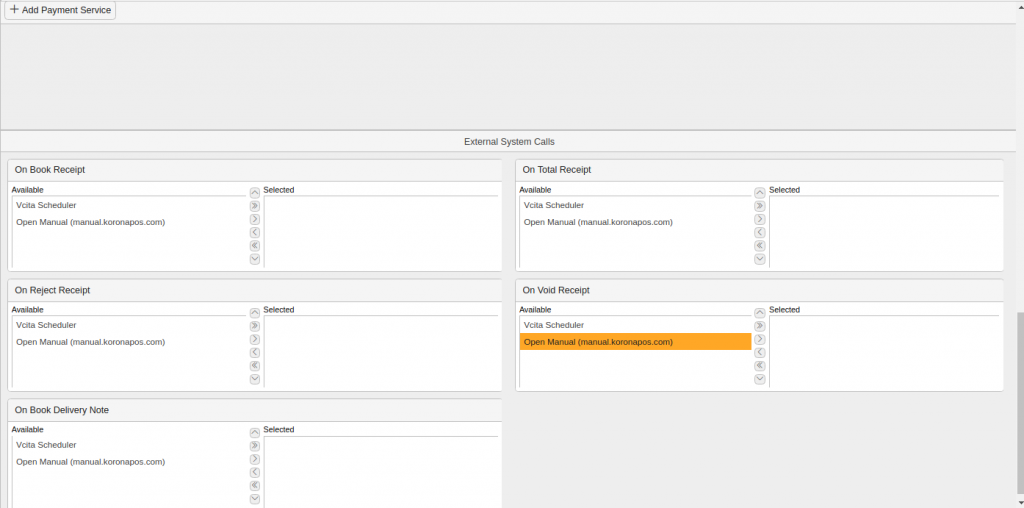
Payment Service and External System Calls
Under the External System Calls tab, you may set up external calls on the following categories: On Book Receipt, On Total Receipt, On Reject Receipt, On Void Receipt, On Booked Delivery Note. under each category, your available calls are for Email Access and Stocks.
Once done, select the Save Button at the top of the screen. you also have an option to Save and Copy. Under the More Drop-down menu at the top of the screen, there is an option to view Receipt Layouts.
For more help, you may hover over the “Help” drop-down menu and select the manual page needed.
To configure External System Calls, navigate to Settings. If you can not locate it there, you will need to Edit Menu Entries.
To learn more, please visit External System Calls.