The first step to configuring a new BlockChyp device is to plug in your device. You will want to make sure you have the device plugged in via Ethernet in addition to making sure it has power. You then want to log into the BlockChyp backend and navigate to your merchant account and select “Activate Terminal”, underneath “Active Terminals”. From there you will want to boot up your terminal.
While your terminal is booting up for the first time, a code will show up on the screen, you will want to enter that code into the Activation Code portion of the “Activate Terminal” page. After which, you will name your device. We recommend naming the device with the same name you use for the POS you plan to connect it to, so if you plan to connect it to POS 01, I would include that in the name of the device. Once you hit Activate Terminal the screen on the terminal should change and flash “Now Activated”.
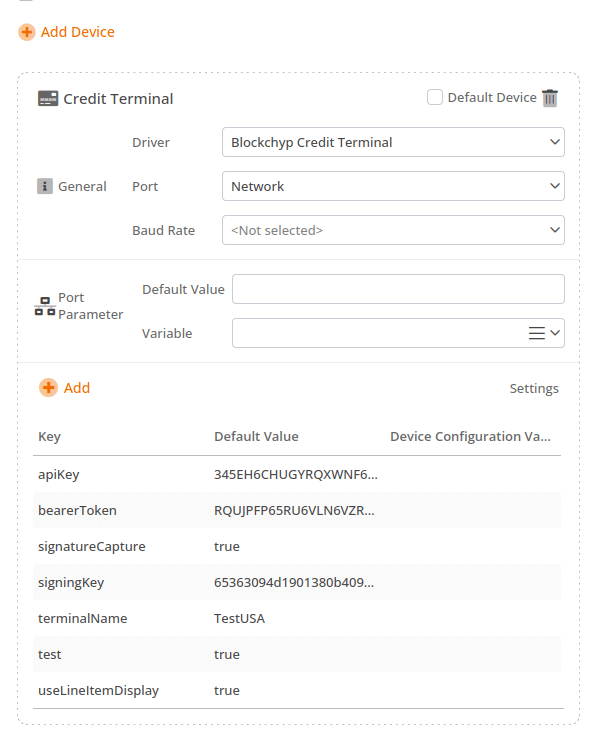
You will want to log into your Korona Studio account. From there you will navigate to Settings > POS Profiles. If you are switching from a previous credit card device, you would want to copy your previous profile and remove the Credit Card device from the POS profile and add BlockChyp as the Credit Terminal under add devices. If this is the first time you’ve set up a credit terminal in Korona you can skip copying the profile. Underneath the device there should be an option to add Settings. You will want to add the following settings, making sure to pay attention to spelling and capitalization and save after adding each variable under the Key portion.
- apiKey – API Key in BlockChyp
- bearerToken – Bearer Token in BlockChyp
- signingKey – Signing Key in BlockChyp
- terminalName – The name you created earlier for your BlockChyp device
- useLineItemDisplay – true or false depending on whether or not you wish the device to display what products are on the receipt
- signatureCapture – true or false, do you wish to capture signatures on the device
You will now want to go under Merchant Tools > API Credentials. For each device you will want to generate a new key. You will also want to make sure that you do not accidentally close the credentials page as it will only display once per credential set and if you are unable to copy it then you will have to delete the credential set and regenerate it. You will want to match the credentials to the requisite ones above, API Key to apiKey, Bearer Token to bearerToken, and Signing Key to signingKey. You will also need to enter the Terminal Name under terminalName, exactly as it is spelled in BlockChyp. You will also need to make sure that the proper POS profile is assigned to the POS you wish to use that device at.
From there you should be good to retrieve master data at your POS, restart the POS, restart the BlockChyp terminal, and then make a test transaction to ensure everything is correctly configured.
Cash Discounting
Please first ensure your BlockChyp account is set up for Cash Discounting.
You will first want to navigate to Sales < Points of Sales and check the version for the POS. It will have to be set to 2.1.23 or above in order for the remaining steps to work. If you are below this version, please contact support and we can help with updating.
You will then want to double click on your POS and select a TIP Account. This will specify where the fee will go when the POS receives the payment response.
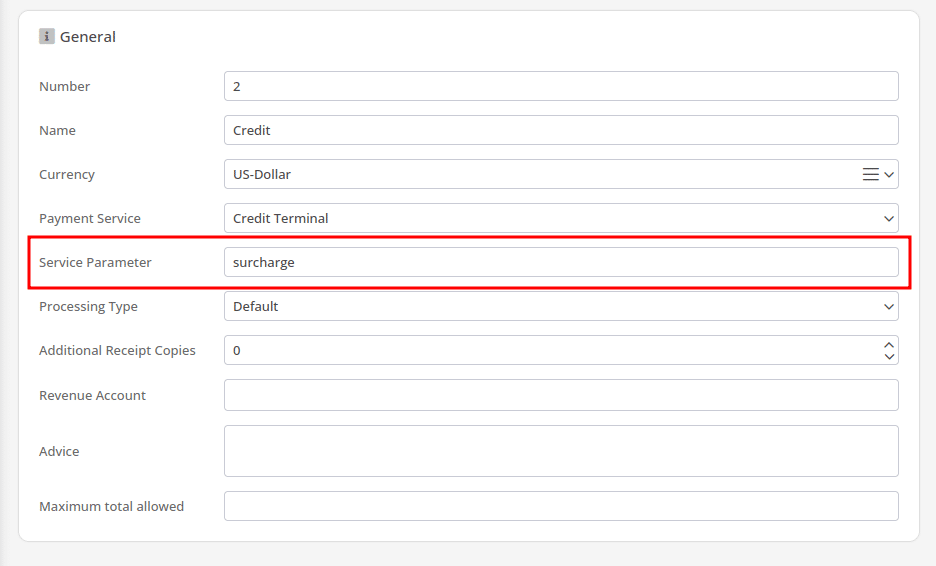
Then you will want to navigate to Settings < Payment Methods and select your Credit payment method. There will be an option for service parameter, you will want to enter “surcharge” as the service parameter for the payment method.
You can then Retrieve Master Data and restart your POS to test.