
A common task in retail businesses is adding new products to your database. Your product catalog should always be up-to-date to guarantee optimal sales and inventory management. KORONA POS makes this workflow quick and painless.
To access your product database, navigate to Inventory > Products in your KORONA Studio.
IN THIS ARTICLE
Working with the Product List
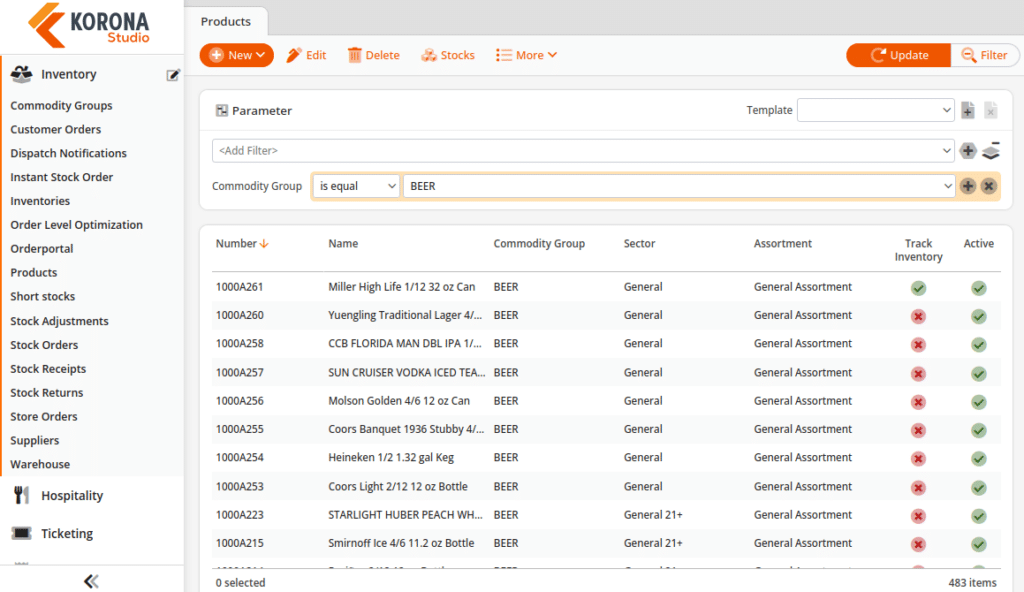
After selecting Inventory > Products from the left side, you will get to your product list. You have the ability to sort the list by each individual column. In addition, you can also manage which columns you would like to see.
In the top right corner of the list, you will have a Quick Search field that allows you to quickly search for products by name or number. For an advanced search, you can use the Filter button, allowing you to filter your product list by very specific filter options. This powerful tool helps you manage large product databases efficiently. You may also Edit or Delete a Product by highlighting the item and selecting the desired choice.
Additionally, highlighting a product and selecting Stocks will list the inventory count for that item per organizational unit. It will also list the total number of Current Goods and Ordered Goods. Moreover, you may select the Store Prices button to adjust prices for multiple org units for the selected product.
If your desired product does not yet exist, use the +New button to create a new one.
Quick Tip: If you can think of a similar product in your database, select a similar item in your list and use the Copy button instead. This will save you time configuring product settings as you only have to change certain settings as opposed to setting all required product parameters.
Create a Product
Only a few basic product settings are mandatory when setting up a new product:
- Name – Name of the product, and what will show on the receipt for the customer.
- Commodity Group – Department/Category for the product.
- Assortment – Leave the default “General Assortment” unless you have a more complicated setup. (To learn more, refer to the Create Assortment manual page.)
- Sector – Tax category for each product, typically taxable (general) or tax free.
- Tags – Optional, but another way to categorize products.
- Ticket Definition – Assign if you are a ticketing customer and this is an admission/ticket product.
Note* If the desired selection doesn’t appear in any drop-down list, try entering part of the name/number to filter the result list. If the desired selections are unavailable, you can create them in the appropriate sections.
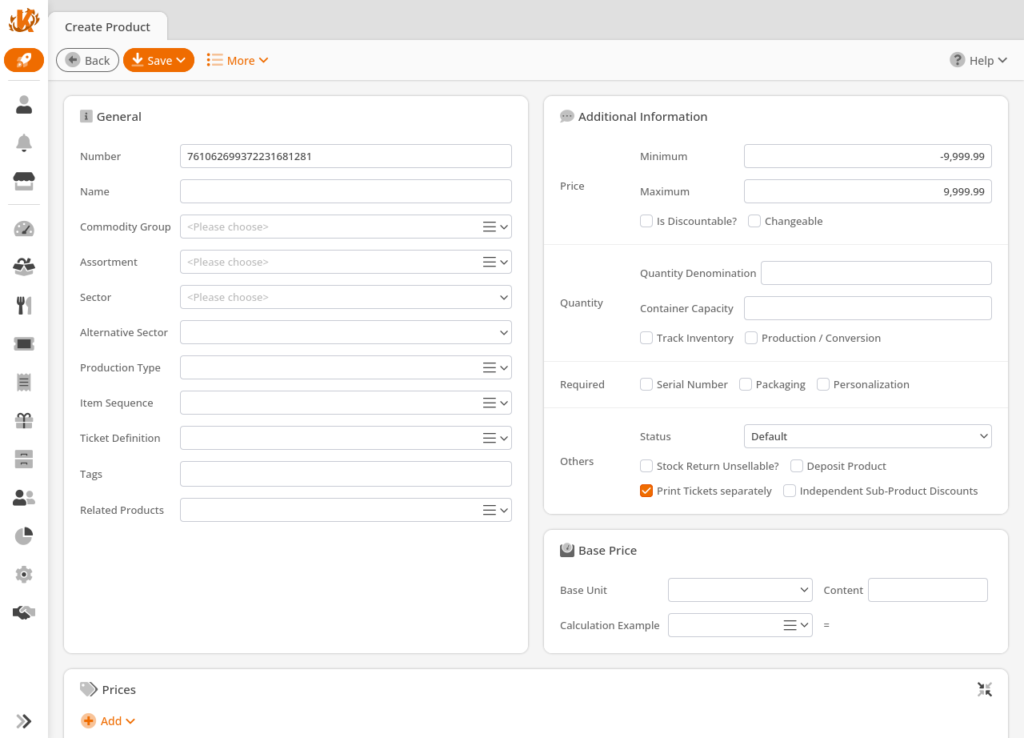
Additional Product Information
- IsDiscountable will allow for discounts at the POS.
- Price Changeable allow manual price adjustments at the POS.
- Quantity Denomination – If the number “1” is entered into the Quantity Denomination field, then only multiples of 1 can be sold of this product, thereby preventing cashiers from selling partial quantities. The same applies to other numbers.
- Container Capacity – This is used for container products only. It is not your on hand quantity/inventory level.
- Track Inventory will track the inventory count for the product.
- Production/Conversion will allows you to transfer the stock of 1 product into multiples of another.
- Require Serial will prompt for a serial number input each time this product is selected at the POS.
- Packaging required prompts for packaging at the POS.
- Personalization forces adding customer information for a specific product on the current receipt.
- Status – Can be used to change the product to sales locked (can’t be sold) or deactivated (acts as if it is deleted)
- Stock Return is Unsellable will mark the product as lost in a Stock Return, and reduce the stock level.
- Deposit Product is most commonly used with CRV or Bottle Deposits. To learn more, please visit our Deposit Product manual page.
- Print Ticket separately prints a separate ticket for each ticket sub-product. E.g. Combo ticket with 3 entries, this setting will make it print 3 separate tickets rather than 1 ticket with 3 uses.
- Independent Sub-Product Discounts – If you want your sub-products to get the same discount from the main product.
Prices
The price section is for setting your retail price by date or product code. If the product has no prices configured, the point of sale will handle items as open items (requires cashier to input price each time).
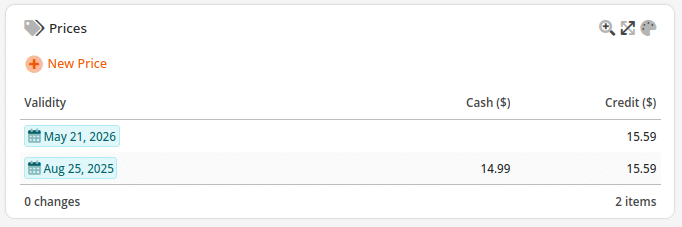
To add a new price, select Add New Price. If you would like to schedule the price change in advance, select a future date, and the point of sale will start applying the new price on the set date.
For adding prices for a specific product code, you can reference our Product Code Quantity manual page.
Suppliers
This section is for assigning a specific supplier (vendor) to the product along with specifying the price you pay for the product. This also includes the
- Order Code – Supplier SKU. The number you give your supplier to order the product.
- Description – Any optional text you want to include about ordering the product.
- Container Amount – How many come in a case/container when you order the product.
- Item Price – Cost. The price you pay for the individual product.
- Container Price – The price you pay for the case/container of this product. Only Item or Container price is required, the other price will be calculated automatically.
Click on +Add to add a supplier to this product and click Save to finalize.
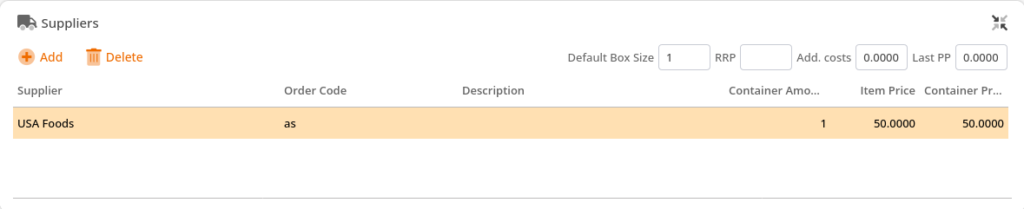
For more information, visit our manual page: Adding Suppliers To Products.
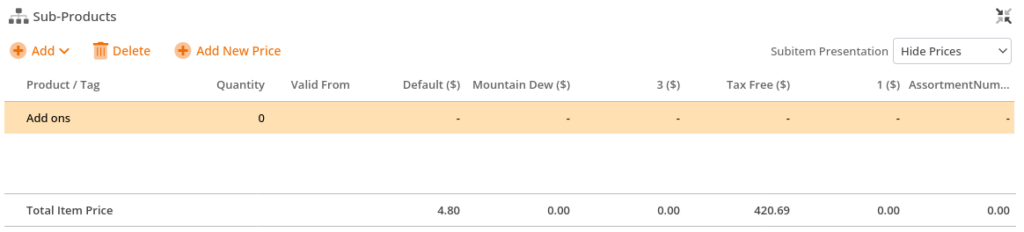
Sub-Products
Sub-products will always get added to the transaction whenever the main product is rung up. You can define a specific price for each sub-product, meaning this can also be used to make “bundle”/composite products. If the sub-product does not have a defined price, the point of sale will use the default price for the sub-product. If the sub-product should not contribute to the price, then you can set the sub-product’s price to 0.
You can also adds tags as a sub-product, using our tag for selection feature. This is commonly used for cafe/bakery merchants that need to add modifiers/add-ons to products at time of sale.
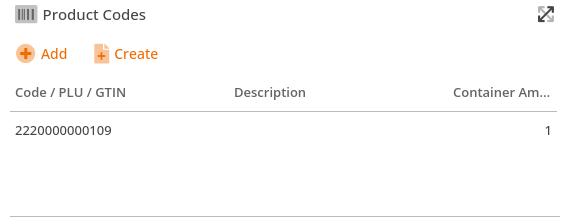
Product Codes
This is for your UPC, SKU, etc. At the POS, any of the product codes can be used to add a product item to the receipt. You can define a specific item quantity with each product code.
This is useful if you sell a product as a single item and by the case. In addition, if you also use separate pricing for different product codes, please look at the Pricing by Product Code manual page.
Editing Products
To edit a product, select the product from the product list and use the Edit button. In addition, you also have the option to use the Copy button, which will create a new product with the same settings.

Another way to edit products is the mass editor. If you have an active filter or select multiple items in the list, you can use the Edit button. This will take you to the mass editor. You can enable multiple settings for change. For additional resources, you can check out our Mass Editing manual page.
*Note: please use this feature with caution, as it affects multiple products simultaneously.