Product tags are a great way to categorize and sort products for rapid searching and button layout creation. With KORONA POS, creating and assigning product tags is easy. Tags can be used for selections, such as product add-ons or modifiers. Tags can also be used to set up promotions for a group of products.
Setting up Product Tags in KORONA Studio
To create a tag inside a product, you may need to have products already created. You can create the product tags while creating the product as well. If you haven’t created any products, please see Creating Products manual page for more information.
Begin by going to the product selection menu through Inventory > Products. Once you are there, select the product that you wish to edit. You will be presented with the Edit Product screen.
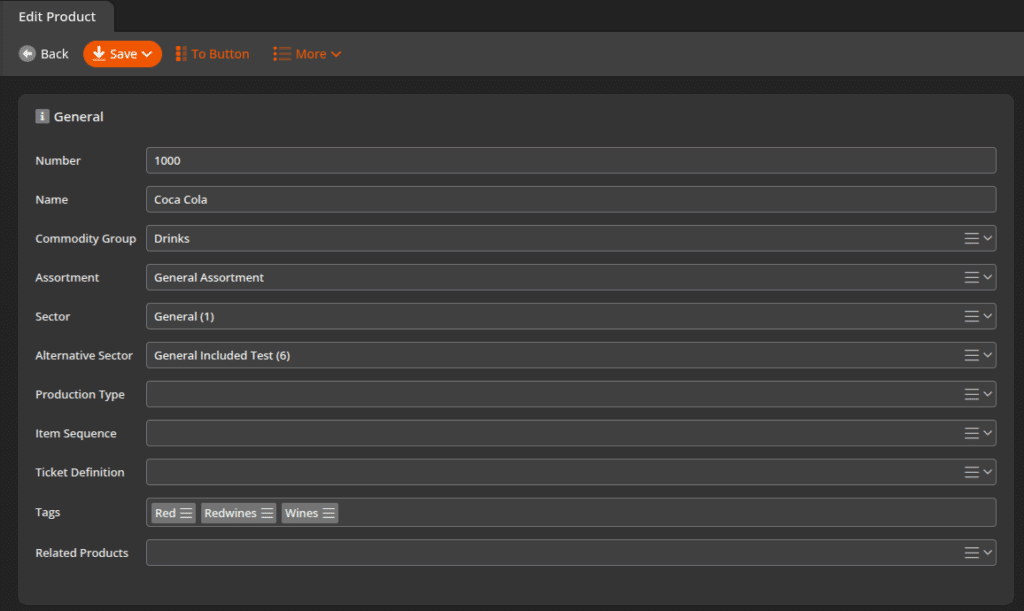
Towards the top right is the Tags field, just below the ticket definition box. Here, you can designate what you need to have your product tagged as. In this case, we will be using the “Red Wines” tag.

Type in the tag you wish to use. Note, hitting the space bar while generating the tags will create individual words. If you need to, you can create the tag as all one word.
Once you have created and added the tag to the product. Click on the Save button at the top of the screen. These tags can also be re-used on other products.
Using Tags to Filter Products
Product Tags can also be used to assist in searching for a certain category of products. In the screenshot below, we have used the “redwines” tag to filter and display all of the red wine products we have in stock. This is done by clicking the filter button at the top of the Products screen.
Next, we select the tag filter from the available filters box. Under the active filter box, we set the tag filter to “is equal” from the drop-down. Finally, we enter the tag of the products we are looking for.
Note* Tags can also be used to rapidly generate button layouts on point of sale terminals. For more information on this topic, please visit our Create Button Layouts from Tags manual page.

Mass Tagging Products
KORONA allows users to mass tag products. To do this, you will need to go to the Product screen by navigating to Inventory > Products. Using the shift or ctrl buttons on your keyboard, select the products you wish to edit.
Click on the Edit button at the top of the screen. You will be taken to an Edit Products screen. This screen will allow you to make edits not related to a specific product.
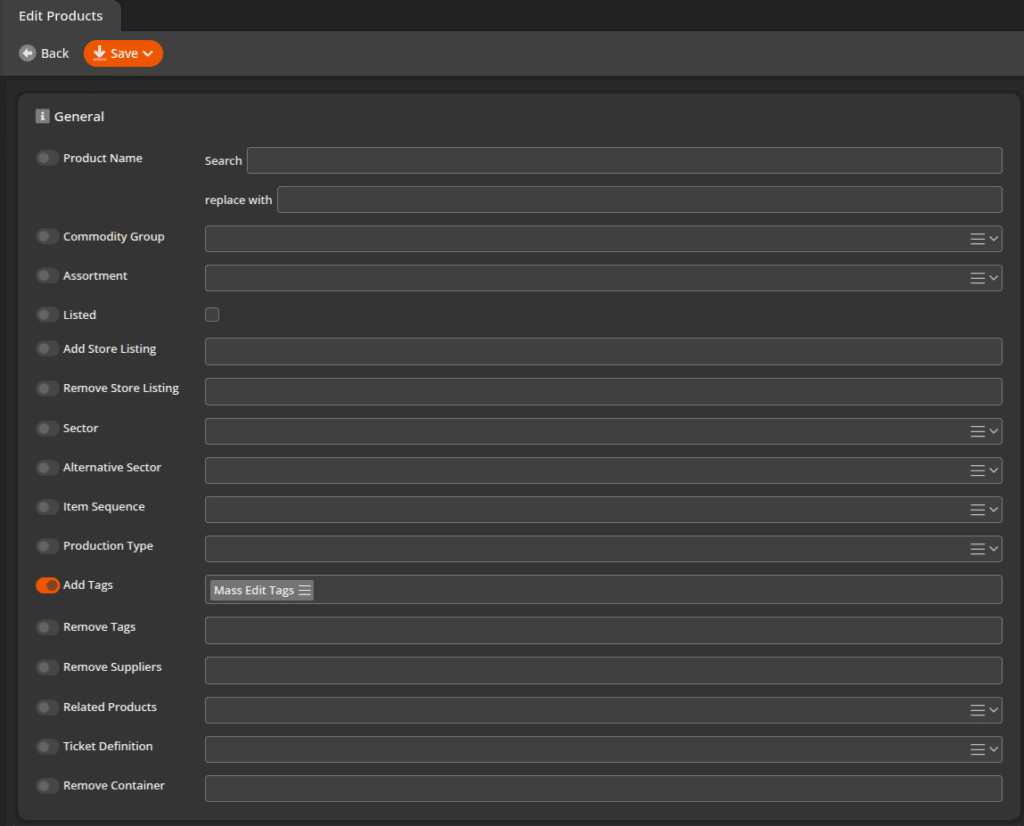
Go over to the add tags box and type in the tags you wish to add. A slider button will activate, indicating that is one of the edits that will be made to the products. You can also remove tags from products if desired. To do this, go to the remove tags box below add tags, and type in the tags you wish to have removed.

When you have finished adding your tags, save them by clicking the save button located at the top of the screen. The products you have selected will now have the tags you added. Any tags you have elected to remove will also be removed from those products.
Product Pack Tags
Product Pack Tags are tags that can be used for packaging products. For example, if you are selling liquids, such as oils, you also need to sell a bottle with it. This allows you to set various prices based on the size of the package that is used with the product. It also allows you to sell multiple packs, such as soda packs.
You will need to have a product created that you wish to have packaging set up for. In our example, we’ll use a Specialty Drink Syrup as the liquid. And then we’ll make specialty packaging products for the different sizes in which we sell this (250ml, 500ml, 750ml).
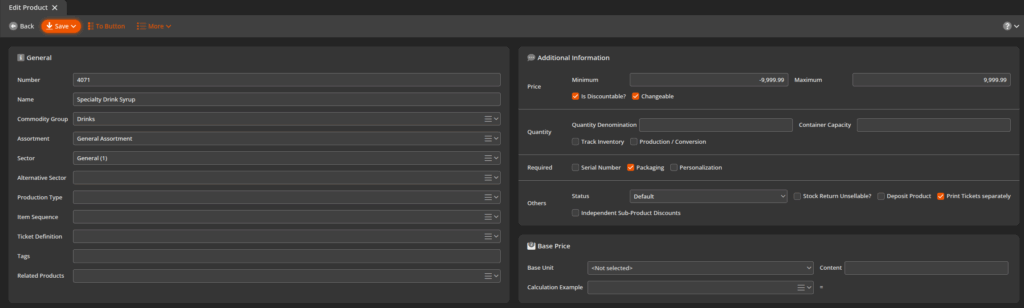
Create the product as you normally would. Give it a name, and assign a sector, assortment, and commodity group to it. In this example, we are charging at the bottle size. So we do not need to specify a price for the juice itself.
Note* For detailed information on creating products, please see our Creating Products page.
In the Additional Information box, tick the checkbox marked Packaging Required. Save the product by clicking the Save button at the top of the screen.
Creating Packaging Products
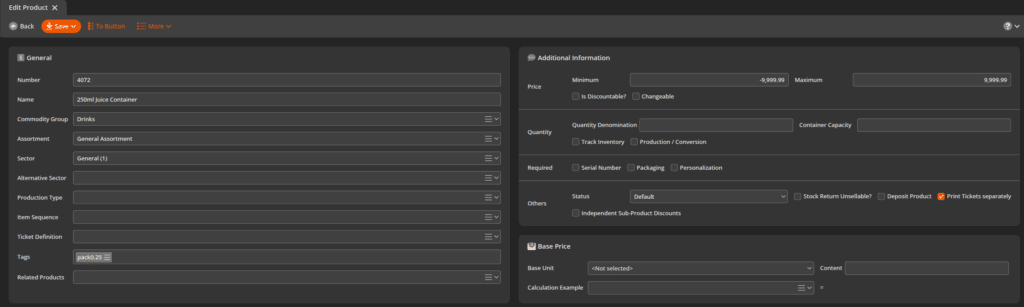
Now we need the packaging products that we’ll sell our juice inside of. Create another product in the same manner. This time, give it a price. For this example, we have priced a 250 mL Bottle at $2.50.
We will now assign the pack tag to the product. You must use a specific format that matches the quantity you ring up at the register.
For our example product that is 250ml, we’ll create a tag called “pack0.25”
Pack Formatting
The format for sizes needs to follow these rules:
pack<quantity>
Whatever is specified in the quantity section of the tag is the amount you’d specify for the liquid product when you ring it up at the POS. That is how the system knows to associate this particular package size with this particular juice product.
Save the product. You are able to create additional package options as needed using the methods above. For instance 500ml would have a tag of “pack0.5” or a 750ml product would have a tag of “pack0.75”
Once all the package options have been made, you will just have to make a button for the juice product itself (liquid inside the containers, not the container products themselves.)
For detailed information on assigning buttons to button layouts, please see our Create POS Buttons / Button Configuration manual page.
Once you have added the product to the button layout, Retrieve Master Data on all terminals.
Using Product Pack Tags at the Point of Sale
When ringing the product up at the point of sale, you want to specify the quantity of liquid before adding the product to the receipt. From there the system will then automatically populate the relevant pack size options for this liquid.