
The Handheld Inventory App allows you to process stock receipts, stock adjustments, store orders, dispatch notifications, count inventory, or scan for product information.
Logging Into the App
To get started, you will need to initiate and load the app. You will be prompted with a login screen.
Log in using your employee-assigned login code, then choose your store location, and it will bring you to the Dashboard Menu.
The dashboard will list all available features the app offers, which include:
- Inventories
- Stock Receipts
- Stock Adjustments
- Store Orders
- Dispatch Notifications
- Product Information

Sidebar Menu
If you click on the ≡ icon, you will be redirected to the app’s sidebar, which gives you the same options as the dashboard. Here, you can update the app with changes by retrieving master data at the bottom or logging out and closing the app. To make this go away, swipe left.
Updating The App
Our inventory app is now hosted directly in the Google Play Store. The app is called ‘Korona.mde’, and you can find it either by searching for the name directly, or just searching for Korona.
Once the app is downloaded and installed, find it in your applications and login with your KORONA Studio credentials for the first time. Going forward, employees will log in using their Cashier login code.
For best practice, uninstall the old app first, if one already exists.
Updating Database
Swipe down from the top of the screen to refresh stock values.
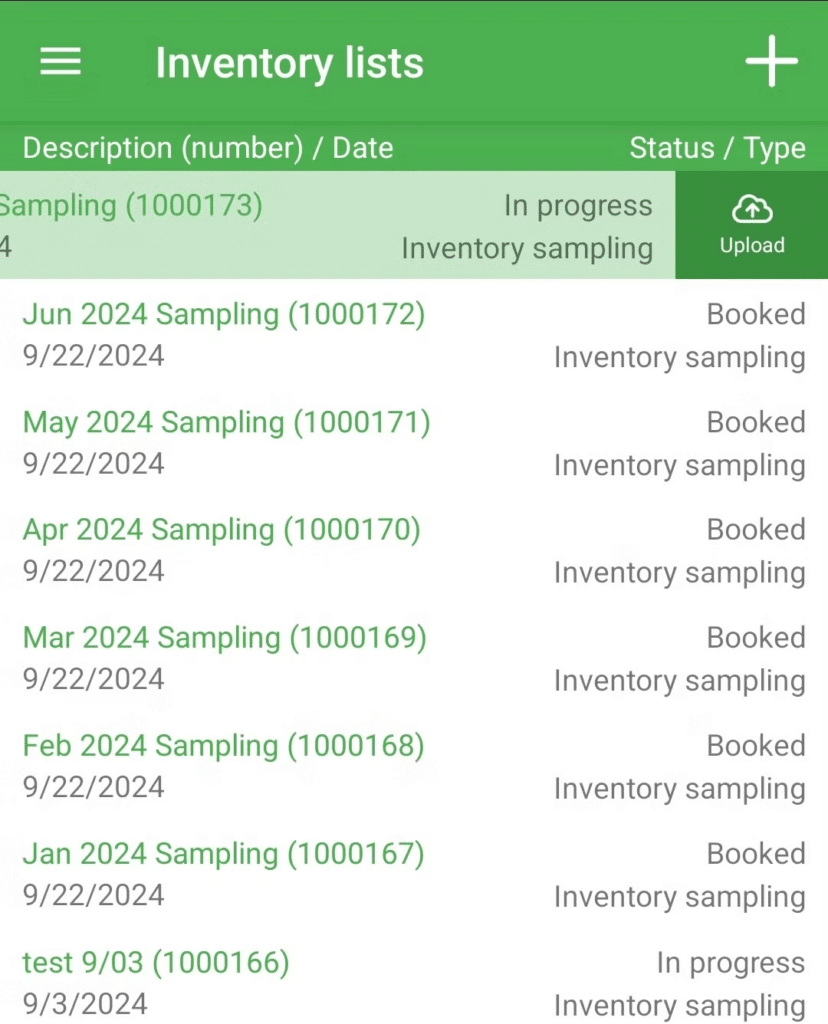
Inventories
This lists all inventory counts or stock receipts you have started in both your KORONA Cloud account and on the inventory app. From here, you can either tap on the + icon to create a new list or tap on any of the counts or receipts on your list to view.
Pressing Plus / Create New: You must fill in the description and then choose whether or not the inventory books automatically, check listing, check assortment, and whether or not products should be active or deactivated.
To confirm your selection, tap ‘Create‘ at the bottom right of the screen.
Edit List: Inside the inventory count screen, tap on the magnifying glass to add a product. After you pull up the product, you are prompted to chose which container amount you’re selecting (if the product has multiple suppliers). Next, key in how many you have and hit the ‘plus’ button to add it to your count or ‘equals’ to set the count to that amount. Alternatively, you can repeatedly scan the barcode of each item to increase the count by 1.
To move on to the next product, select the magnifying glass to search again or scan the next product.
The inventory will save itself, or you can swipe down to reload the screen and ensure it has been saved. This saves the inventory locally to the device. To upload your changes to the cloud from the inventory lists screen, swipe left on the inventory and press ‘upload.’
Warning: Always manually retrieve master data BEFORE working on an Inventory Count and hit Upload after working on one to make sure no one is making changes in the Studio that could effect the veracity of your work.
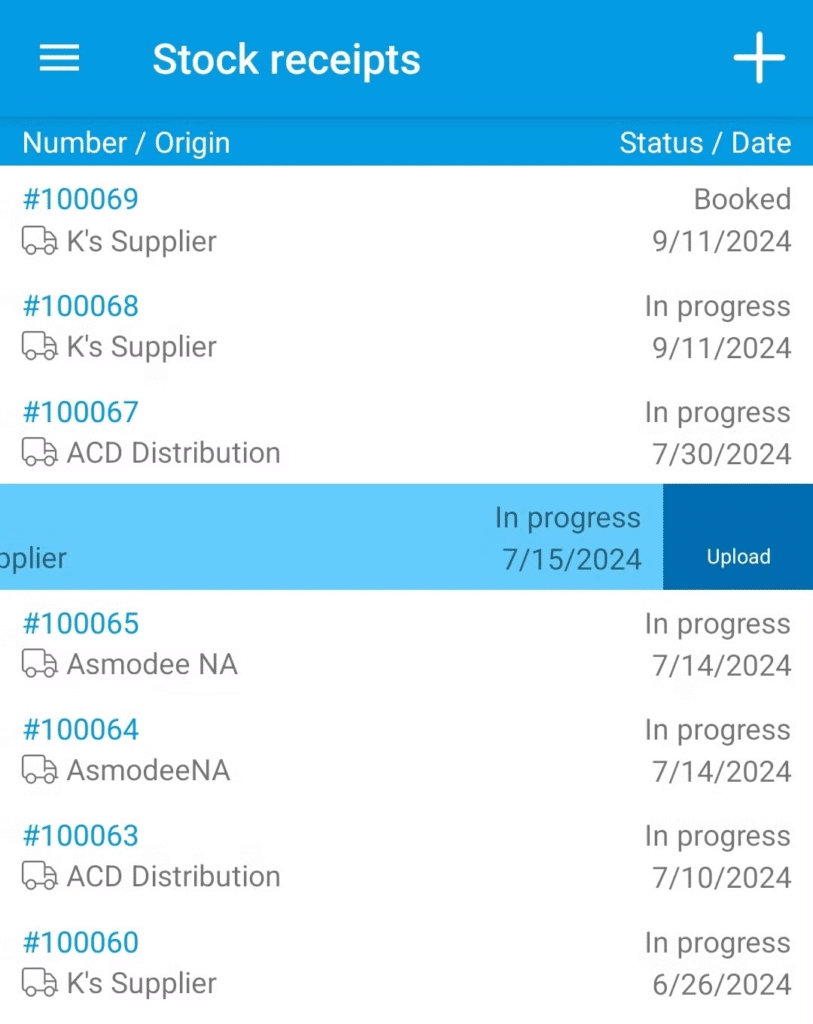
Stock Receipts
Create New / Press Plus: You can create a stock receipt from an existing stock order or dispatch notification, or an empty stock receipt. If you select empty, you can choose between a supplier and a warehouse.
If it’s an external stock receipt, choose a supplier. If it’s an internal stock receipt, choose the warehouse.
Edit List: Inside the stock receipt, you can either search for items to add or scan them. Like an inventory item, after you add the item, you can either increase its total using the plus button or set an amount you’re receiving using the equal button. Additionally, you can scan the items repeatedly to increment by 1.
Swiping left on an item allows you to either undo or edit an item.
Upload: Similar to inventory, when you’re finished, you can upload it to the cloud by going back and swiping left on the stock receipt. Stock receipts have to be booked from the backend.
Switch Origin Warehouse: If you’re doing a stock receipt with no source and it will be an internal transfer, you can switch the origin warehouse to the target warehouse. This sends stock from the warehouse you have selected in the settings screen of the app to the Target Warehouse. We recommend internal stock transfers from the website instead of the handheld if you have more than 2 warehouses.
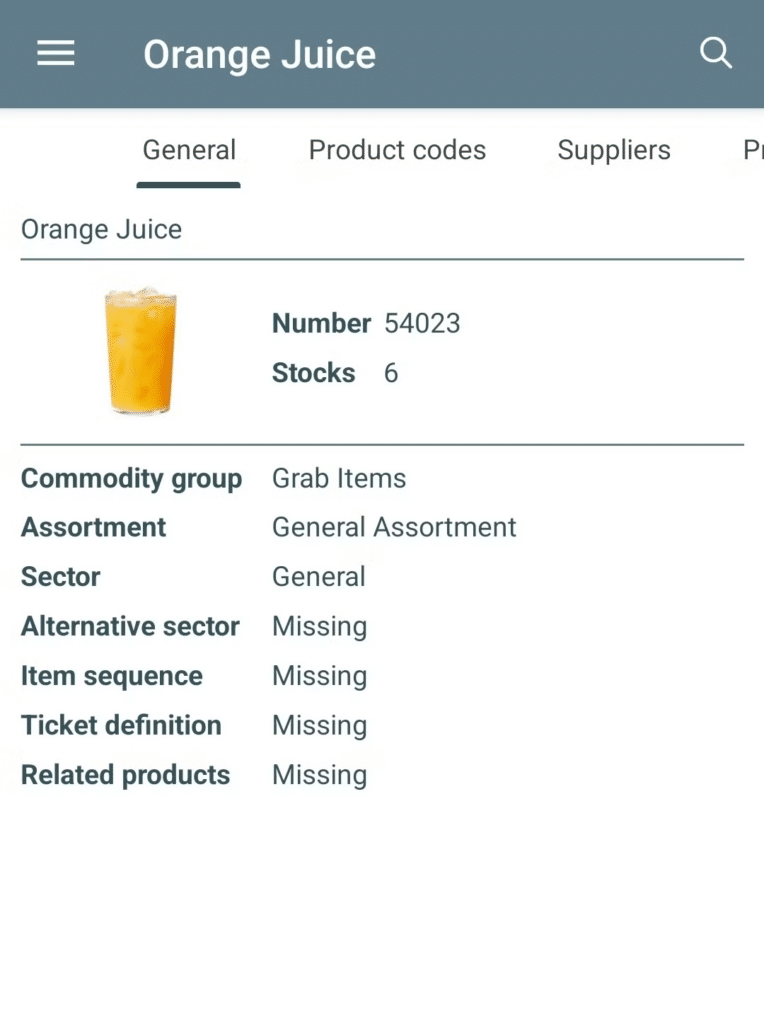
Product Information
In this module, scanning a product will allow you to gather information.
You can see product number, name, stock level, commodity group, sector, alt sector, sequence, ticket definition, codes, suppliers, and related products.
Stock Adjustments
Create New / Press Plus: You can create stock adjustment by pressing the + icon. You are then prompted to give the reason for the stock adjustment like ‘broken,’ ‘damaged,’ etc.
Edit List: Inside the stock adjustment, you can search for the item using the magnifying glass or scan the item. Entering the number and hitting the minus (-) will reduce it by that amount, whereas the plus (+) will increase it.
Swiping left on an item allows you to either undo or edit an item.
Book: From the list of stock adjustments, swiping left allows you to book the stock adjustment.

Dispatch Notifications
Pressing on ‘Dispatch Notifications‘ will pull up a list of all dispatch notifications. You can see what is on a dispatch notification by pressing on it.
