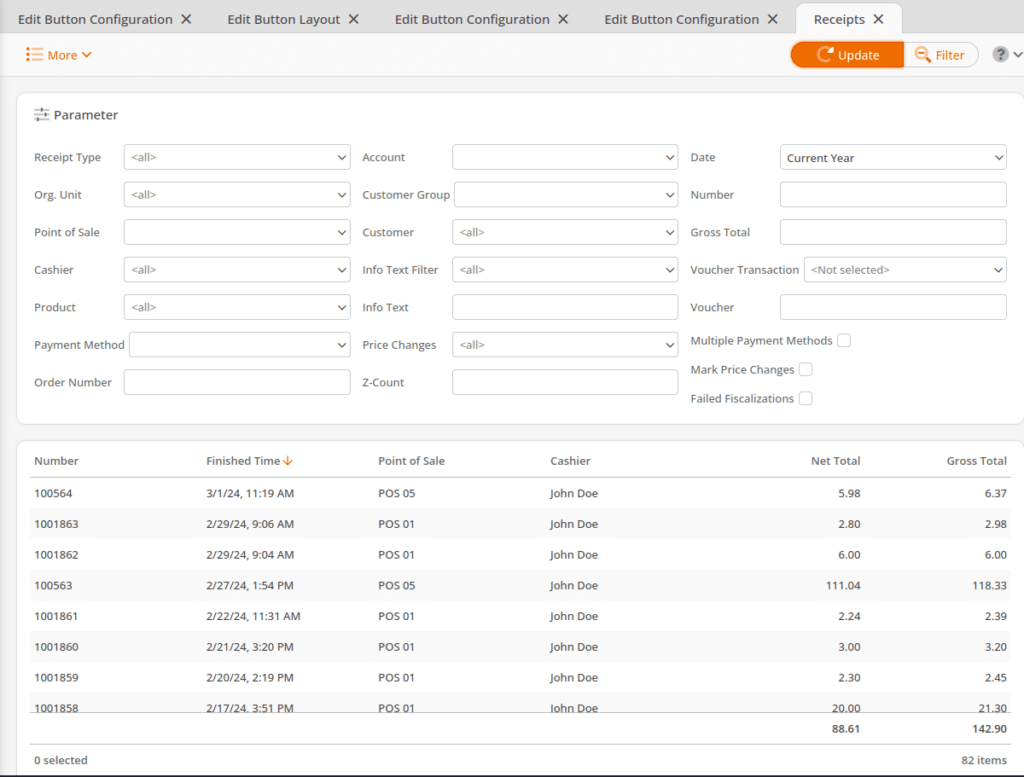
The feature lists all sales receipts within a given time frame.
Start by navigating to Sales > Receipts.
You may Filter this page by Receipt Type, Organizational Unit, Point of Sale, Cashier, Product, Payment Method, Account, Customer Group, Customer, Info Text Filter, Price Changes, Z-Count, Date, Receipt Number, Gross Total on the receipt, and specific Info Text.
You may list receipts with price changes by checking the Marked Price Changes checkbox. You may also show receipts with multiple payment methods by checking the Multiple Payment Methods checkbox.
Once you have chosen the desired filters, click Update. Listed below are the Receipt Number, Finish Time (of the transaction), Point of Sale, Cashier, Net Total, and Gross Total. An accumulation of net and gross totals, as well as the total number of all listed items, is located at the bottom of the screen.
Right-clicking on the Point of Sale will give you these additional menu options:
- Edit Point of Sale
- Account Transactions
- End of Day Statements
- Hierarchical Commodity Group Report
- Receipt Journal
- Receipts
Right-clicking on the Cashier category will allow for these menu options:
- Edit Cashier
- Time Tracking Entries
- Account Transactions
- Balance Statements
- Cashier Report
- Discount Report
- Payment Method Report
- Receipts
Selecting one of the listed receipts will prompt a preview on the right-hand side. You may print the receipt in its original format by selecting Copy from the top of the screen. However, if receipt printing was deactivated when completing a receipt, the original can now be printed out later.
The additional copy will be printed out as a further printout. You may also export the receipt into a more invoiced format by selecting PDF or Excel from the More drop-down menu.
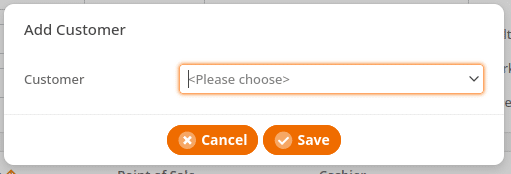
Add Customer
From the More drop-down menu, you can designate a customer to a specific receipt by clicking Add Customer. A text box should appear. Select the desired Customer from the drop-down menu and click Save. The receipt preview should now update with the customer’s name.
*Note: For this to work, the customer must be prerecorded. To learn more about setting up customers, please refer to our Customers manual page.
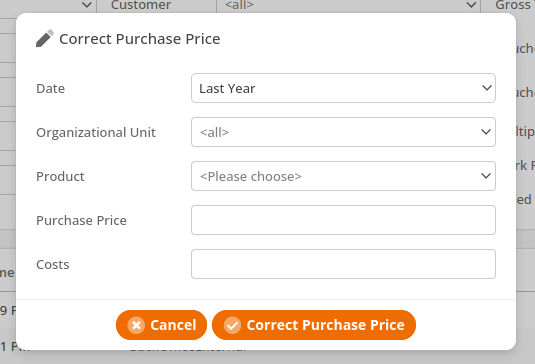
Correct Purchase Price
Additionally, you may correct a product’s purchase price by clicking Correct Purchase Price from the More drop-down menu. Once the text box launches, select the Date, Organizational Unit, and Product. Type in the Purchase Price and Cost. Once done, click Correct Purchase Price.
A text box will appear with the following message: “Unless you have specified a value, Purchase price respectively costs will be irreversibly overwritten. This process can take a while. Do you want to continue?“
Select Yes. A new text box should appear on the upper right-hand corner of the screen, indicating changes have been saved.
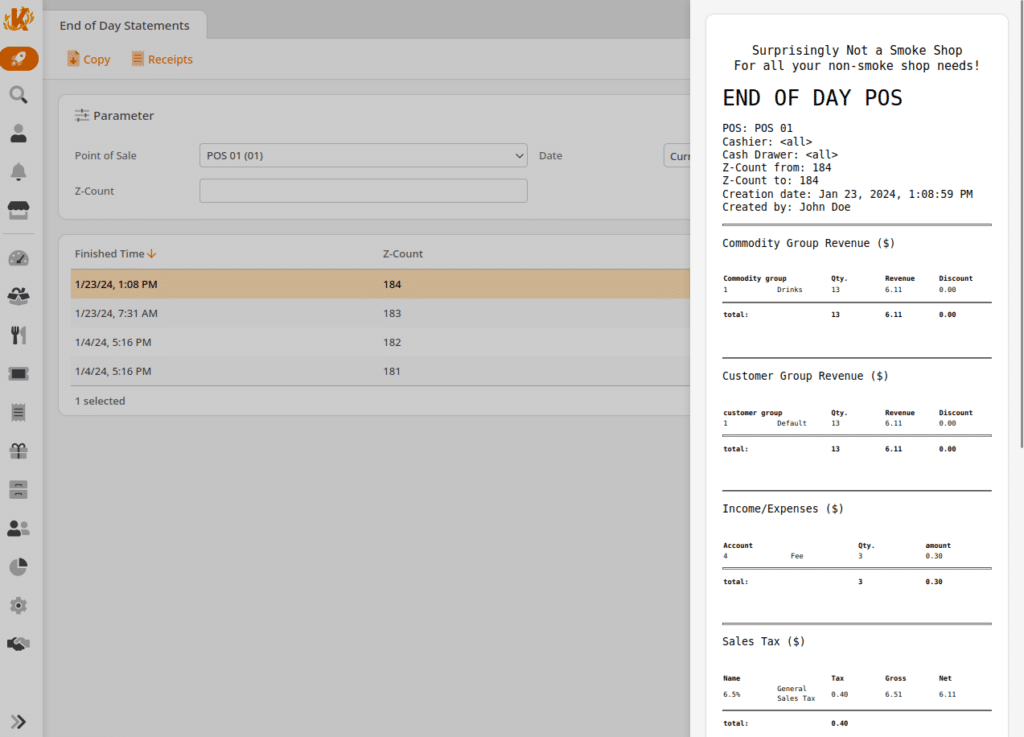
End of Day Statements
EOD Statements may be selected on any given receipt. This will redirect you to the End of Day Statements page. This page may be filtered by Point of Sales, Z-Count, and Date. Once you have made your selections, click Update. Clicking on one of the listed end-of-day statements should prompt a preview on the right-hand side.
This receipt may also be exported in its original format by selecting Copy from the top of the screen. You may also select Receipts to be taken to a list of receipts associated with that specific end-of-day statement.