
To set up your time tracking entries, navigate to Employees > Time Tracking Entities.
Here, you can set up your different clock-in and clock-out actions. Some common examples are Start Shift, End Shift, Start Break, and End Break.
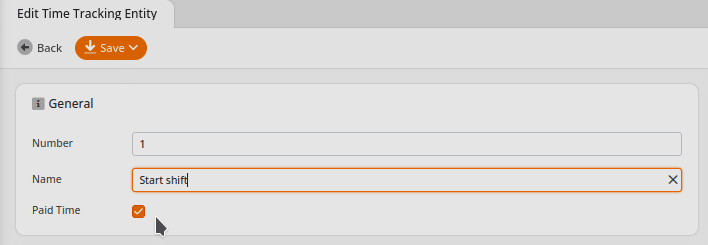
Make sure that the right entities are set as Paid Time. In the examples below, the “Start Shift“ and “End Break“ should be set for the paid time.
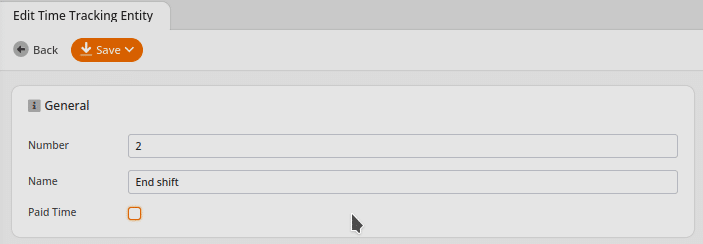
“End Shift“ and “Start Break“ should not be set for the paid time.
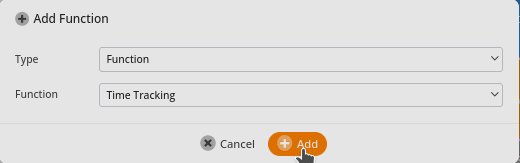
Once you have set up your Time Tracking Entities, you can set up a button for cashiers to perform time-tracking actions. The POS function is called “Time Tracking.”
You can find a guide for setting up buttons here: Create POS Buttons / Button Configuration.

Time Tracking at the Login Screen
You can also set up Time Tracking functionality at the login screen. This way, your cashiers do not have to log on to the terminal to clock in and out.
To set up your time tracking at the login screen, please visit the Working Times manual page.
After restarting the POS, your time tracking button and actions should be available. By pressing the time tracking button, the POS will open a new screen for performing time tracking actions.
Before performing the actual time tracking action, the cashier number must be entered. Please keep in mind that the cashier number can be different from the login code.
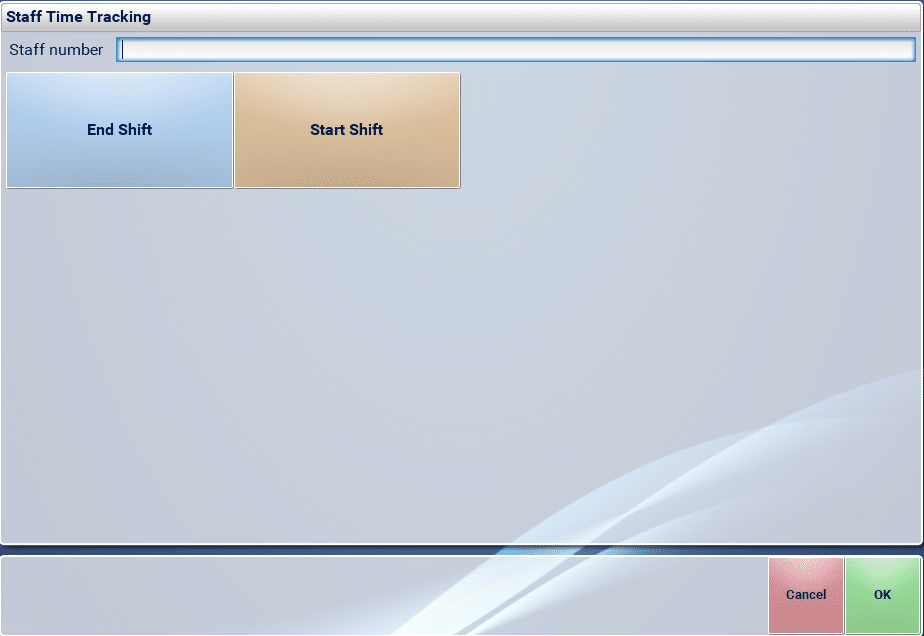
You can review and reassign cashier numbers under Employees > Cashiers. Once the cashier enters their number, the time tracking action button is used to log a Time Tracking Entry.
Time Tracking Entries can be reviewed, corrected, and created if missed in the cashier edit screen under More > Time Tracking Entries.
For more information, please visit our Working Times manual page.
Important Note
Time Tracking is only available in our Retail Package.