Selecting products by using tags is excellent for businesses that want to create products with modifiers or for building gift baskets/custom kits to sell. They can also be used to set up combos with various options. For example, you can have a sandwich combo with chips and a drink.
*Note: Before setting up sub-products for selection by using tags, you will need to have the products created and tagged. Please visit our Creating Product Manual Page for additional information.
Setting up sub-products for selection by tags
Navigate to the products screen by going to Inventory > Products. Select the product to which you would like to add the sub-products.
When you have made your selection, click the Edit button. Inside the product screen, you will notice the Sub-Products box towards the bottom right.

Click the arrow on the right of the title bar to expand it, and then click the +Add button. You will see a small drop-down menu. Select the option for Add tag for selection.

You will now see a pop-up box allowing you to add the tag. Once you have made your selection, click the add button.

Sub-Product Configuration
You can also configure your sub-products. You can choose various quantities, validity dates, and default price.
Using the quantity field, you can choose how many times a tagged item can be added. For example, if the quantity is set to zero (0), you can add it as many times as you want. When you’re done, you must hit the “ready” button. If you specify the number in the quantity, that will automatically set the quantity of the selected tagged product to the specified quantity.
So, if you had a Tag for “double,” it would have a quantity of (2) specified, and then any selection made under that tag menu would be added as a sub-product with a quantity of 2.

You can also choose to change the price per add-on. You can globally set up a price for all the sub-products under that field. This would also work the same way if you set that field to 0. You can also elect to have no price for that group, KORONA will then pull the price from that individual sub-product.

Sub-Product Presentation
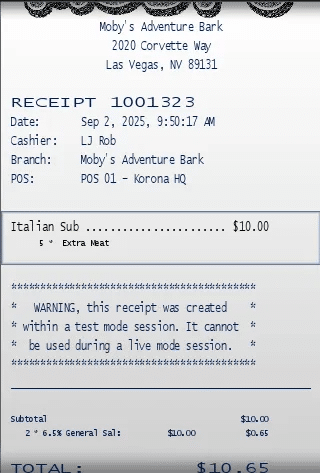
Finally, you can choose how you would like the sub-product information displayed on the receipt with the Subitem Presentation Field.

Finally, you can choose how you would like the sub-product information displayed on the receipt with the Subitem Presentation Field.
If desired, you can choose to have all the information hidden. You can also choose only to hide the prices or quantities.
This works great if you want customers to see what they’ve added to their product. This also works great for items like custom-made sandwiches.
Finally, you can choose to have all the information displayed on the receipt. This is great if you not only want to show what the customer paid for that particular add-on but if they ordered two helpings of it as well.
Once you have finished adding your sub-products to your product, click the Save button towards the top of the screen.
Now, whenever you ring up that product, it will allow you to have various add-ons/options and charge appropriately.
Hide Prices
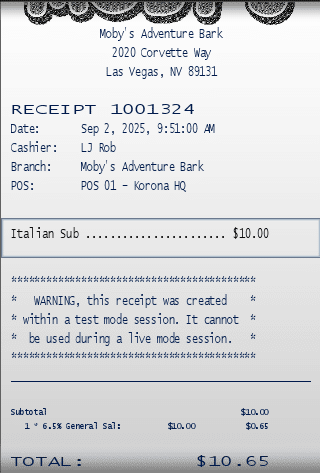
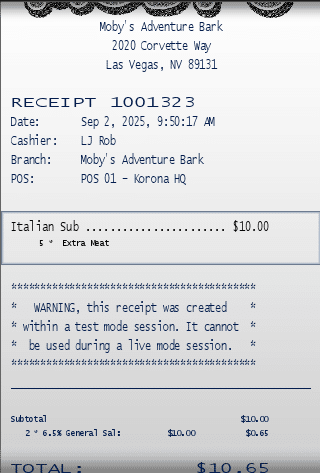
Hide All
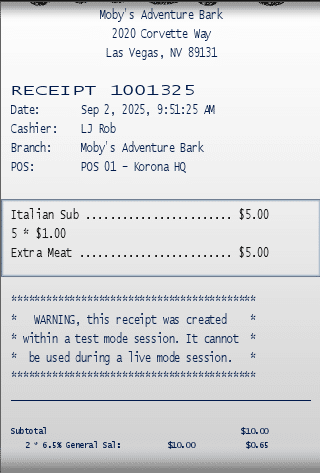
Show All
Hide Prices & Quantity
Example Product with sub-products selected by tags
A great example of how tagged sub-products are used as add-ons for a sandwich. We have created a sandwich. In the back office, we gave it two sub-products from tags, dressing, and vegetables. When the cashier goes to ring up the customer’s order for the sandwich, they will select it on the terminal.
Instead of being taken back to the main screen, they can now select the dressing they want to add to their sandwich.
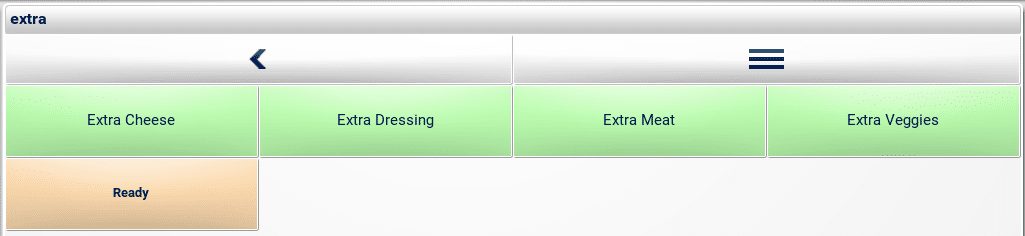
Once we have made your dressings selection, click “done.” After we have added the dressings, click on “ready.” From there, we can complete the order.
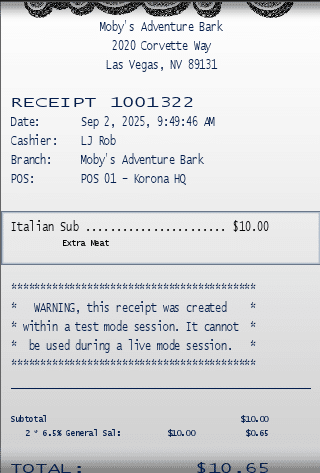
You will see on the receipt that the main product shows the sub-products listed below it in a smaller font. Notice that we’ve hidden the price from the receipt. We did this by selecting “hide price” in the Sub-item Presentation drop-down menu in the Sub-Products box in the back office.