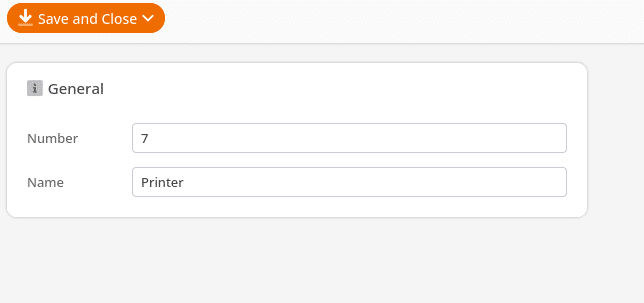
By clicking +Add Device inside of POS Profiles, you can configure the hardware or connected peripheral devices.
*Note: You can use the same POS profile on multiple points of sale if they all behave and connect similarly.
Adding a Receipt Printer
When adding a new Receipt Printer, click +Add Device on the first drop-down menu for “Type” and select Printer.
The second drop-down will vary based on the type of printer you use. Epson and ESC/POS are the most common device selections and are compatible with most printers.
Once that has been selected, press OK to confirm your selections.
The next step is to assign a Port for this device. This refers to the type of physical connection for the device.
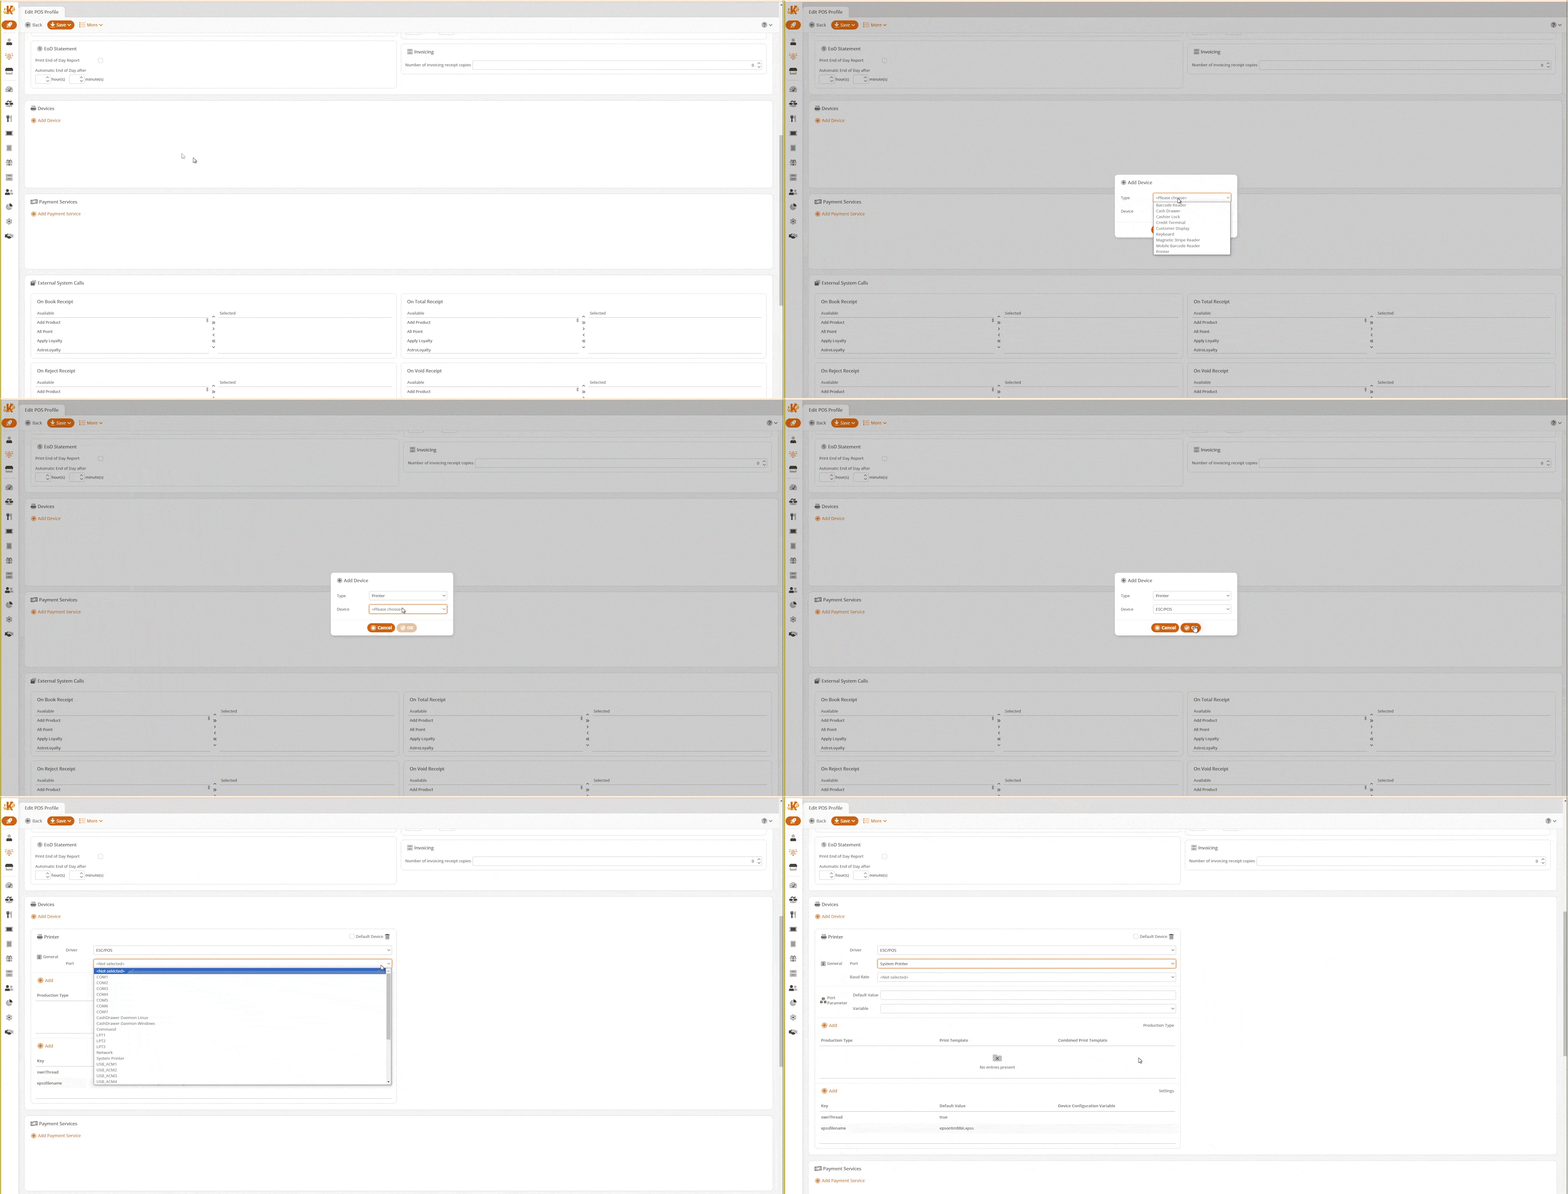
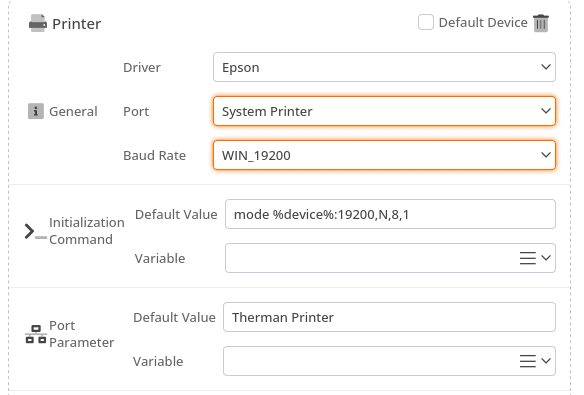
Again, this can vary based on your particular printer, but the most common selections are going to be USB_LPT1 (For USB-connected printers on Linux) or System Printer (for printers that are recognized/installed already in Windows).
For Printers that are installed as System Printers, you’ll need to assign a Variable under the Port Parameter by referencing the printer’s name in Windows.
You can use a Default Value if all devices using this POS profile will use the same Variable. If the Points of Sale will have unique Variables then that is where the Variable field is most useful.
Adding a Cash Drawer
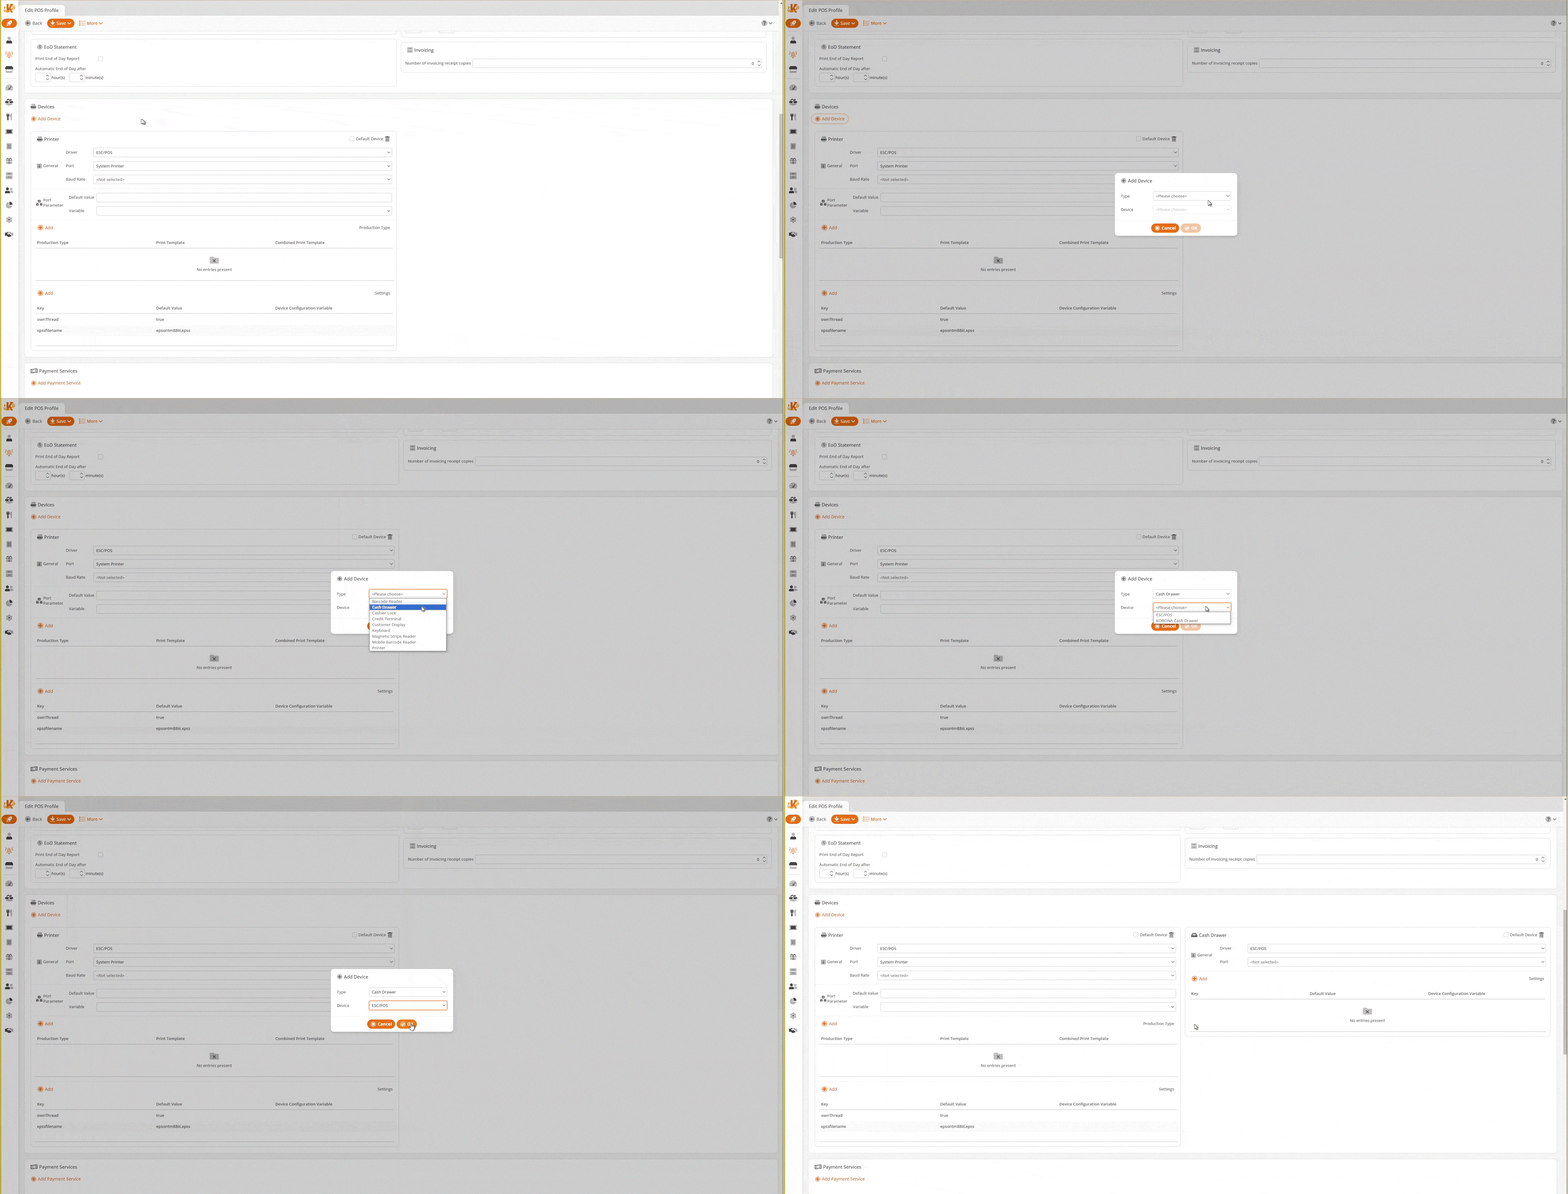
Almost all configurations will have the Cash Drawer connect directly to the back of the Receipt Printer itself.
When adding a Cash Drawer, click +Add Device and select Cash Drawer. The device will be ESC/POS.
Fill out the rest of the settings according to the printer settings it is attached to. They should match each other.
Adding a Credit Terminal Device to the POS Profile
- For detailed instructions on connecting a PAX Credit Terminal to your point of sale, please reference our PAX Set Up manual page.
- For detailed instructions on connecting a Dejavoo Credit Terminal to your Point of Sale, please reference our Dejavoo Set Up manual page.
- For detailed instructions on connecting a Genius Credit Terminal to your Point of Sale, please reference our Genius Set Up manual page.
- For detailed instructions on connecting an Econduit Credit Terminal to your Point of Sale, please reference our Econduit Set Up manual page.
Assigning Additional Settings on Hardware Devices
Some devices, when added, will give you an option to assign settings like Baud Rate, Initialization Commands, and Port Parameters.
Baud Rate: This refers to information transfer speeds to match the device’s settings. Although typically not required, in some instances, it’s necessary when connecting devices such as external customer displays.
Initialization Commands: These are used to start a specific service on the host device that enables communication between certain devices. These are typically not required.
Port Parameters: Refers specifically to the port type selected and can be used to specify things such as the Name of a printer or the IP address of a device. Default Value would be used for ALL devices using this POS profile, whereas a Variable can be configured per point of sale.
Point of Sale Device Configuration Variables
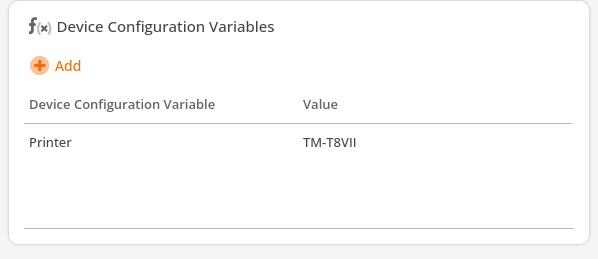
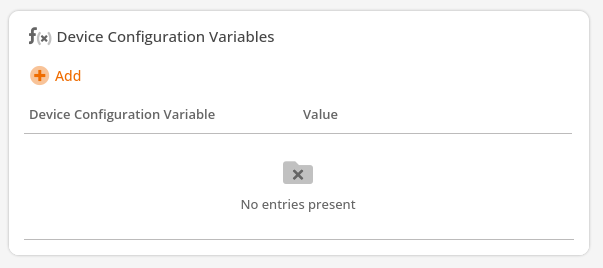
Under the menu option Sales > Points of Sale, you can edit individual point of sale units. From here, you can set specific Device Configuration Variables for your points of sale one at a time if they have a unique set-up.
Click the +Add option under Device Configuration Variables. From there, you can select from a list of already created Variables or click the option for +Create Device Configuration Variable.
When creating a new Device Configuration Variable, you want to assign it a name (typically something that references the type of variable like “printer” or “credit terminal”). Once the name has been assigned, you can then assign it a Value. That Value will be unique to this Point of Sale.
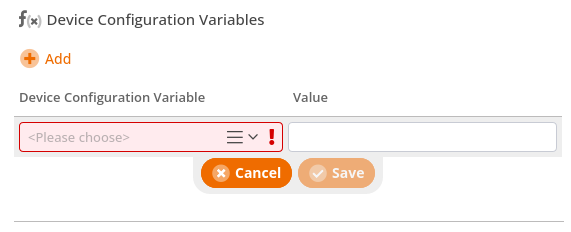
You can have a POS Profile reference the same Device Configuration Variable, such as Printer, but have the Value for each of those be unique for every point of sale. That would allow a single POS profile to be used on all of the points of sale, even if the printers all have different names.
