A Credit Authorization Terminal Assistant exists on the dashboard to help you with this step. Continue with this article if you have already tried that method and still have problems.
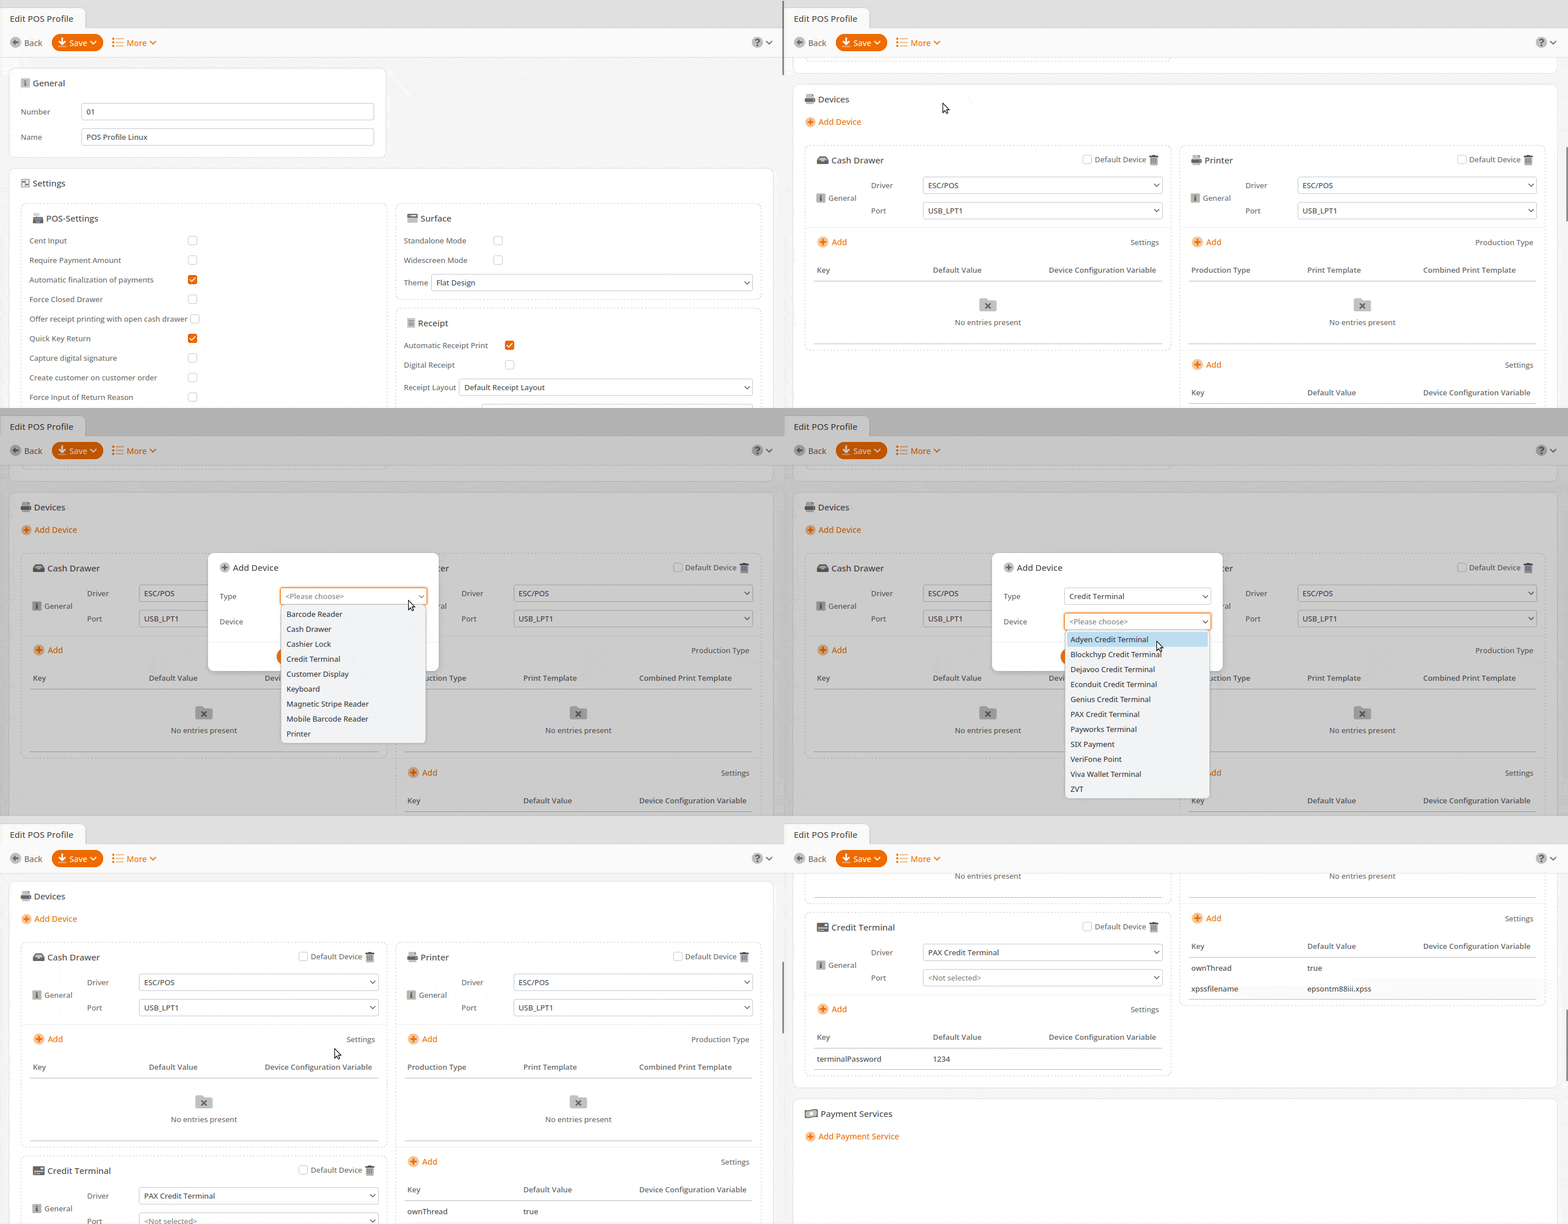
First, create a new device in the checkout profile. To do this, go to Settings-> POS Profiles and edit the POS profile to which you want to add the credit terminal.
Next, scroll down and click Add Device. Select Credit Terminal next to Type and PAX Credit Terminal next to Device, and hit OK.
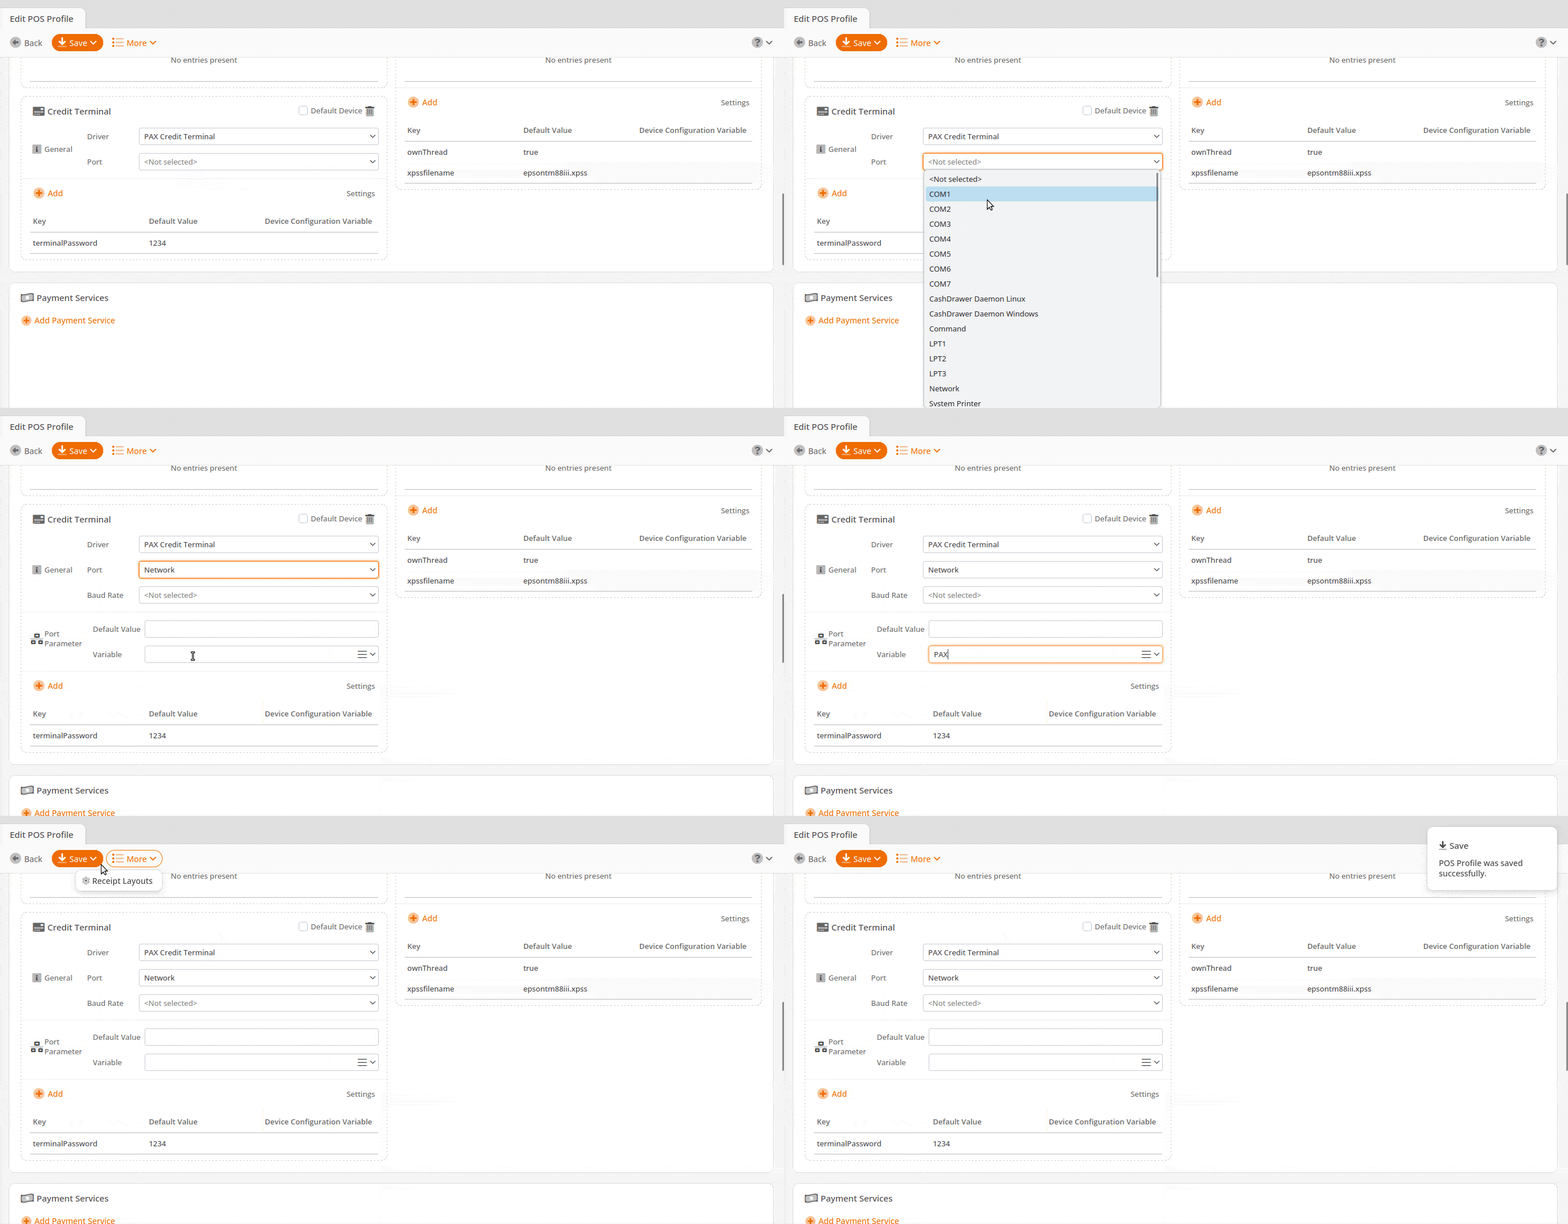
The next step is to add a Port and either a Default Value or Device Configuration Variable. Since the IP address for each PAX will be unique, you will most likely be using a Device Configuration Variable. For more on setting up Device Configuration Variables, you can reference the Adding Devices manual page.

Finding the IP Address of Your Pax Credit Terminal
First, ensure the terminal is connected to the same network as your POS. Next, power the device on and hit Menu. The credit terminal will then ask for a password. The password varies and can be obtained from the company from which you obtained the device.
After entering the password, use the down arrow until you see Communication and select. It will ask for the password again. Enter it and use the down arrow again until you see LAN Parameters and select.
Next, select IP Address. The credit terminal will display its IP Address. This will be a 12-digit number, each set of three numbers separated by a period. Eliminate all leading ZEROs from this number (leaving a single ZERO if necessary) and enter it into the Port Parameter field as described above.

EXAMPLE* If your credit terminal displays 010.001.000.247, enter 10.1.0.247 into the Port Parameter field.
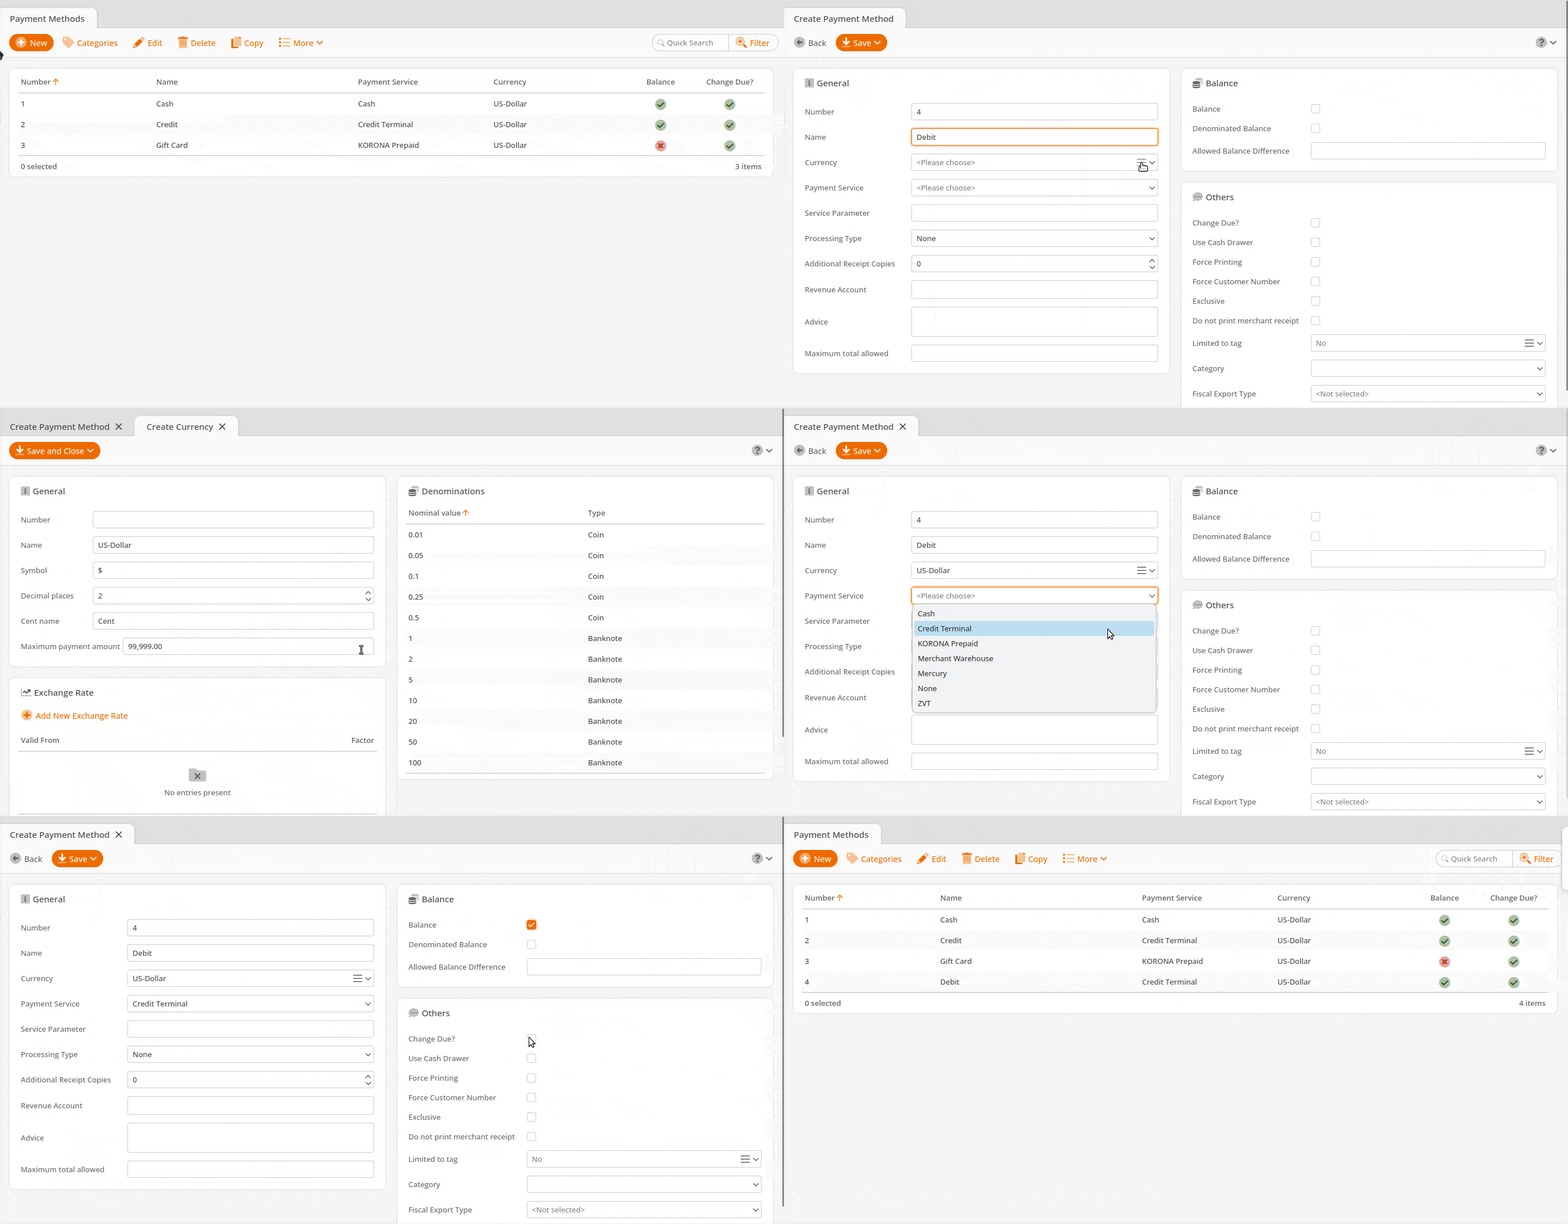
In the last step, you must customize the payment methods. Navigate to Settings > Payment Methods. Edit or add a credit payment method. Make sure the Payment Service is set to Credit Terminal and the Processing Type is set to Default.

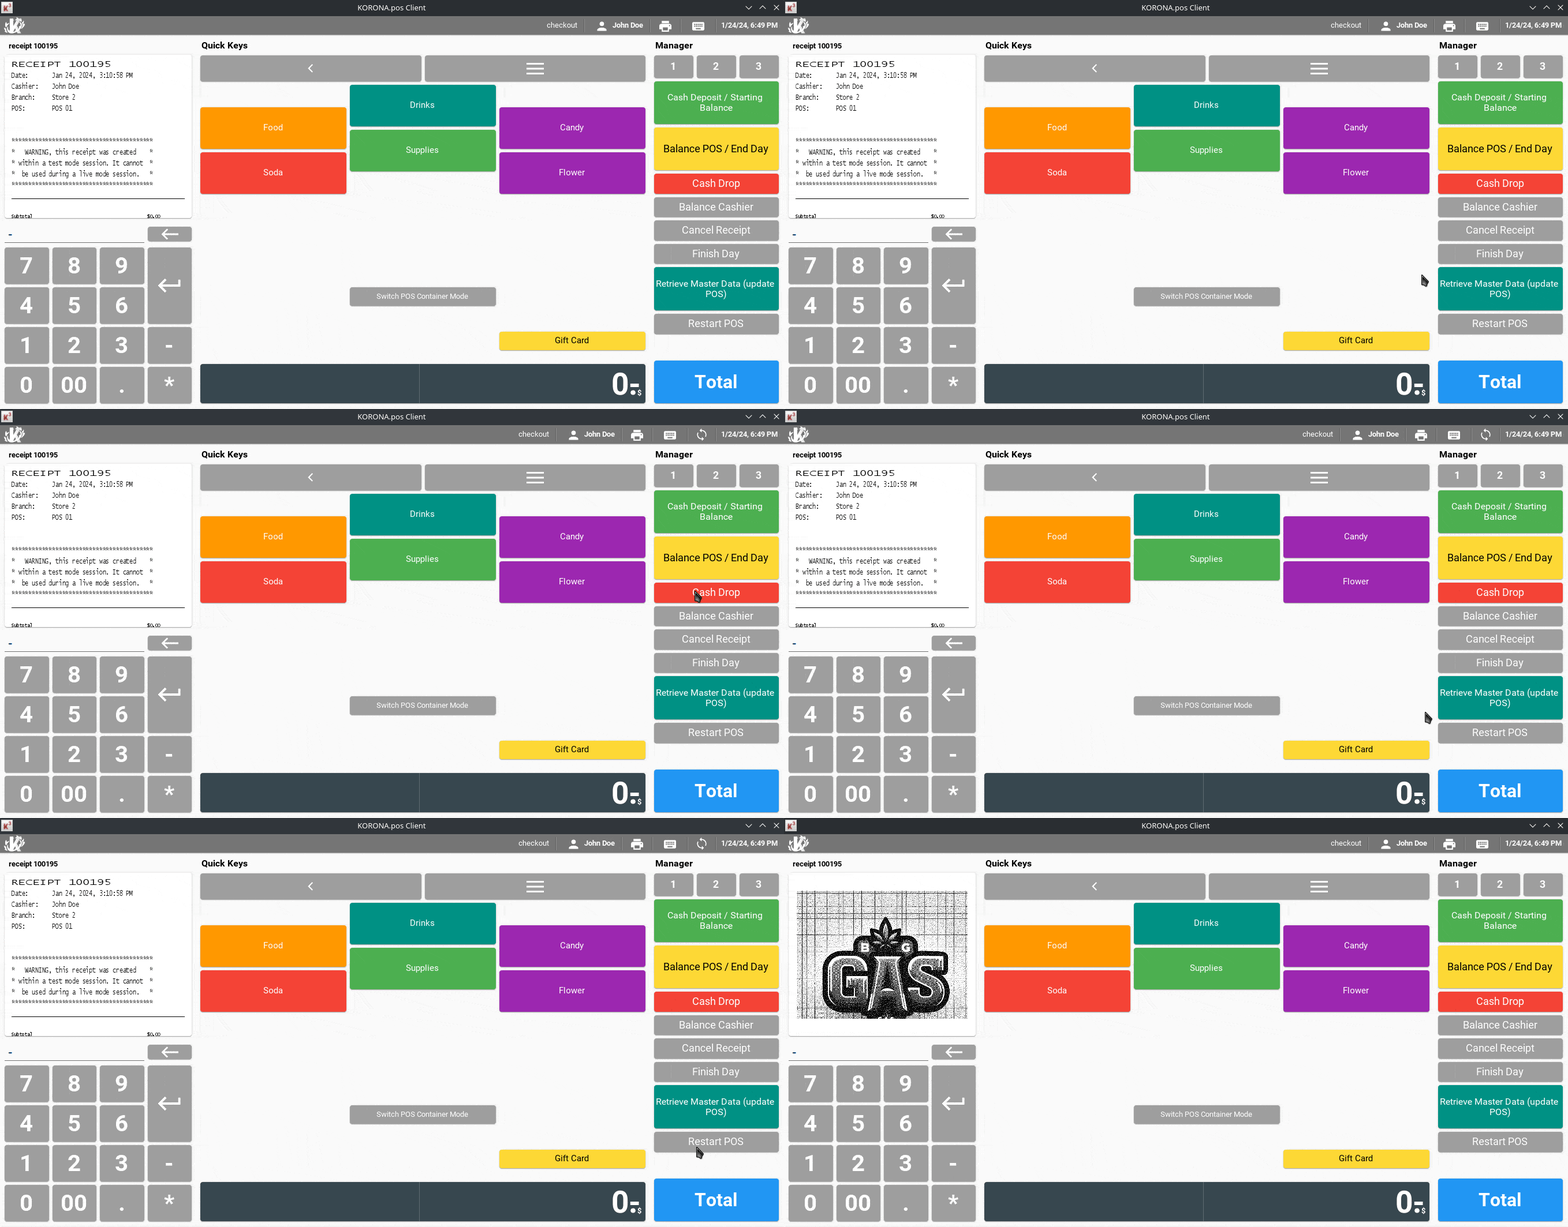
Note:* It is necessary to restart the POS software for the change to take effect after you update the master data at checkout when making changes to the device profile.


