In addition to the PAX terminals, KORONA POS is also capable of working with the Genius provided by Cayan. This guide will walk you through the process of setting up your Genius with KORONA Studio.
Getting the Genius Terminal IP Address
Before working in the cloud, you must hook up the Genius device to be operational. If you have not done so already, connect it to its power adapter and hook it to an ethernet cable.
When it finishes booting up, press the 0 button three times. When prompted for a password, enter the default administrator password with the device and note the IP Address. The IP Address will be in the format of ###.###.###.###. You will use this number to tell KORONA POS where the device is.

Adding the Genius to the Device Profile
Now, you need to tell KORONA POS that this device exists. Begin by going to the POS Profile settings page by navigating to Settings > POS Profile and selecting the Profile to which you wish to add the Genius tool. Scroll down to Devices and click on Add Devices. In the box that appears, set the Type to “Credit Terminal” and the Device to “Genius Credit Terminal” using the drop-down menus. Then click on the OK button to finish adding the device.
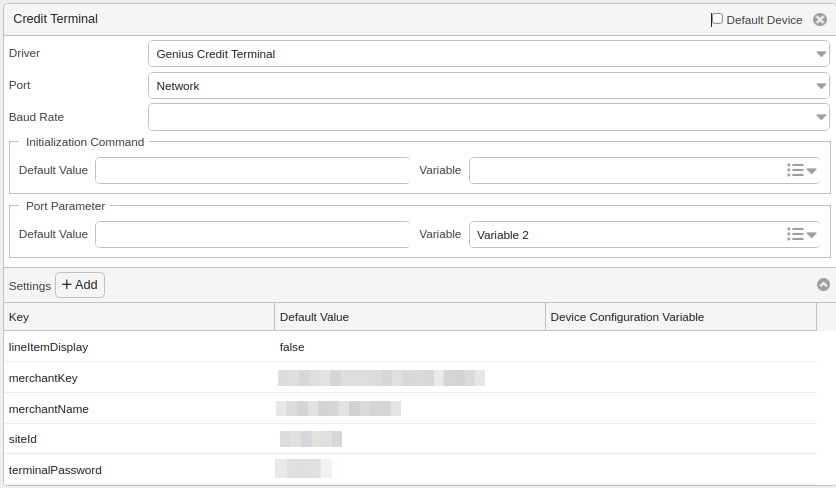
In the new Credit Terminal box, verify that the driver drop-down has “Genius Credit Terminal” selected. In the Port field below that, select “Network” from the drop-down menu.
You can link the IP Address that you noted earlier here as the Default Value of the Port Parameter or assign it a Variable. You can read more about Device Configuration Variables.
Finally, locate and expand the settings section and leave the terminalPassword field as is. You will need to enter the SiteId, MerchantKey, and MerchantName as provided by Cayan. This data will always be in the Value instead of a Variable as it will be the same for all devices, unlike the IP, which can differ.
NOTE* This information MUST be exact, or the terminal will NOT work.
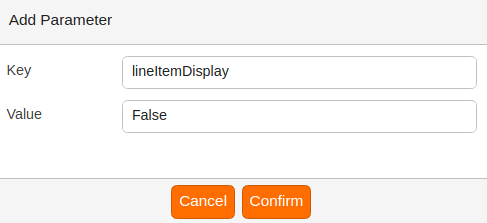
Genius has a feature that allows the device to display line items on the terminal as they are added in KORONA POS. Should you wish to turn this feature off, go to the device settings and click on Add Parameter. In the box that appears, add the parameter “lineItemDisplay” in the Key field; in the Value field, enter “false.” Click on Confirm to add the line.
When you are done, click on the Save button at the top of the screen. We will now create the payment method for your new Genius device.
Creating the Payment Method
First, navigate to Settings > Payment Methods. Next, click the New button to be taken to the payment method creation screen. Give the payment type a Name and choose a Currency. In the Payment Service field, select “Credit Terminal” from the drop-down menu.
With Genius, you have a variety of service parameters you can enter. Service parameters are advanced options that you can use with the terminal. Here is a list of available parameters:
- add_value – This allows you to add money to gift cards.
- balance_inquiry – Use this value to have the ability to check gift cards.
- keyed –To be able to enter credit card numbers manually, use this option.
- keyed gift – Use this option if you want to be able to enter gift card numbers manually.
- tip– If you want customers to enter tips on the Genius, put “tip” in the service parameter.

NOTE:* Cayan must enable this functionality for the tip prompt to appear on the Genius. For tips added at the POS, select Pre-Auth / Post-Auth from the Processing Type drop-down menu.
ALSO NOTE:* Some of these options are meant for advanced users and may require additional configuration to use. If you have any questions, please contact support.
Now, locate the Processing Type drop-down and set it to “Default.” If you wish to be able to process returns or refunds, you will also need to tick the “Change Due?” checkbox.
When you have finished creating the new method, click Save.
Creating the Credit Button
We now need to be able to use our new Genius at the point of sale terminal. For this, we will need to create a button.
Begin by navigating to your button configurations screen by navigating to Settings > Button Configurations. Select the configuration you wish to edit. Next, click “Button Layouts” at the top of the screen. In the list that appears, select the “Payment” Layout.
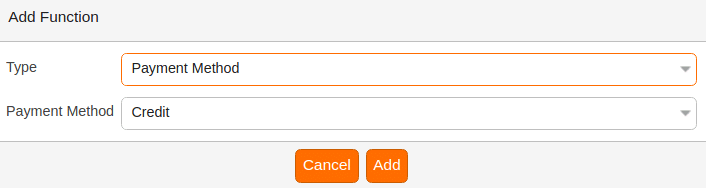
In the layout, select an empty space and use the boxes to the left to name and format your button. In the functions box, click on “Add Function” In the box that appears, set the type to “Payment Method” After that, click on the Save button at the top of the screen.
Finally, on the terminal, select Retrieve Master Data. When it is done downloading the data (Indicated by a grey cloud with arrows disappearing), restart your POS software. Your terminal is now ready to process credit cards with the Genius terminal.