Accounts are often used in KORONA to track non-revenue transactions. These can be cash drops, cash deposits, gift card sales, and lottery.
Setting up an Account in KORONA
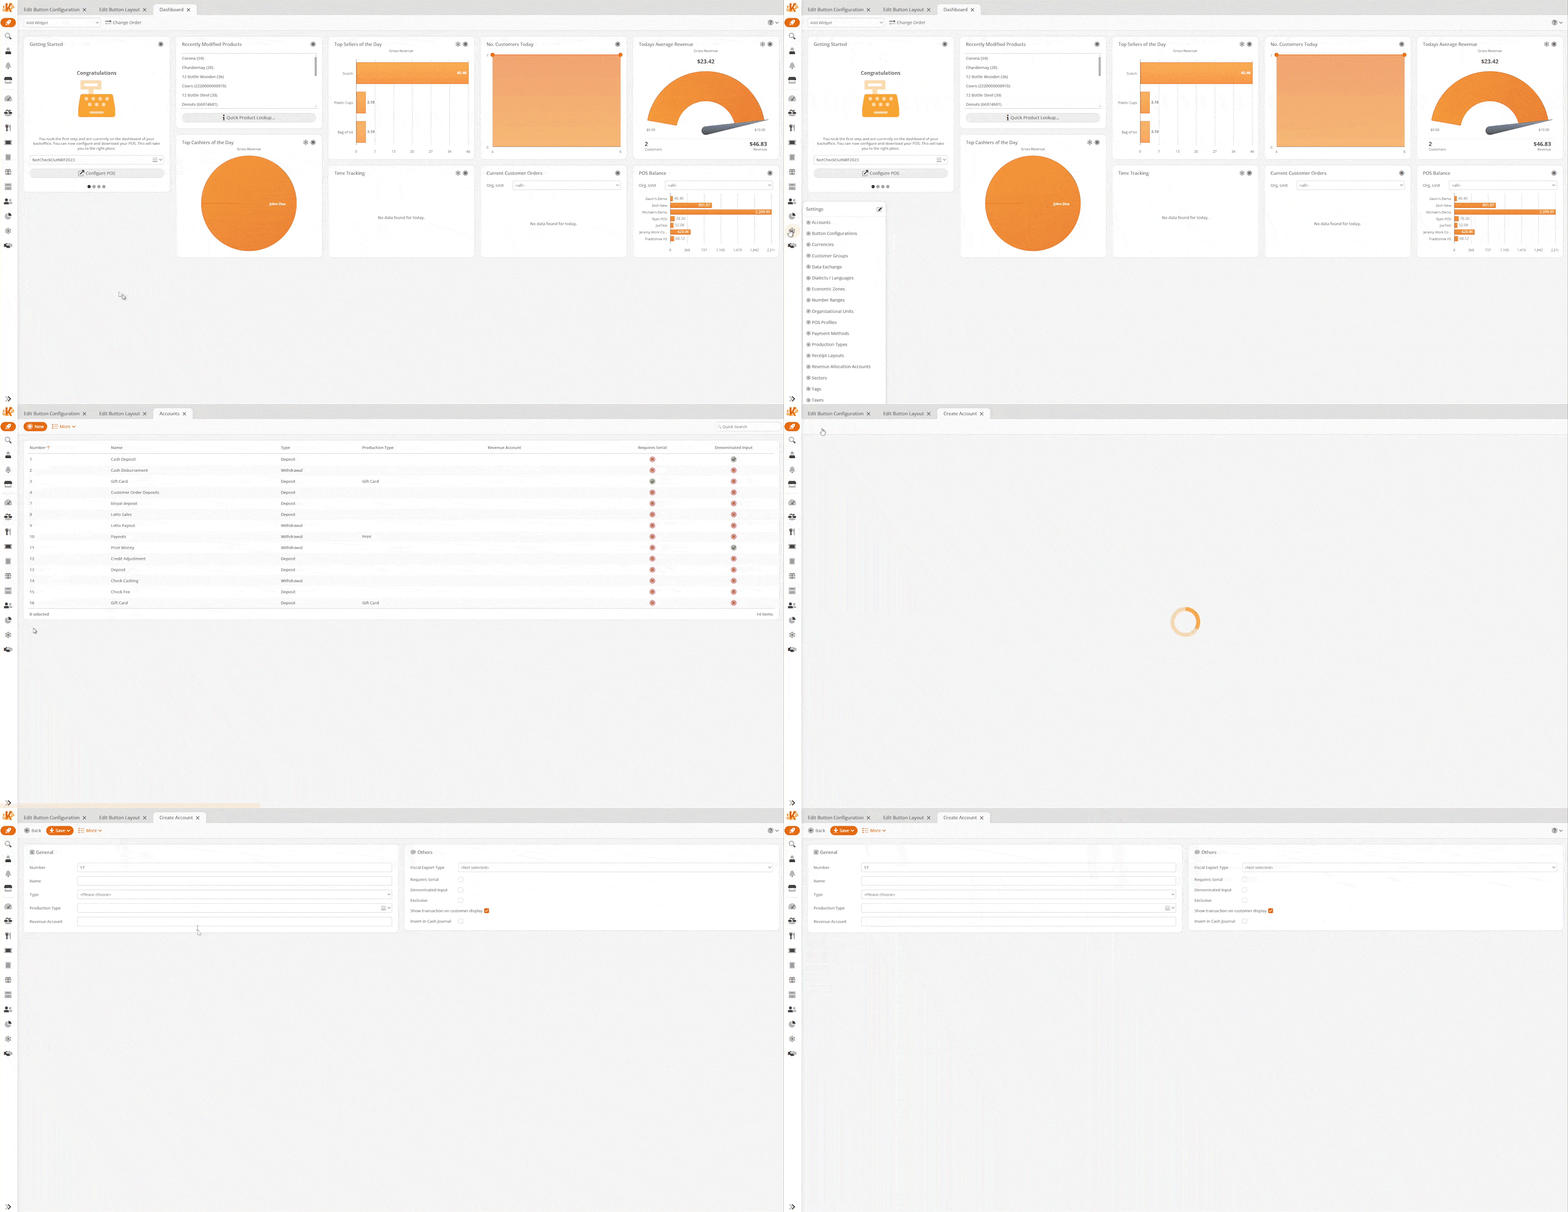
To set up an account, go to Settings > Accounts. Once you are at that screen, click the +New button at the top.
You will then be taken to the Accounts setup screen. In this example, we will be creating a Cash Deposit account. The account is already given a number. This number is automatically assigned to the account.
Give your account a name and select its type. There are two types to choose from: “Deposit“ and “Withdrawal.” Since we are putting money into the system, we are making this account type “Deposit.” However, if you choose to subtract money from the account, you would select the type “Withdrawal.”
If desired, you can attach it to a Production Type or give it a Revenue Account (optional). You can also Require Serial Numbers (used mainly for gift cards) or Denominated Input.
The option to Show transaction on customer display can be used to customize whether or not the customer-facing display will show details related to this account if on the current receipt.

Adding the Account to the POS Terminal
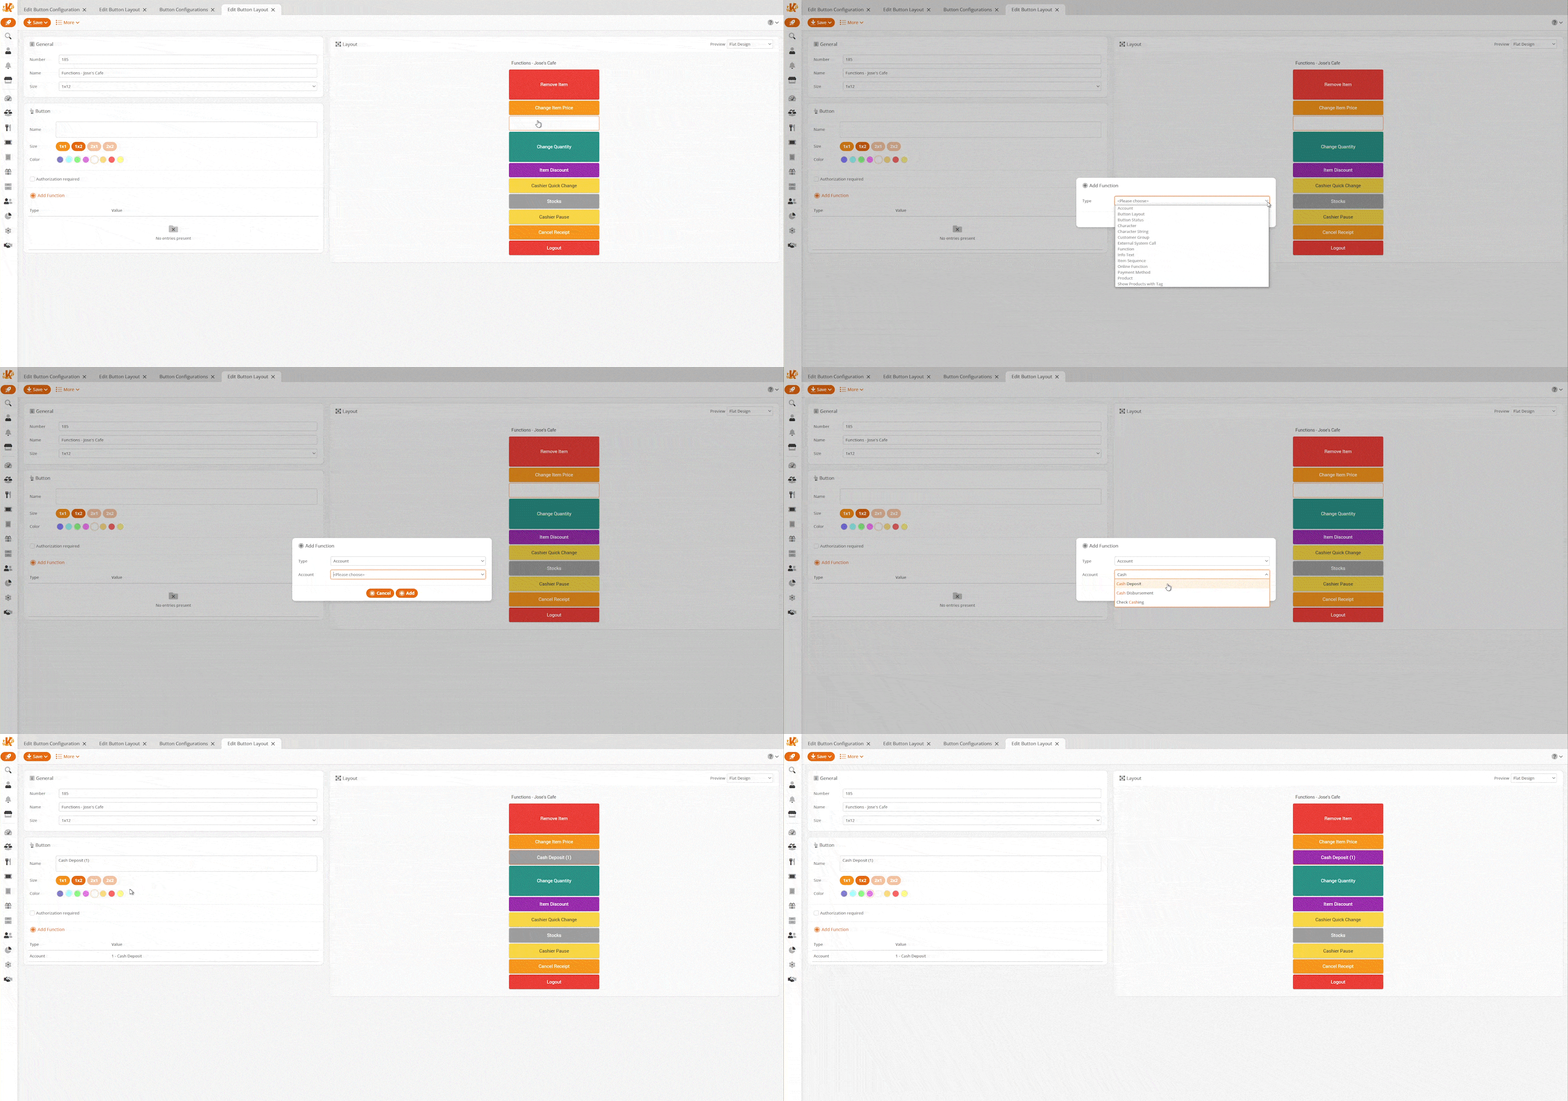
Go to the button configurations by navigating to Settings > Button Configurations. Select the button configuration that you wish to edit. On the following screen, select the button layout to which you wish to add the button. Inside that layout select the empty square you wish to place your button and click on the Add Function.
From the Type drop-down menu in the popup dialogue box, select Account. After that, select the account you wish to assign by using the account drop-down. Click Add. Then save your layout.
For detailed information, please see our Create POS Buttons / Button Configuration page.

Using the Account at the POS Terminal
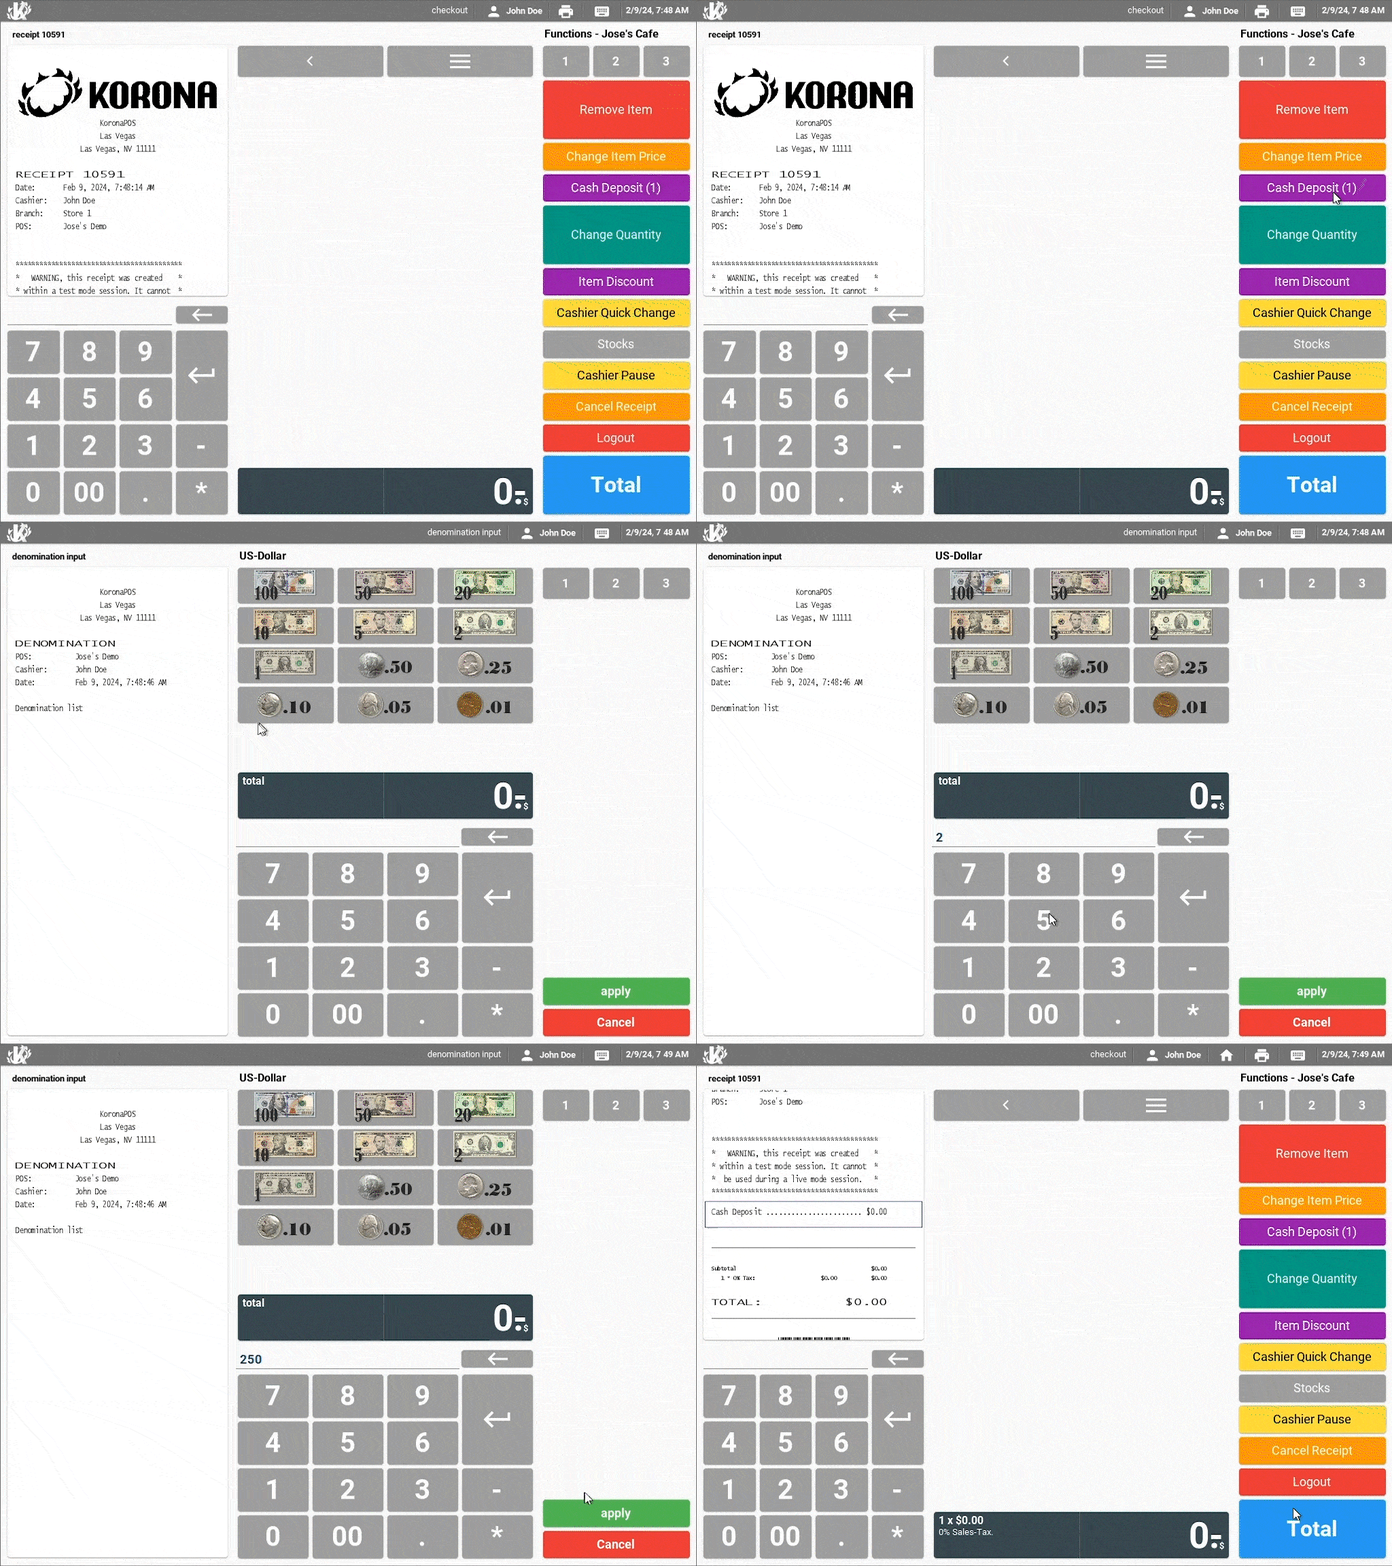
Remember to Retrieve Master Data at the point of sale terminal(s) you wish to use the account. To use the account that has been created, you will need to locate where we put it on the terminal.
In this case, we will use the account to record a Cash Deposit. We select that button and punch in how much money we are taking in. In this example, we are receiving $250.00. We process the transaction as if we are ringing up a sale.

To view and apply funds directly to an account from the POS, you can use the POS function Cost Account. This function will list all the accounts. From there, you can select the account to which you wish to add or subtract funds. Enter the amount and click Enter. The deposit/withdrawl will appear on the receipt line.
*Note: If an account has the type “Withdrawal,” you will still use positive numbers when interacting with that account at the register. For Example, say you have a Withdrawal account for paying out lottery tickets, which we will call “Lottery Payouts.” If a customer has won $5.00, you would still enter 5.00 at the register and not -5.00.
Viewing Accounts with the Organization Unit Report
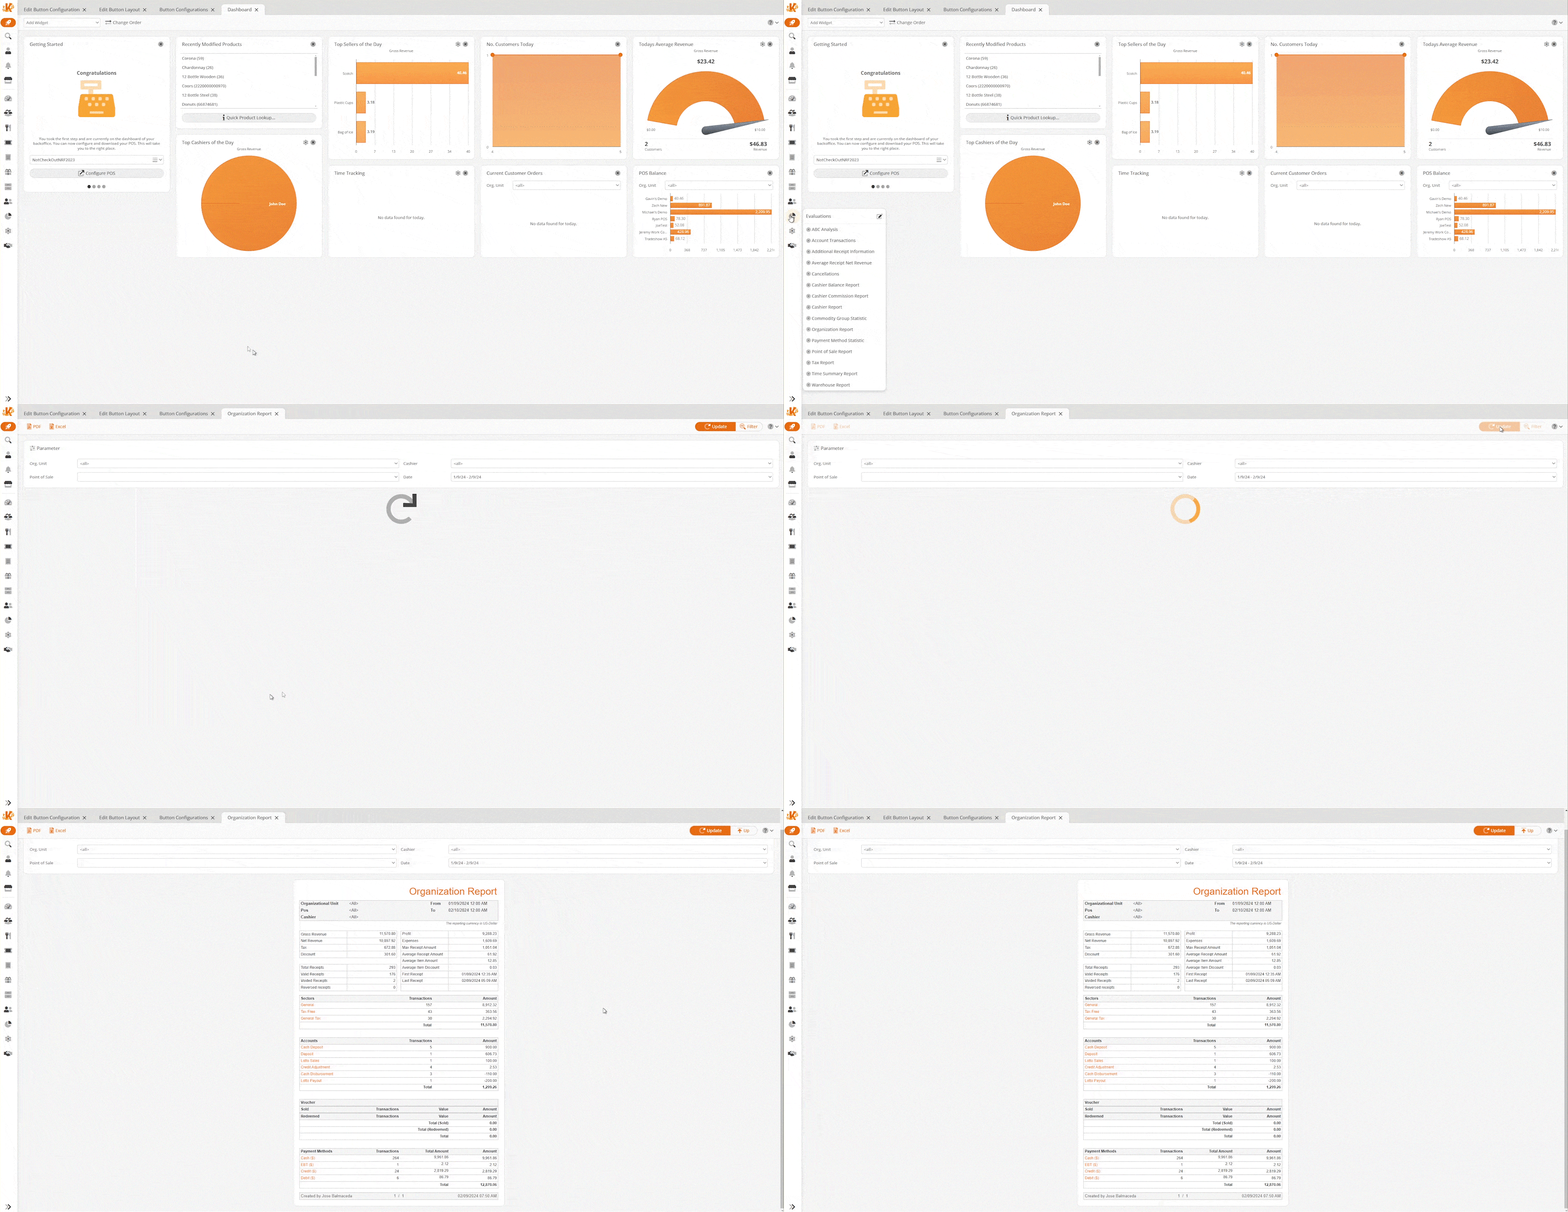
The account can now be used for tracking monetary transactions. In this case, we’re tracking cash deposits made at the point of sale. These transactions will show up on the Organization Report. However, they will not affect any revenue that the store has made.
For example, in this report, you can see how the store has made a gross revenue of $12.22. The payment method shows $262.22. The payment method factors the revenue taken in with cash, as well as the cash deposit of $250.00 made that same day.
This report may be found under the Evaluations tab. If you cannot locate it there, you will need to Edit Menu Entries. You may Filter this report by Organizational unit and Date.
Clicking on one of the Payment Methods within this report will give these additional menu options: Edit Payment Method, Cashier Balance Report, and Receipts. You may also select one of the listed Accounts for these additional options: Edit Account, Account Transaction, and Receipts.
Finally, you may export this report into a PDF or Excel simply by selecting one from the top of the page.


