
Store Orders allow you to create an order request directly from the point of sale or the back office. When placing a store order, you can just focus on what you need. You do not need to worry about where the items come from, as the system will automatically account for suppliers.
*Note: This is not to be confused with Stock Orders. To learn more about stock orders and receipts, please visit our Stock Order and Stock Receipts manual page.
Creating Store Orders (Back Office)
If a product is being ordered frequently, creating a store order template will help facilitate the process. To learn more, please visit our Store Order Template Manual page. To create the store order from the back office, navigate to Inventory > Store Orders. Next, click +New from the top of the page.
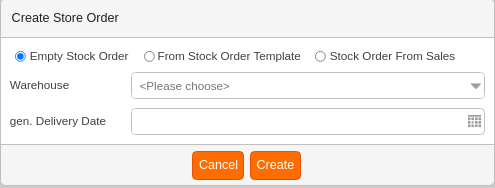
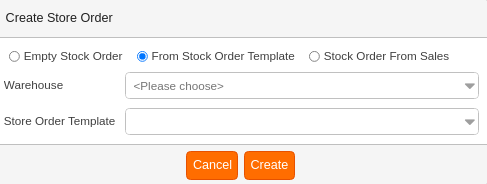
When creating a Store Order with the + New button, you’ll be presented with three ways to make an order.
Empty Store Order: Will have you fill out what warehouse needs to order said product and pick a general delivery date. You will then fill out the products manually.
From Store Order Template: Will have you fill out what warehouse needs to order said product and pick a template to fill the order with.
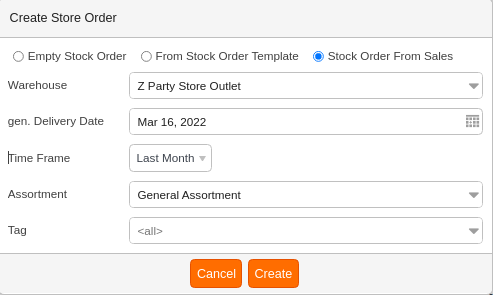
Store Order From Sales: Will have you pick a Warehouse that needs the product and a general delivery date. From there, you’ll fill out a Time Frame for the system to reference your sales data, as well as what assortment of products and any tags you wish to specify. The system will auto-populate a list of the products that have sold within those criteria in the sold quantities. This is essentially a replenishment order to get back the goods you sold.
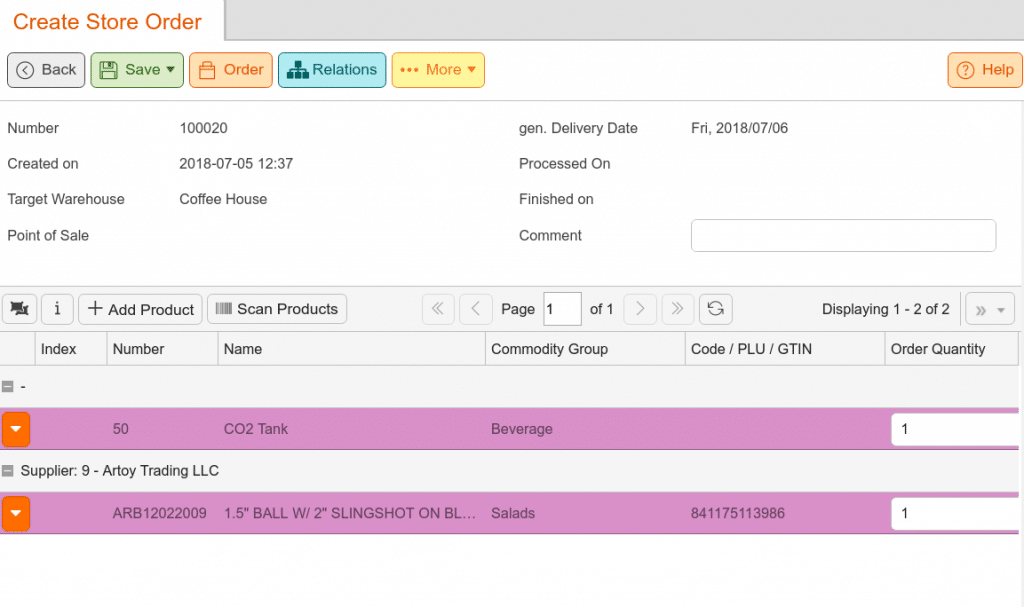
On the Create Store Order page, you will be presented with the following information. Order Number, Created On (Date). Next, Select a Target Warehouse and a General Delivery Date. Also, type in any Comments you wish and click Save. You will now be able to add products to the store order by clicking the “Add Product” or “Scan Products” button.
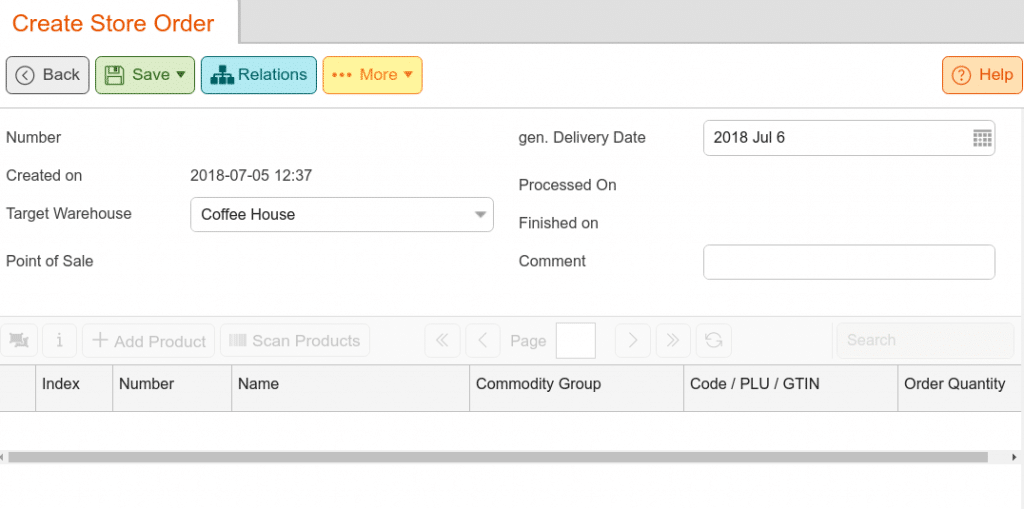
You may change the desired quantity of the product(s) by editing the number in the Order Quantity field. Additionally, selecting the orange drop-down menu next to each individual product will allow for these additional options:
- Remove Product, Add New Price – allows for an adjustment of Supplier, Order code, Description, Container Amount, Container Price, and item price from the same screen.
- Edit (allows for a supplier and Source warehouse change from the same screen)
- Edit Product (will take you to the edit product screen)
- Store Prices (will launch the store prices screen, which allows for an adjustment of price for all org units).
Across from the +Add Product button is an Information Icon. This will give a key to all the highlighted colors and their meanings. You may also choose to group by supplier by clicking on the double black screen icon.
Once you are satisfied with the order, click on the Save button at the top of the screen. If you are ready to place the order, click the Order button. You will be presented with a pop-up dialogue box with the following options.
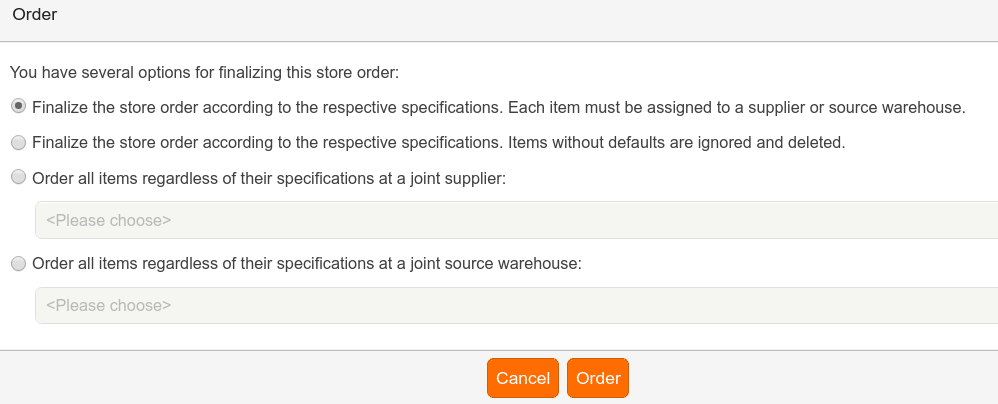
- Finalize the order and assign each item to a supplier and warehouse.
This option is ideal when ordering multiple items from either a specific supplier or warehouse. Using this will generate the appropriate orders for that supplier or warehouse
- Finalize order and have items without supplier and warehouse deleted
Use this when you have everything set up: suppliers, warehouses, etc. Any products that do not have any suppliers or warehouses will be deleted from the order.
- Order all items from a single supplier.
Use this for when you know all your items are coming from a single supplier. This will generate an order for that supplier upon completion. You can select the supplier by using the drop-down menu below this option.
Order all items from a single warehouse.
Use this when you want all your orders from a specific warehouse. This will create and assign an order to that warehouse upon completion. You can select the warehouse by using the drop-down menu below this option.
Once you have made your selection, click on the order button. You may now view the order by navigating to Inventory > Stock Orders.
*Note: The stock order will still need to be booked and sent to place the order with a supplier or source warehouse.
Editing Store Order (Widget)
There are different ways you may edit the orders. You may navigate to Store Orders, select that order from the list and click on Edit. You can now adjust the quantities of each individual item. When you are done, click the Order button to convert the store order into a stock order.
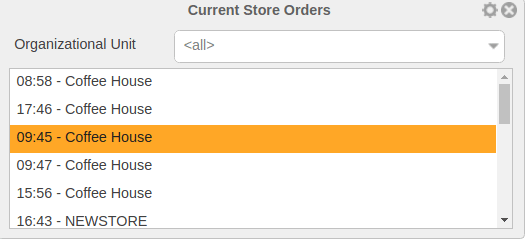
You may also edit store orders straight from Dashboard using the Current Store Orders Widget. This widget will list all store orders for all org units, or you may specify to list orders for one org unit. Double-clicking on one of the listed orders will launch the Edit Store Order page.
This feature helps compile multiple store orders for multiple organizational units simultaneously. If you have store orders from multiple customer orders or if you have multiple stores creating their individual store orders, this feature would be most useful in these scenarios.
*Note: The stock order will still need to be booked and sent to place the order with a supplier or source warehouse.
Store Order Collection
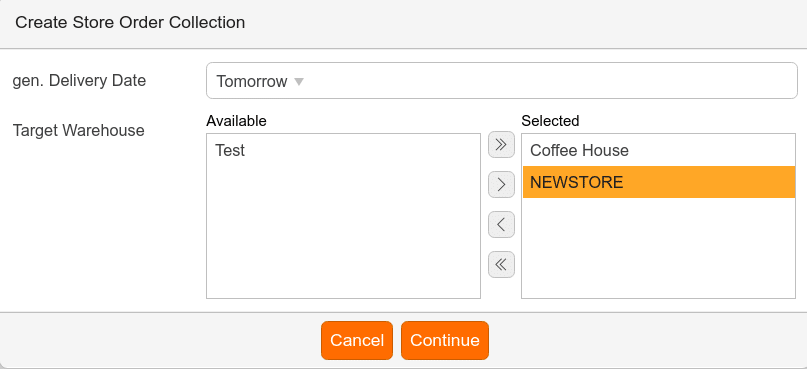
On the store order page, select Store Order Collections from the top of the screen. Next, click +New. Once the Create Store Order Collection textbox launches, Select a gen. Delivery Date, select the Target Warehouses you wish to place an order for, and click Continue.
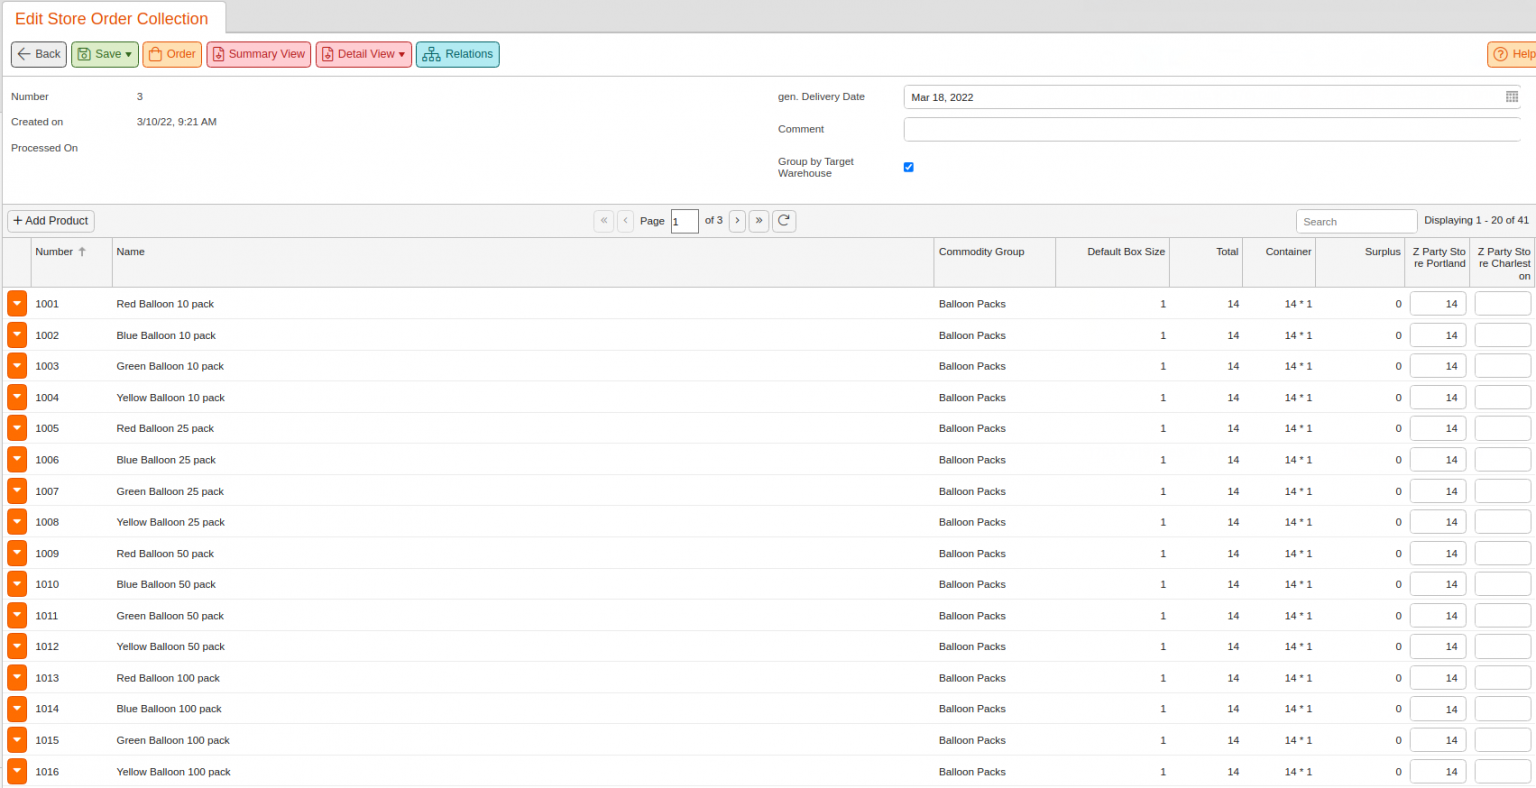
On the Edit Store Order Collection page listed is the Order Number, Created On date, Processed On date,
You may adjust the Gen delivery date and enter in a Comment. You may also group by Target Warehouses simply by ticking the corresponding checkbox.
Listed below are the product Number, Name, Commodity Group, Default box size, Total, Container, and Surplus. Followed will be the Target Warehouse names (previously selected). Add in the desired products and adjust the quantity for each target warehouse. Once satisfied with the selections, you may place an order by clicking the Order button from the top of the page. You may also click Save and download a summary of the order by selecting Summary View from the top of the screen. This will give a PDF of the layout you see on the screen.
For a more detailed PDF, click on Detailed View. This report will list the items with their target warehouses listed and the quantity ordered for each warehouse. this report will also tally up the container amount for all warehouses.
Finally, hovering over the Detailed View button will give an additional option for a Detail View Grouped by tag report. This report should be similar to the detailed view report but will separate the items by tag and list any that do not have one attached.
You can also create a collective PDF for all listed store orders in the list of store orders under More> PDF.
If you have to print out many store orders, e.g. as a delivery note, this function is a real time saver. You simply use the filters to see only the store orders you need and then create the PDF.
Creating Store Orders (POS Terminal)
If the cashier or manager determines that certain products are sold out or will be out of stock, they can set up a store order through the terminal. The Create Store Order button is required. To learn more about creating buttons, please refer to our Create POS button/Button Functions manual page.
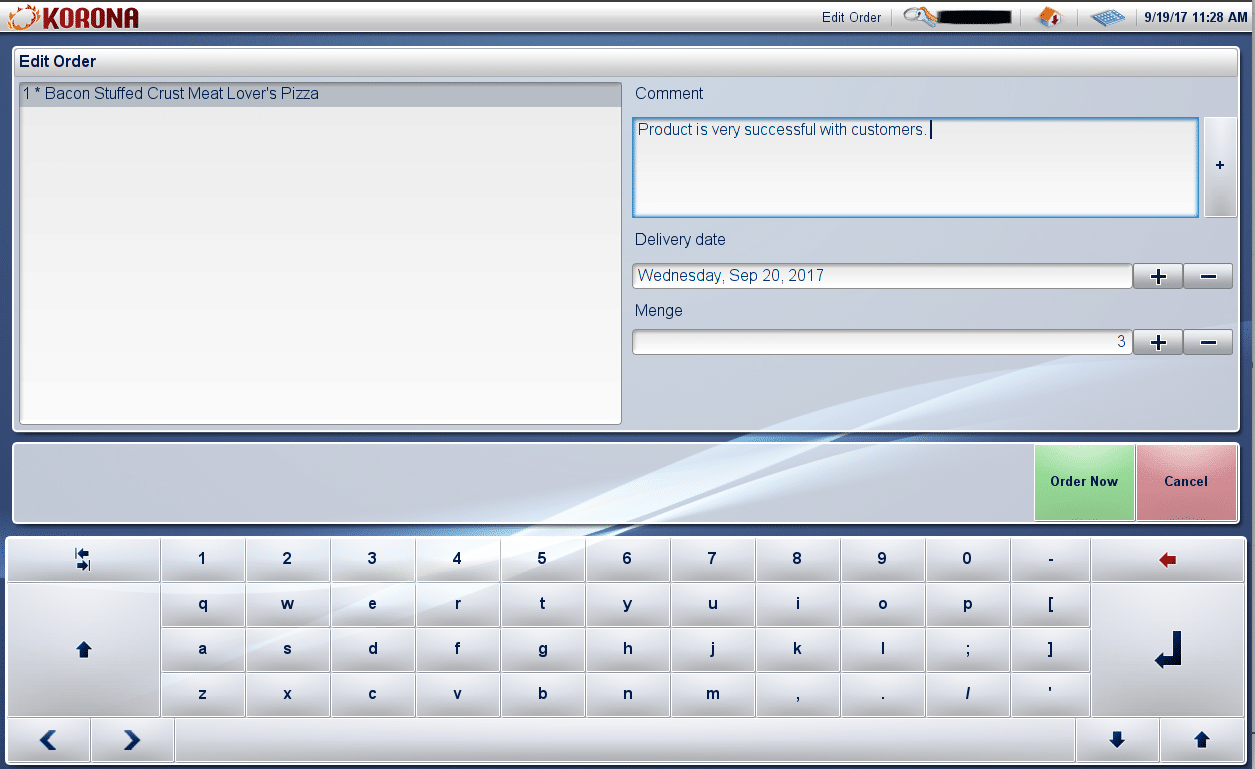
At the terminal, all items that need to be ordered must first be added to the receipt. Once you have added all the necessary items, press Create Store Order. You will be taken to the terminal’s store order screen. Here, you can enter the Delivery Date and enter a Comment if desired.
Once you have entered all the information needed, press the Order Now button at the bottom right of the screen.
You can find the store orders by navigating to Inventory > Store Orders. There, you can either edit the order or remove it.
To be able to look up the store orders you create at the POS, you will need the button function Search Store Order. To learn more on how to create buttons, please refer to our Create POS button/Button Functions manual page.
*Note: Orders created from the POS cannot be Finalized or Booked from the POS. They must still be confirmed in the Korona.cloud back office.