Creating Customers in the KORONA Studio
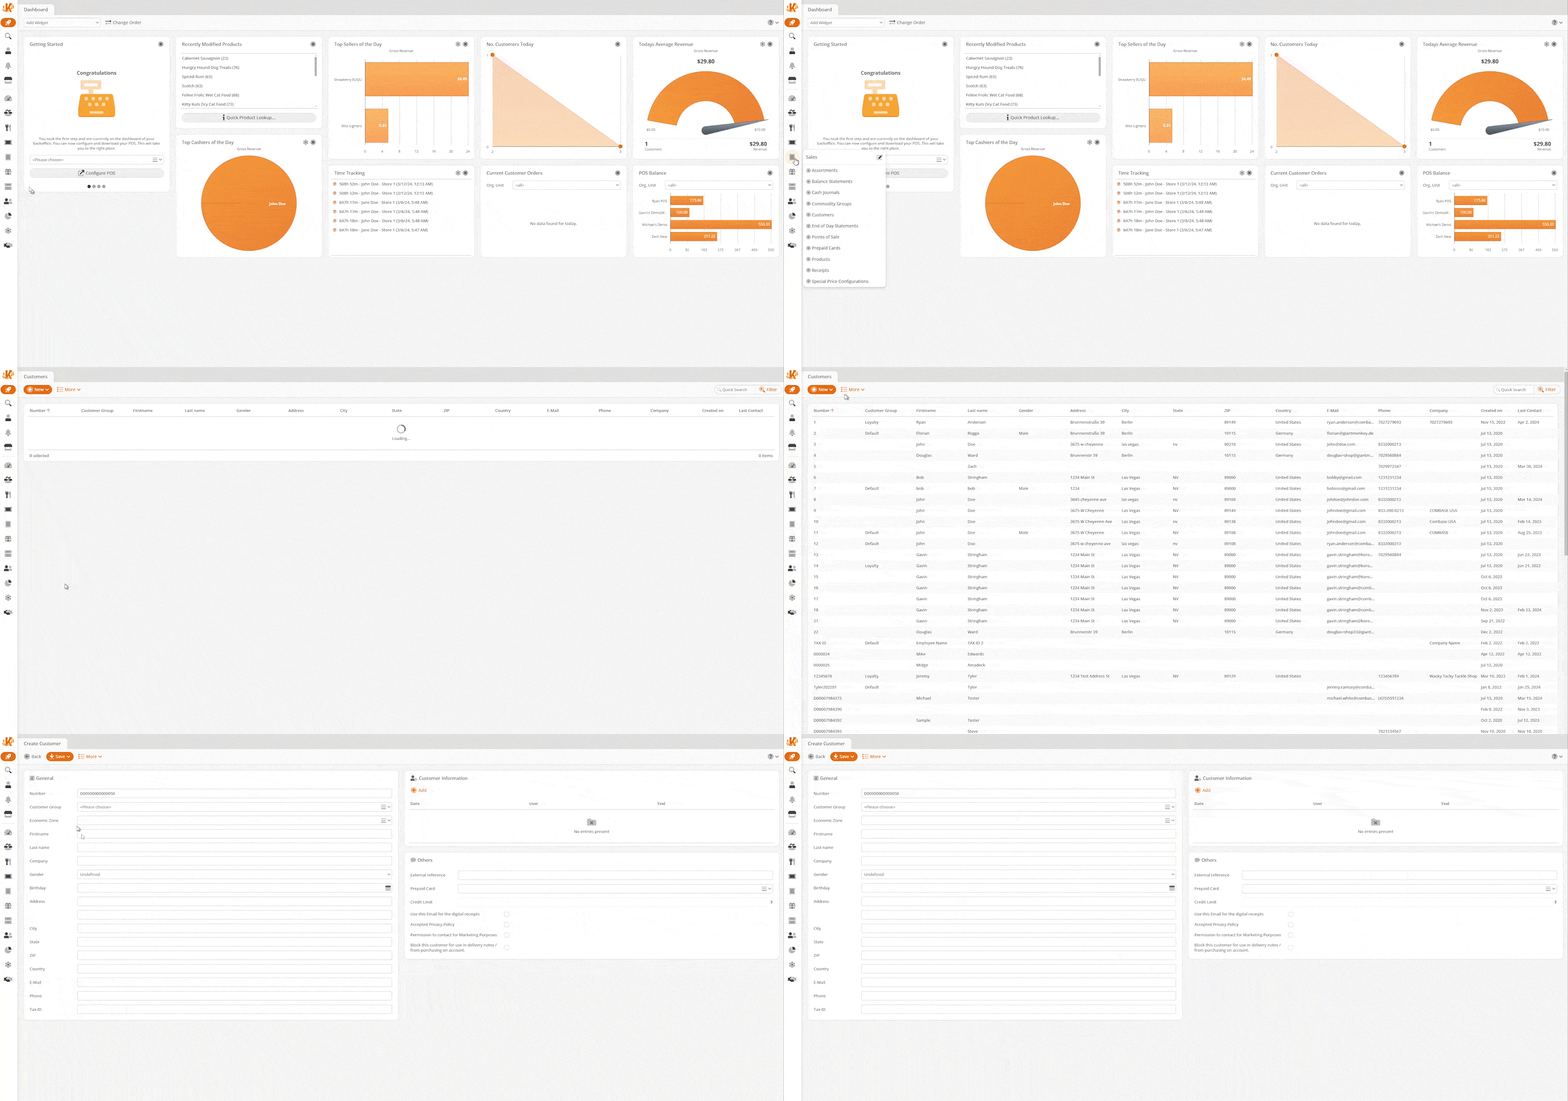
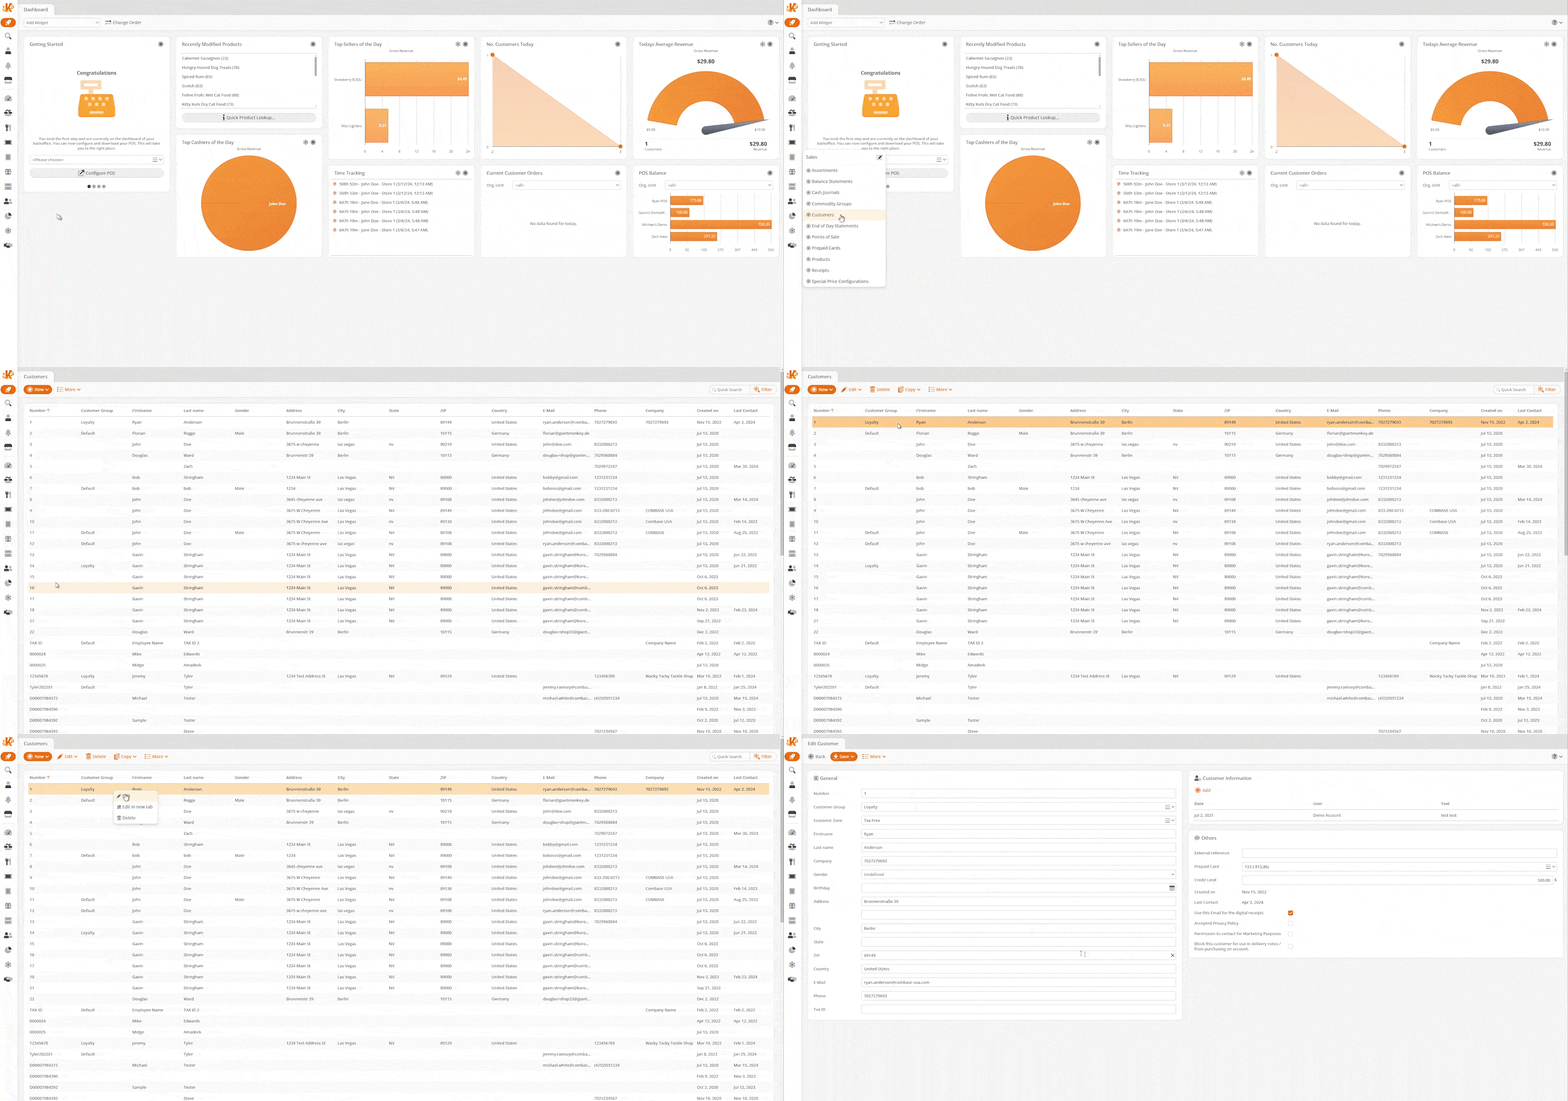
To create customers, start by navigating to Sales > Customers. On the Customers screen, there will be an overall count of customers you have created. Click on +New.
You will be taken to the Create Customer page. Here, you are required to, at minimum, enter the customer’s last name and select a Customer Group. You can now also fill in any additional customer information. Once you have done so, click Save.
Click on Back to be taken back to your Customers page. Your new customer should now be listed.

Editing Customers
To edit a customer, select the customer and click on the Edit button at the top. An Edit Customer screen should appear and should be identical to the Create Customer screen. Once you have finished editing, click Save.
The Edit Customer page now also has a checkbox added to the bottom that allows the customer’s email to be used for Digital Receipts.
You can also now add an external reference (perhaps a customer number from a third party) to customer information. This external reference will now show on the PDF of an invoice as well. If left blank, the field is omitted on the invoice.
There are also check box options where you can specify if a certain customer has accepted any sort of privacy policy or if they have given permission for marketing campaigns.
Finally, there is a section under each customer where you can assign a Prepaid Card and Credit Limit. These can be used to set up and configure charge accounts per customer. For more information on this, please refer to our Setting up Charge Accounts manual page.

Deleting Customers
Deleting customers can be done by selecting the customer and clicking on the Delete button at the top.
A dialog box should appear asking: “Are you sure you want to delete the selected items?” Click Delete.
Filtering Customers
On the Customers page, the Filter icon on the top right-hand side should help refine certain customers for running CSV exports.
Your list of available Filters are: Company, Customer Group, Economic Zone, First Name, Last Name, and Number. You can also filter your customers by those who have accepted your Privacy Policy and those who have opted in to receive marketing emails (Marketing Contact Permitted). These filters will help you stay compliant with GDPR.
Once you select a filter type, it should appear in the Active Filter box. Next to every active filter is a drop-down menu to help you refine the search even more. Your available options are ‘begins with,’ ‘contains,’ or ‘is equal.‘
For example, we filtered our customers by Names beginning with the letter J.
Looking up Customers (POS)
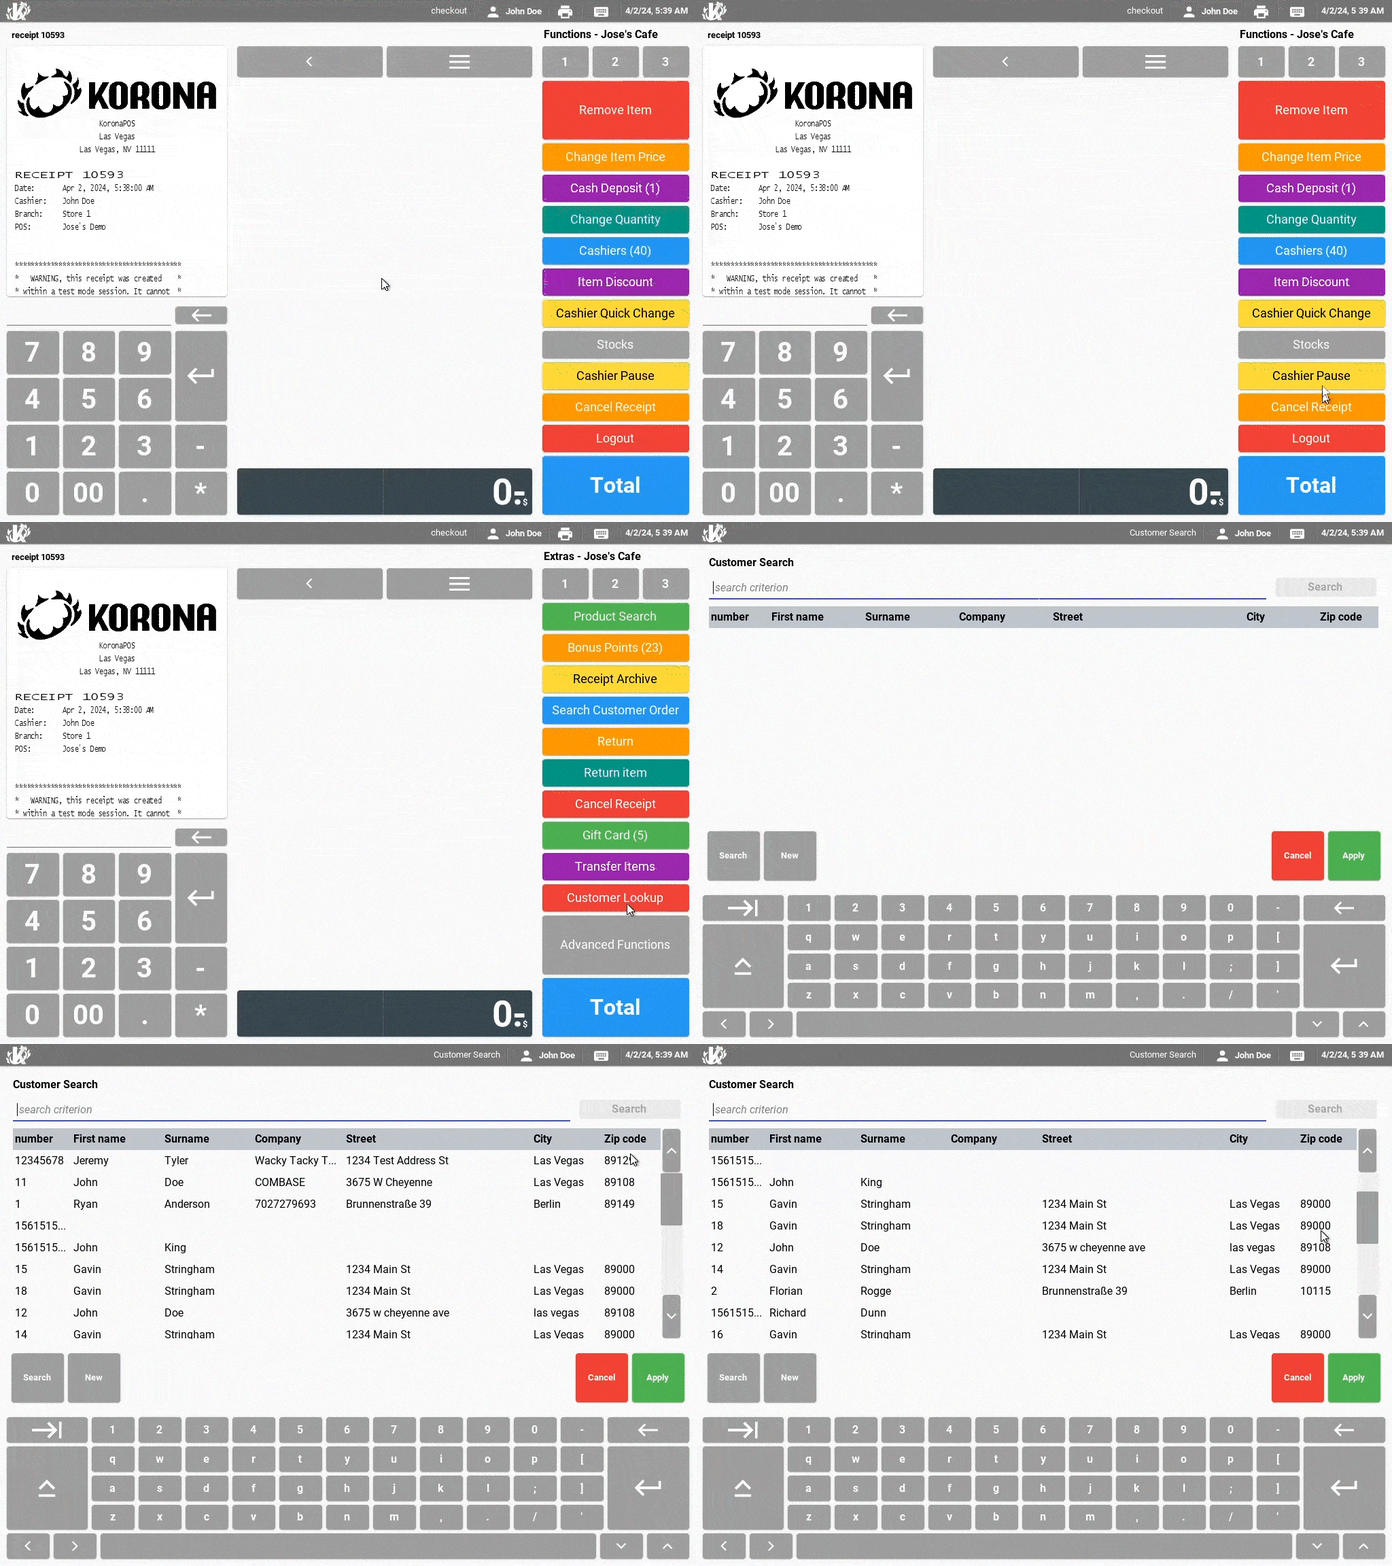
To be able to look up and create new customers from the POS, you will need to add the Button Function Customer Lookup. To learn how to do so, please refer to the Create POS Buttons / Button Configuration manual page.
To search for the customer, type their names in the search bar at the top of the screen. You can also search for the customer by typing any of the following information or by typing only the beginning letter of the following information: Name, Number, Company, Street, City, or Zip Code.
For Example, we searched for the letter ‘M,’ and in our results, John appears on the list due to the M in his street Name “Mildberry.”

For a more detailed explanation of searching customer orders, watch the video below:
Creating Customers (POS)
Creating a new customer is as simple as selecting Customer Lookup and clicking on New.
This should take you to the Personalization screen, where you can enter all the information for your new customer. Once done, click Add. Notice the customer’s name is now reflected on the receipt and should be listed in the back office now as well.
You may also use the button function Show Receipt Customer to list any customers associated with the current receipt. If one does not exist, the system will allow for a new entry.


