Setting up events is easy with KORONA. With KORONA, you have the ability to create events, shows, tours and recurring events. You can also sell tickets in advance with KORONA. One of the main benefits of setting up Events is once the capacity is met it is no longer possible to sell Event Tickets.
Creating Event
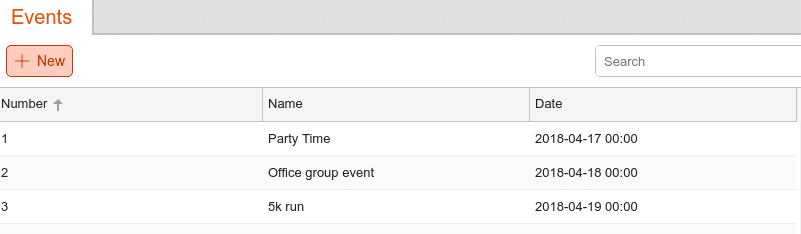
To create or edit events, go to the Events tab by navigating to Ticketing > Events. If you want to create a new event, click on the +New button. If you need to edit an event, select the event you wish to edit and click on the Edit button.
Once you have finished, click save and back to see the list of events you have created. Click the event you wish to edit and click Edit. Here, you will need to fill out the following fields:
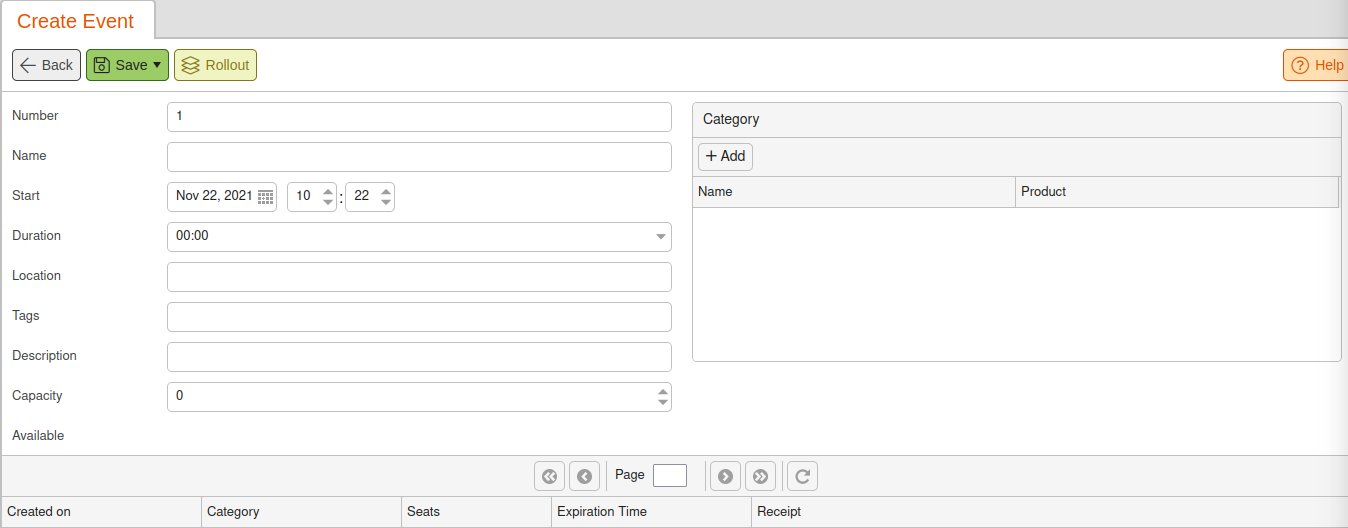
- Number: A number that is automatically generated for the newly created event. You can change this to a number of your choice if desired.
- Name: This is where you name your event, this will also display on a connected WooCommerce Events page.
- Start: In the first field, you set the date, and in the second field, the time at which your event starts.
- Duration: Set the duration of your event in steps of 15 minutes.
- Location: Here, you can describe the location of your event.
- Tags: you can add multiple tags to your events for easier sorting, comparison, and exporting later.
- Description: A brief description of the event.
- Capacity: Set how many tickets can be sold for your event.
- Category: Here, you will have the following fields:
An Add button to assign different ticket items to this event. The product you select will be used for Pricing/Sector/Commodity Group related information. If this product has a ticket definition already, these Event settings will take precedence when sold through the Events interface options or connected WooCommerce Webshop.
Name: Allows you to give your tickets event-specific names or price points. For instance, a ‘VIP ticket’ or ‘General Admission.’
Once you have finished filling out the necessary fields, click the Save button at the top of the screen.
*Note: You will need to Retrieve Master Data on your terminals in order to book tickets for this event.
*Note: When you add tickets, enter the first letters of your tickets to find them quickly and easily.
Rollout Events
Rollout events are set up to recur daily, weekly or monthly. To create a rollout event, you can choose from an already created event or create a new one.
Once you have all your event parameters set up, click the rollout button at the top of the screen. A pop-up box with interval and ending date selections will appear.
First, select your interval. It can be daily, weekly, ONE_TIME, or monthly. Then, select the date that you want the event to stop recurring. Finally, click the OK button.
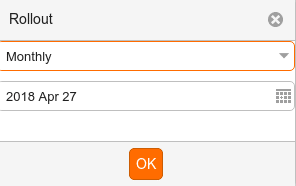
Go to the events screen. You can now see that the event has been duplicated based on the parameters you have specified. The event is duplicated until the end date.
Working with Events at the POS Terminal
You can sell event tickets from your point of sale terminals. Additionally, you can also sell your event tickets in advance at the same terminal.
In order for Event Sales and Event Presales to work, you will need to add their corresponding functions to the button layout.
Detailed information on button layouts can be found on our Create POS Buttons / Button Configuration manual page.
Working with Events on a WooCommerce Site
You can see all of your Events that are available and created in KORONA on a connected WooCommerce Webshop. This way, you can sell tickets for events and have the ticket in QR code format sent directly to your customer’s email. They can then easily present this for scanning during admission.
For more information on setting up a connected WooCommerce Webshop, please refer to our WooCommerce Integration Guide.
Working with Event Sales
Event Sales refers to selling the tickets for an event on the day of that event. For example, if there is a show going on at a specific time, you are able to sell tickets for that event that day.
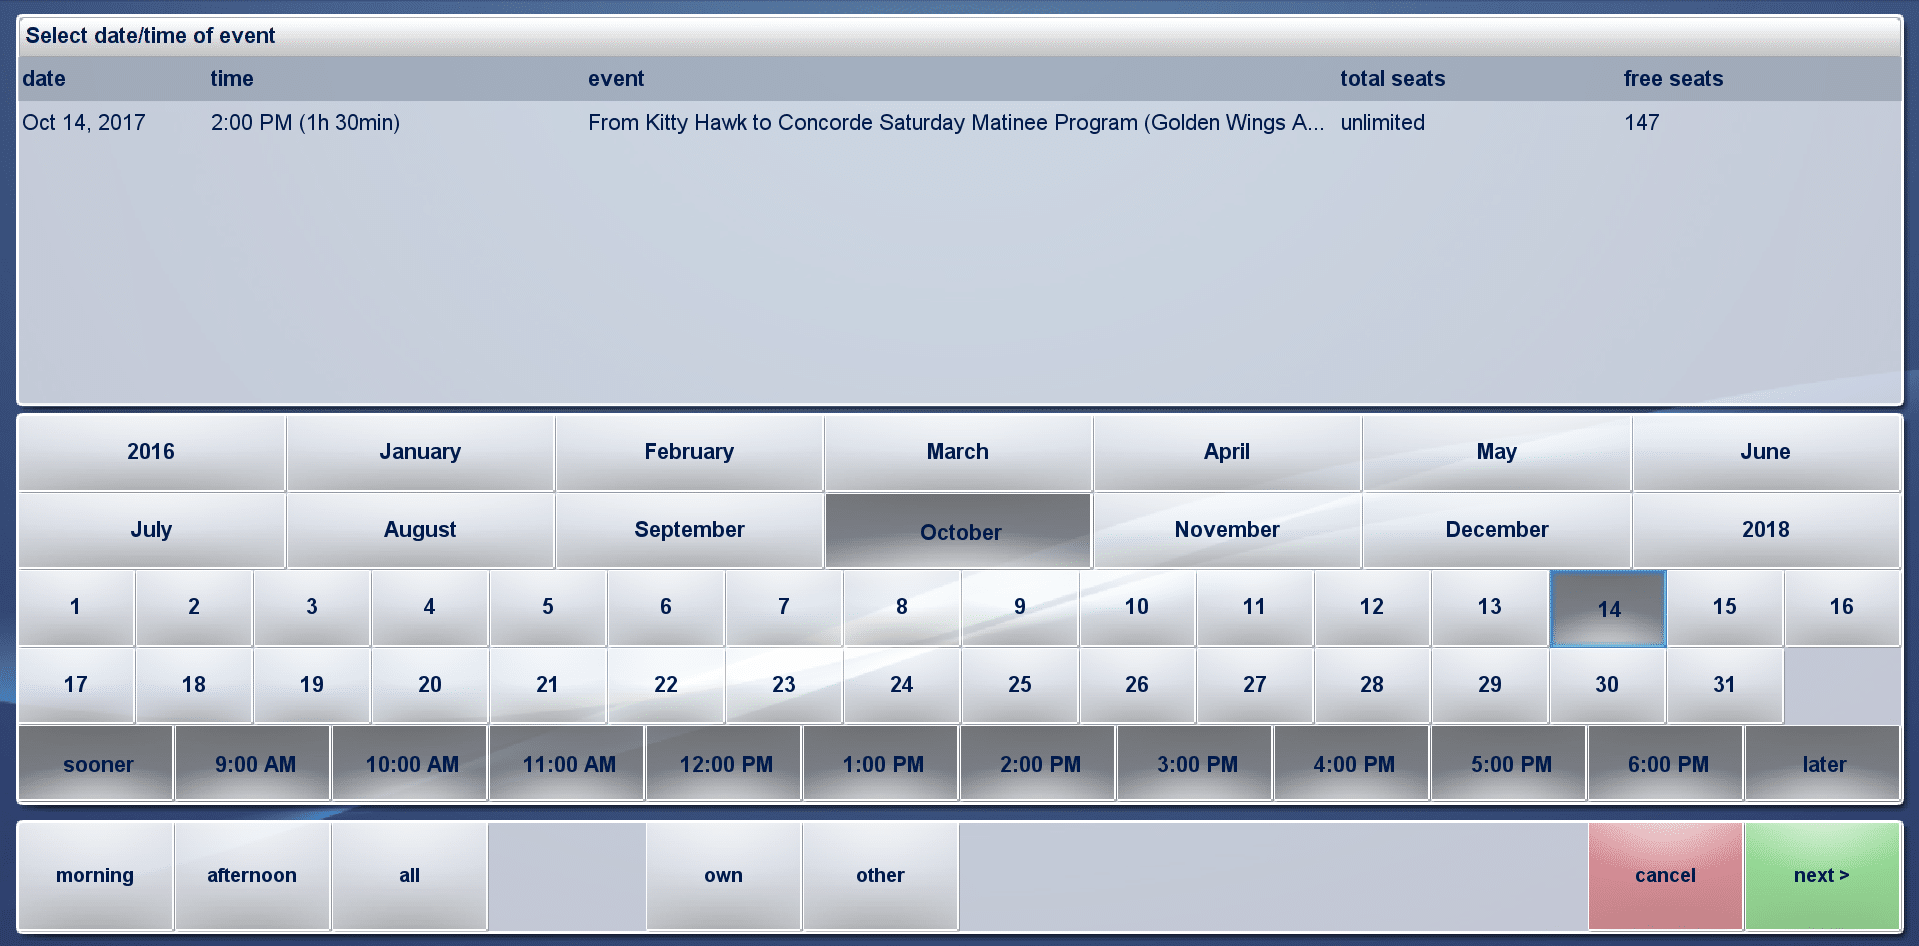
First, select the Event Sales function on the POS. A listing of events for that current day will be displayed on the screen. Select an event.
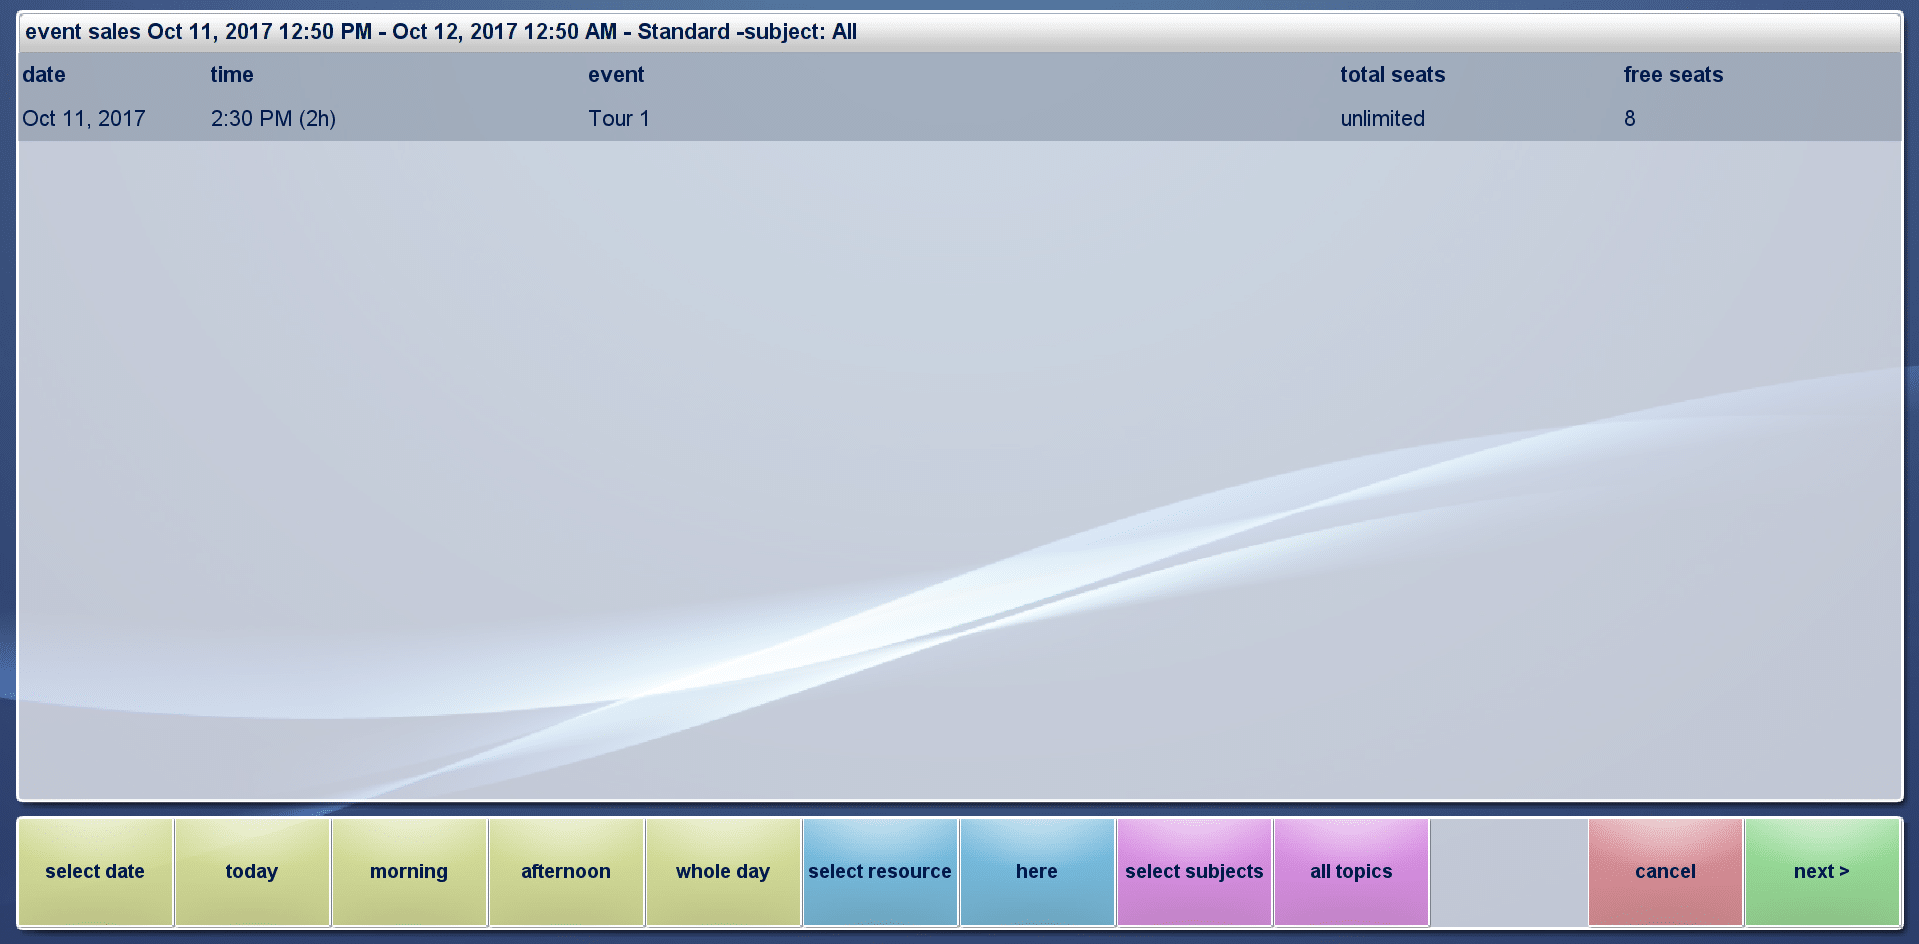
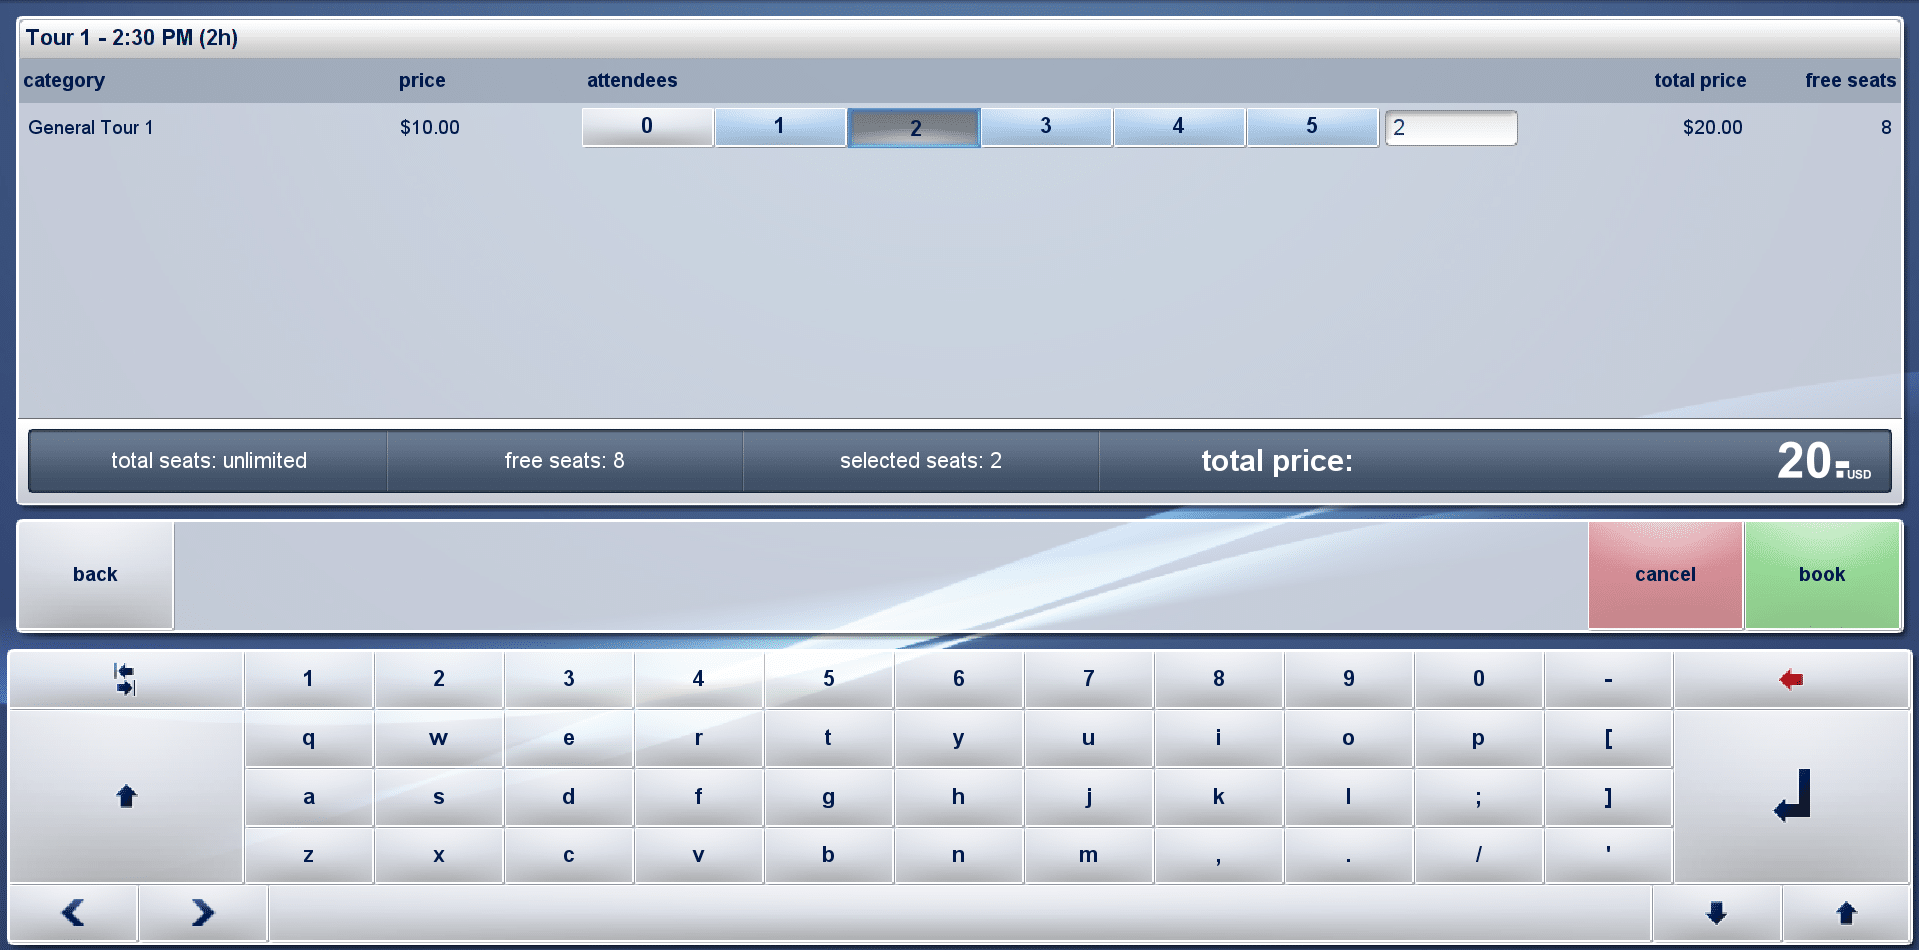
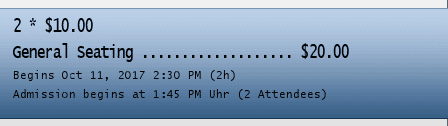
You will then be taken to a screen with the available tickets that can be sold for that event. Select the tickets you wish to sell and enter the quantity. Once you have confirmed your selections, select Book. Continue the transaction normally.
Working with Event Pre-Sales
Event pre-sales allows you to sell tickets for events in advance.
Begin by selecting the Event Presale function on the terminal. This time, you will be given the option to select the date fo the event taking place. Use the keys to select the month, date, and time for the event. Any events for that day will be listed.
Select the event and tap the next> button. Then, proceed to add the tickets available for sale as per the customer’s request. Finally, when you have confirmed everything, select Book. Continue the transaction normally.