
*Note: The Orderportal is currently being updated in the U.S. region and will be re-launched soon.
Tip
For suppliers/vendors wishing to integrate with the Orderportal please see this manual page.
The Orderportal is a way for you to interface directly with suppliers. Suppliers are able to import their product list and see your stock orders. The Orderportal allows you to create or match products from the suppliers product list, and to create Stock Orders that are sent directly to the suppliers service. The supplier then updates the status of your order which you can track within your stock order.
Adding a supplier to your Orderportal
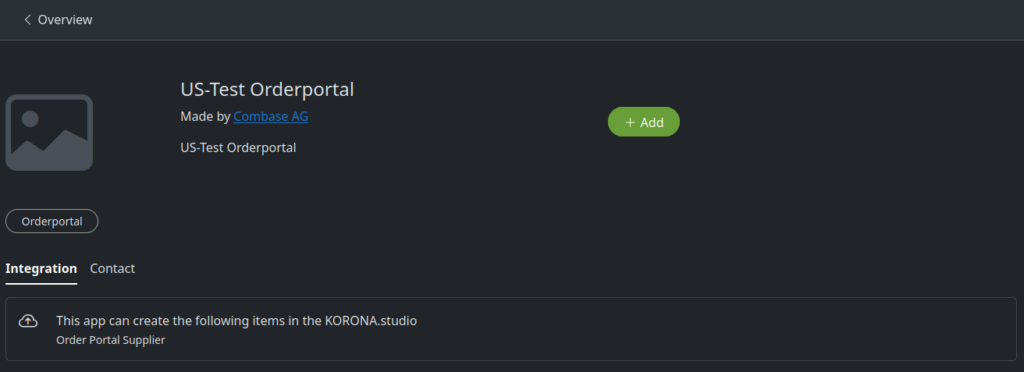
To add a supplier integrated with the Orderportal, visit the KORONA.appcenter and log in with your regular KORONA.studio login. Locate your supplier in the list, open their integration page, and press Add.
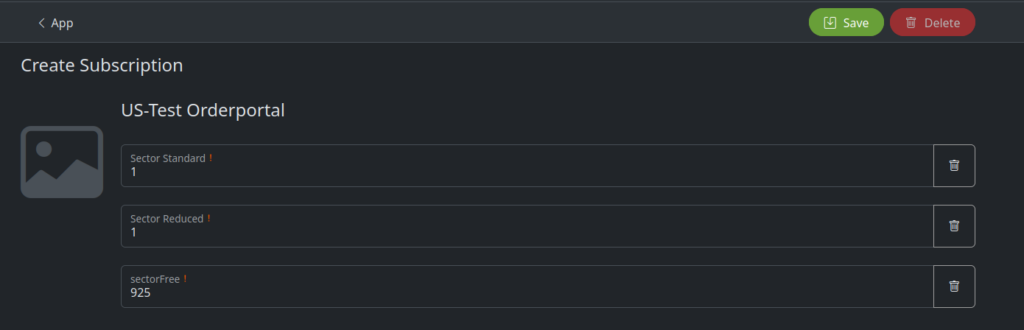
Fill in the sector (tax) information and then press Save. If you do not have a reduced tax center, use your standard sector.
Once you have finished adding the supplier on the KORONA.appcenter, we will connect the supplier to the Orderportal on KORONA.studio. Log in to your KORONA.studio account and go to Inventory > Supplier. If the supplier does not exist, create a new one (see this page on creating suppliers).
Once you are on the Edit Supplier page, find the Order section. Change the Order Interface “Precasted” selection to Orderportal.

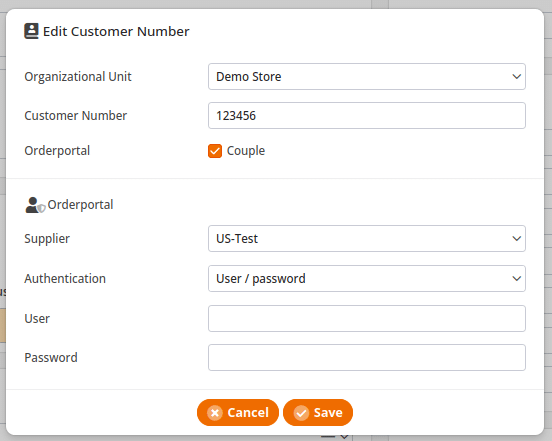
Now, scroll up to the Customer Numbers section and press Add.

Select your Organizational Unit, input your Customer Number (get this from the supplier), and press the Couple button. Choose the same supplier you added via the KORONA.appcenter, and choose your authentication method. The supplier will provide you with your authentication credentials.
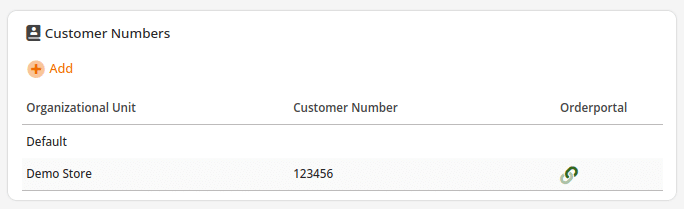
Once you press save, the customer number added should show as Coupled.
Using the Orderportal
Once you have finished the above steps of adding a supplier to the Orderportal, you are ready to begin ordering via the Orderportal. Go to Inventory > Orderportal (you may need to edit menu entries if you do not see this option). Select the supplier and target warehouse, and then it will populate with that suppliers products.
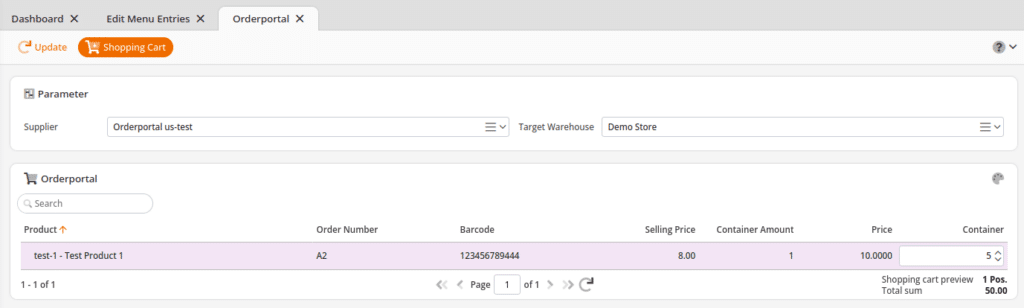
You will order products by the Container, which is based on the Container Amount. This means if the Container Amount is 5, and you order 10 containers, you will receive 50 of that product.
Once you are done selecting which products you are going to order, press the Shopping Cart button at the top. On the Shopping Cart page you have the option to Create Stock Orders or Update Products.
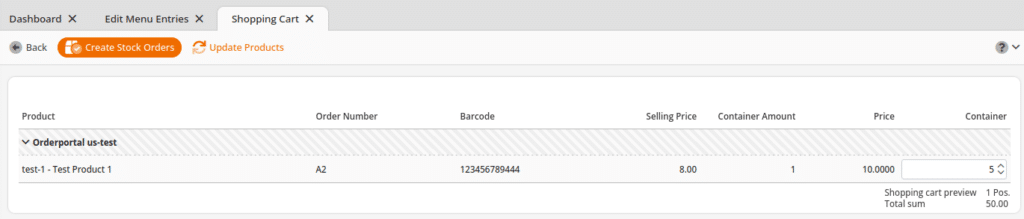
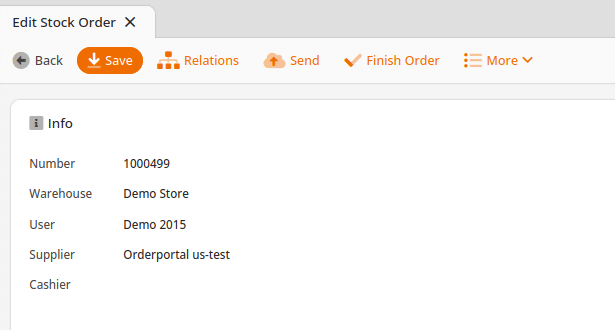
Update Products will create new products, or it will update information, such as barcodes, for existing products. Once you finish or skip this step, select Create Stock Orders. This will bring you to the Stock Order page. Edit the stock order that was created via the Orderportal, fill in any additional information or make changes as necessary, and then book the stock order. After booking the stock order, you will press the Send button. The send option is the final step, and will then allow the supplier to see your order.
*Note: If an order has been left unbooked for the same supplier/items it will update the existing stock order instead of creating a new one.
Once you have sent the stock order, it will update and show you the status of your order in the line that says Orderportal.
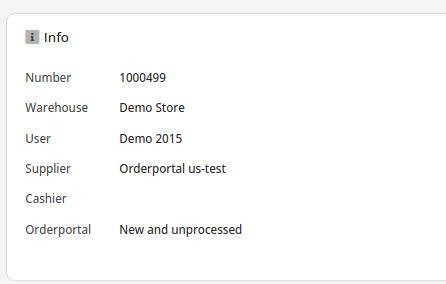
There are four statuses available:
- New and unprocessed – The default when a new stock order is sent.
- Rejected – There has been an error processing this order, or it cannot be fulfilled.
- Processed – The order has been processed but is not yet accepted.
- Accepted – The order has been accepted and the items have been shipped.
Once the order has been accepted, you may receive a dispatch notification if the supplier provides it. After receiving the products, you can either create a stock receipt from the dispatch notification or the stock order itself.