Number ranges are an alternative method of performing functions at the terminal. With number ranges, you can program in a range or pattern, and when that pattern is run, KORONA POS will perform that function. This is great for setting up scannable user ID cards for time tracking or setting up loyalty cards.
Creating Number Ranges
Begin by navigating to Settings > Number Ranges. To edit existing number ranges, double-click the row. The input fields are now displayed again. Select a number range and press the “Delete Number Range“ button above the list to remove it. The patterns for the “Open Invoice“ and “Redeem Coupon“ functions cannot be edited.
To allow the entry of different patterns, they must be set up so the terminal recognizes the entered number – for example, a product number or customer number.
Begin by clicking the “Add Number Range” button to add a new range. Next, select the function you want to use in the drop-down menu. Then, enter the pattern that you would like assigned to that function in the text field.
For example, if you select the function “Set Receipt Customer,” and your customer numbers start with “K,” enter the expression “K*.” As a result, all patterns beginning with K will be recognized as customer numbers.
Since KORONA POS can also recognize inputs such as “Kurt Mickey” as customer numbers, creating a more specific range is better. In this example, the “K” is only followed by digits. However, since there is no expression for any number of digits, you can specify the pattern with “K ### *.” Thus, entries beginning with “K” and three digits followed by any characters will be recognized as customer numbers.
When satisfied with the setup, click the Save button below the new line. After you have created all necessary number ranges, click the Save button at the top of the screen. Below is a list of functions that are available to use.

Available Functions


- Add Sale Serial Number: Attaches a serial number for that product to the receipt. This would be used for expensive products, such as TVs. It can also be used for gift cards and tickets.
- Assign Salesperson: Assign a salesperson to the receipt. (If you have multiple sales agents with cards formatted with sa4299### and your sales agents’ logins with those 9 digits beginning with sa4299, they will be logged in)
- External System Calls: This performs an external system call programmed in the system.
- Instore EAN/GTIN 4, 5, & 6-Digit Price: This is normally used for weighed products. The price is embedded in the last 4, 5 or 6 digits. For detailed information on Instore EAN/GTIN Codes, please visit our Instore / Inclusive Price Code manual page.
- Login Cashier: Logs the cashier in when scanned (If you have cashier cards formatted as 4955####, and you set your cashiers’ login codes with 8 digits beginning with 4955, they will be logged in)
- Logout Cashier: Logs the cashier out when scanned
- Open Customer Order: Opens up a customer order for viewing
- Open Delivery Note: Opens up the delivery note associated with a transaction
- Open Invoice: Opens the scanned invoice for review
- Open Quote: Opens a quote within the system for review
- Open Rental: Opens the scanned rental for review
- Redeem Coupon: Adds a coupon to the receipt of redemption
- Redeem External Coupon: Adds a coupon to the receipt – can be configured with Couponing Promotions to recognize different codes to apply different promotions
- Set Receipt Customer: Assigns a customer to the receipt – if you have customer loyalty cards formatted as k####, and you set up the cards with 5 digits beginning with “k”, that customer will be assigned to that receipt
- Set Receipt Customer Group: Assigns a customer group to the receipt – for example, you are running a loyalty club and your club members have cards that can have a specific format, you can scan that card and attach that customer group to the receipt, provided that the group’s numbers match what you have programmed
- Set Receipt Customer Number: Assigns a customer number to the receipt – if you have customer loyalty cards formatted as k####, and you set up the cards with 5 digits beginning with “k,” that customer will be assigned to that receipt. Instead, it will assign the number scanned, not the name.
- Set Receipt Order Number: Assigns an order number to the receipt
- Set Sale Tag: Uses an expression to be typed into the POS, assigning a certain tag to this receipt – that tag could serve as the trigger for promotions or any number of things
- Set Email for Digital Receipt Dispatch: Using a format with the @ symbol will automatically flag the receipt to send a digital copy of the receipt to the entered email address once the sale is finalized.
- Show Button Layout: This is useful if you don’t want cashiers getting to certain layouts. An example would be if you have certain layouts designated as 223###, and you scan in a manager card with a number of 223434, KORONA POS will then pull up that layout.
NOTE* If you have two number ranges that are the same, KORONA will activate the range that comes first in the list from the top. So if you have Login Cashier as a range and its formatting is similar or matches the pattern for accessing a button layout, and you have the button layout below the Login Cashier function, it will log in the cashier.
Sort By
You can change the order in which the entries are checked against the number ranges. To do this, click and drag the number range to the desired position.
The less specific number ranges should be placed towards the bottom of the list.
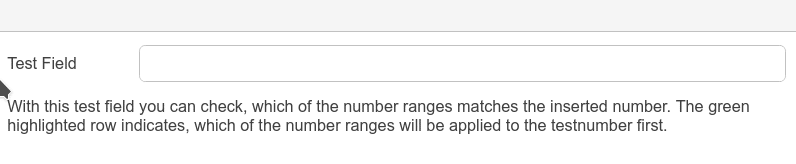
Test Field
The test field tests the functions and number ranges you created. To test a range, enter it in the Test Field at the top right of the screen. The row that corresponds to that number range will be marked green.