
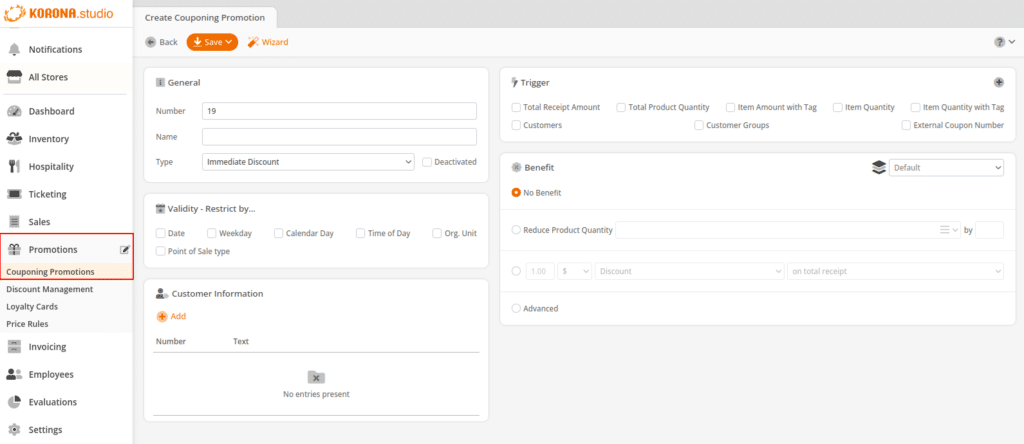
Go to the promotions page by navigating to the Promotions module on the left side, then select “Couponing Promotions.” Here, you can create new promotions or manage existing ones. To get started, click on +New.
This screen allows you to create promotions based on a wide variety of parameters. To create your promotion, you will need to set up the triggers and benefits appropriately for the promotion you wish to have. Details on each of the triggers are described below.
General Info Section
In the general information box, you can set the name and type of discount.
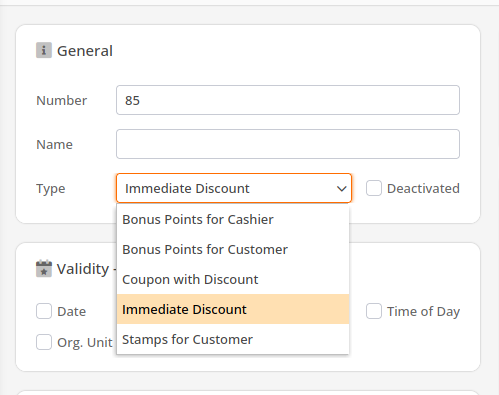
Type of Discounts:
- Bonus points for Cashier
Allows cashiers to accrue bonus points on sales they make
- Bonus points for Customers
Allows customers to accrue bonus points on sales they pay for.
- Coupon with Discount
Will print out a coupon for use the next time in-store
- Immediate Discount
Gives an immediate discount or benefit on the current receipt.
- Stamps for Customer (Punch/Stamp cards)
Similar to bonus points, these stamps or punches will accrue and be used later for a benefit.
Validity Section
Here, you can set the dates and times for your promotion.
Note
The conditions (products, etc) do not have to be the same as the products in the benefit box. For example: Buy $10.00 worth of Chips and get a $2.50 Pack of Soda for free.

- Date
Use this to restrict your promotion to a certain date range. The start date is included. The end date will not be included in the promotion.
- Weekdays
What days of the week do you want your coupon to be good for? If you only run a happy hour M-F, this will allow you to set that up.
- Calendar Days
This allows you to determine what days of the month you want your promotion to run. So, if you only want it to run every third day or every other day, you can check those days.
- Time of Day
Use this to restrict your promotion to certain times of day. Note that time is in military/24-hour format.
- Org. Unit
Use this if you want to restrict the promotion to certain Org Units.
- Customer Information
If you would like to add info text with this promotion, you can add it here.
Also, please try our Promotion Wizard.
Trigger Section
Here, you can set what causes your promotion to happen.

- Total Receipt Amount
You can trigger a promotion to occur based on the total exact amount or greater.
- Total Product Quantity
You can trigger a promotion based on the total number of products on a receipt.
- Item Amount With Tag
You can trigger a promotion based on the total of items with a specific tag. If you are trying to set it in increments, use >=.
- Item Quantity
You can trigger a promotion based on the total number of a specific product on a receipt. If you are trying to set it in increments, use >=.
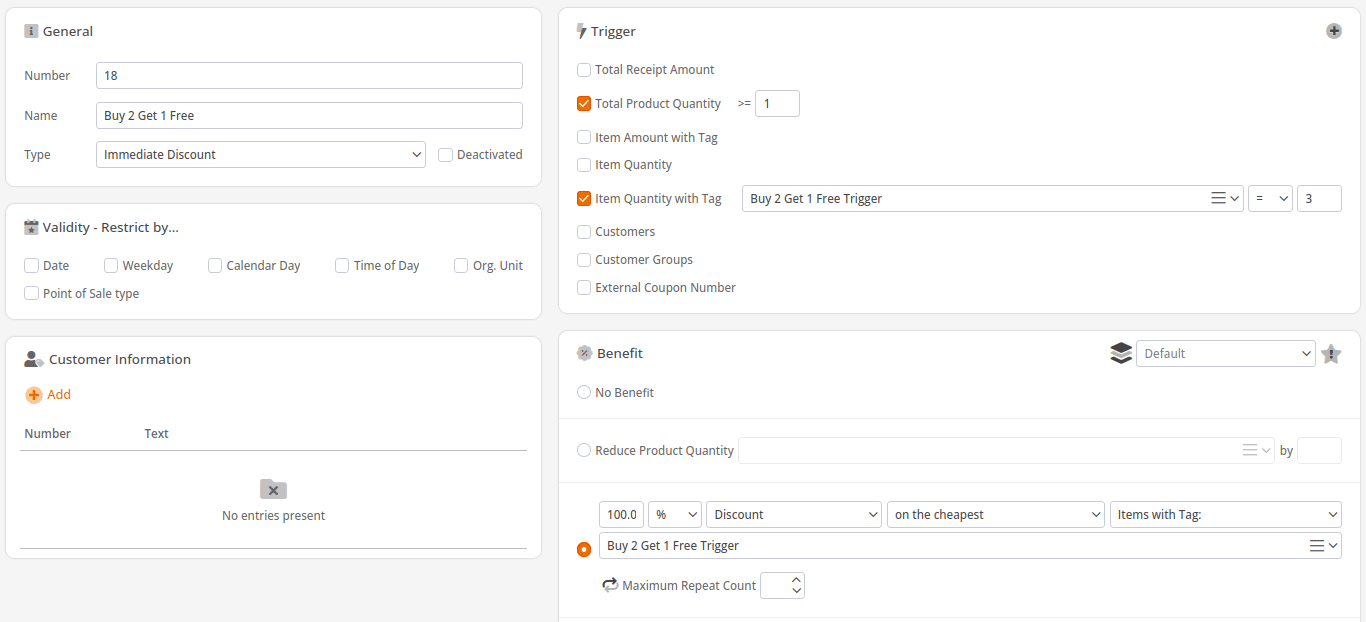
- Item Quantity with Tag
Use this if you want to restrict the promotion to certain Org Units.
- Customer
You can trigger a promotion by assigning a specific customer.
- Customer Group
You can trigger a promotion by assigning a customer group to a receipt. This is a great way to trigger employee discounts.
- External Coupon Number
In the Trigger box, you can enter something alphanumeric in the field “external coupon number.” Since the triggers can be combined, you can easily attach further conditions to them, such as a minimum amount for a certain product group.
Note
When using ‘External Coupon Number,’ you will also need to add a number range for ‘Redeem External coupon.’ Additionally, you will need to generate the barcode on your own. This is best utilized to trigger promotions that last for a set period of time, as there is no way to limit the number of redemptions.
Configuring External Coupon Promotions
Couponing promotions can be triggered using External Coupon Codes. This requires a few small steps:
Go to Promotions -> Couponing Promotions, and click +New.
Set the Type to “Immediate Discount,“ and under Trigger, click the check mark for External Coupon Number. Fill that in with the UPC from the Coupon.
*NOTE: If the coupon has a number field that changes between coupons, only fill in the numbers that will not change. The other numbers will be addressed in the next step.
Go to Settings -> Number Ranges, click “+ Add Number Range,” and scroll until you find Redeem External Coupon.
A blank field will appear with an asterisk. The asterisk is a wildcard symbol, allowing coupons to be numbered. For example, if you wanted to do a special printing of 100 Coupons, the coupon number might resemble (1-100)######,
The number signs represent the numbers on the coupon that do not change. After the asterisk, just enter the numbers that do not change from the coupon and click Save.
At the POS, Retrieve Master Data and restart.
Benefit Section
- No Benefit
The promotion does nothing. This is another way to turn off your promotion instead of deleting it.
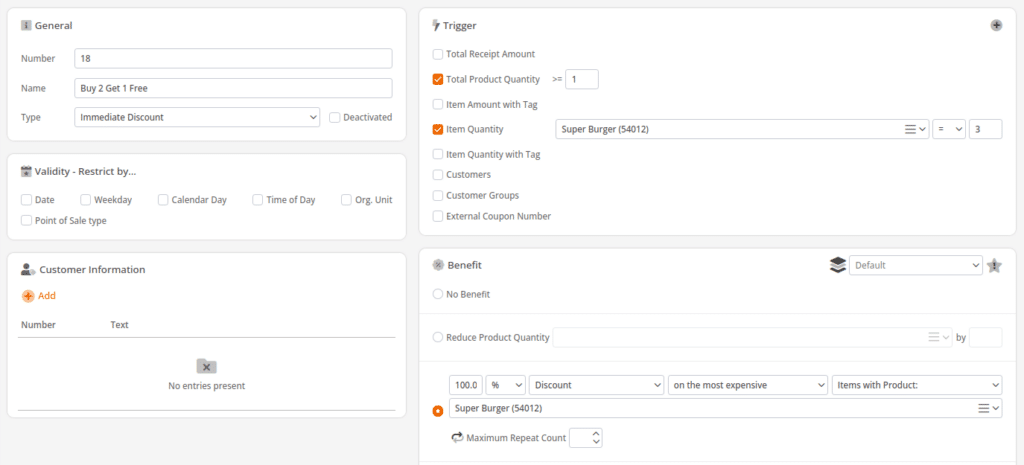
- Reduce Product Quantity
This is how you would do a buy one get one or a buy 2 get 1 free promotion.
BOGO example:
Trigger: Candybar= 2
Benefit: Reduce Product Quantity Candy Bar by 1.
- Discounts
You can choose what kind of discount you’d like customers to receive. The first box is for a number, either a percentage or a dollar amount. The second box allows you to choose whether it’s the dollar amount or the percentage. The third box determines whether or not you are setting a fixed price or if it’s a discount. The final box is broken down further here:
- On total receipt
This would set the total price of the discountable items on the receipt if selected in conjunction with “Fixed Price.” Items marked as not discountable would still count towards the total.
- Distributed on all
This will distribute the discount evenly across products within the defined parameter of the fifth box.
- On every
This will give a discount for every item within the defined parameter of the fifth box.
- On the cheapest
This will give a discount on only the cheapest item within the defined parameter.
- On the most expensive
This will give a discount on only the most expensive item in the defined parameter.
- Maximum Repeat Count
This sets the maximum number of times this benefit and trigger can be applied for discounts that can be applied multiple times, or for restricting the number of times they can be fired.
- Advanced
Look forward to a host of new changes coming soon. These will be available within the next few development cycles. For now, these should not be used.
Discount Management
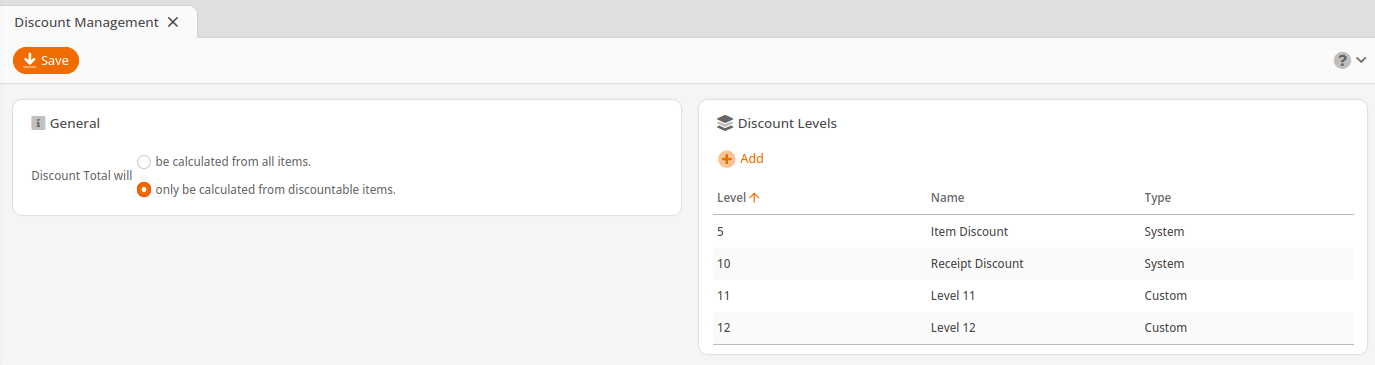

To set up a “Happy Hour” promotion for all items in the Commodity Group “BEER”, use the Validity section to specify the “Time of Day.” Then, in the Benefit box, you can set it to make all beers $2.99, for example. Alternatively, if you do not want it to apply to all items in that Commodity Group, you can do so by tag (as seen in the example above), and tag the select beers to which you want this promotion to apply.
