
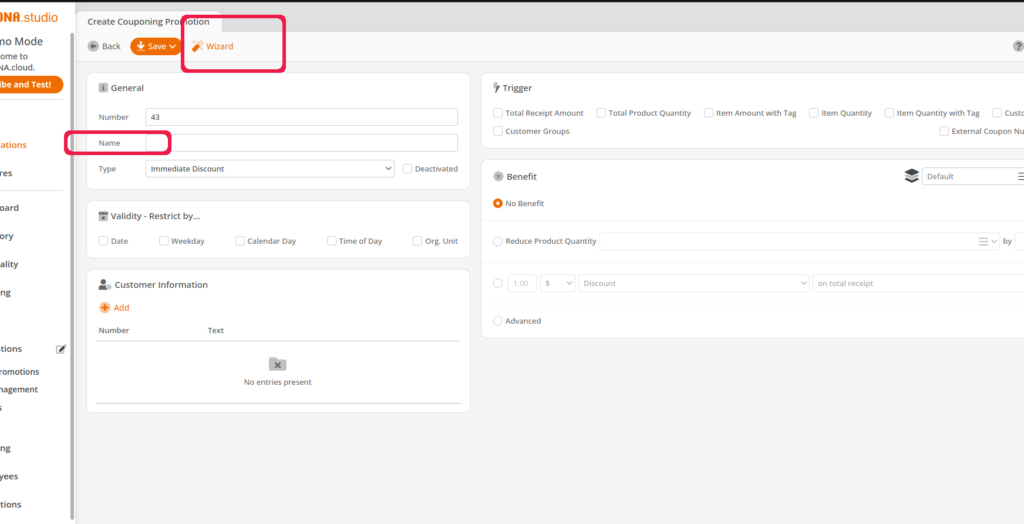
To begin creating a promotion, give it a name and then click ‘Wizard.’
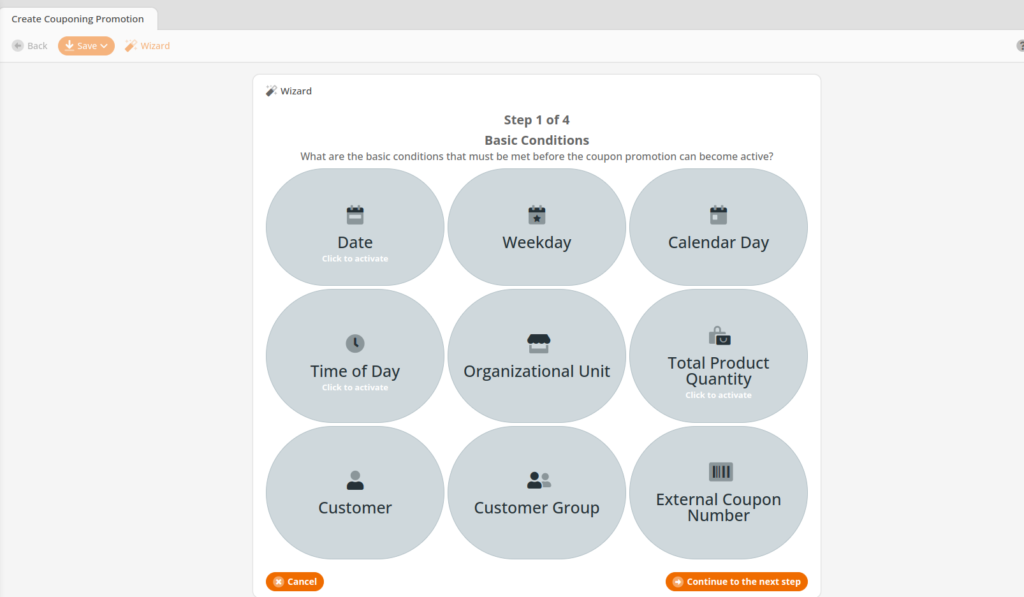
The next step is to set the basic conditions for your promotion. You can pick more than one. If you decide not to use one, hit the little trash can icon after you click on the condition.
- Date: Should this promotion be valid only between certain dates?
- Weekday: Should this promotion be valid only on certain days of the week?
- Calendar Day: Should this promotion only be valid on certain dates of the month?
- Time of Day: Should this promotion only be valid at certain times of day?
- Organizational Unit: Should this promotion only be valid at certain locations?
- Total Product Quantity: Should this promotion require a certain number of products on the receipt to be valid?
- Customer: Should this promotion only be valid for a certain customer?
- Customer Group: Should this promotion only be valid for a certain customer group?
- External Coupon Number: Should this promotion only be valid if an External Coupon is scanned? This will need to be set up in number ranges as well.
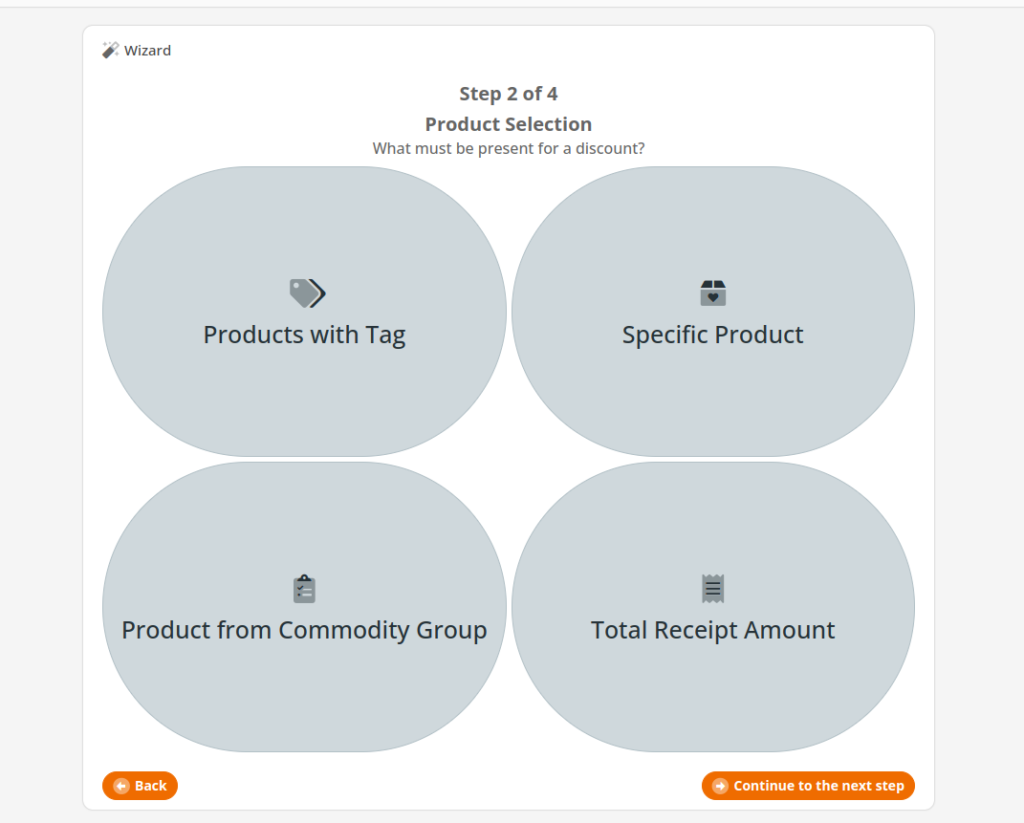
This step is asking for which product or condition must be present for the promotion to be valid.
- Products with Tag: Should products with a tag be present for the promotion to be valid?
- Specific Product: Should a specific product be present for the promotion to be valid?
- Product from Commodity Group: Should any product from a Commodity Group be present for the promotion to be valid?
- Total Receipt Amount: Should a receipt have to hit a certain amount for the promotion to be valid?
This step asks what sort of discount should be applied.
- Price Reduction: Should the product’s price be reduced by a specific amount?
- Discount: Should the price of the product be reduced by a percent?
- Fixed Price: Should the product be sold at a fixed price?

This step gives us an overview of our promotion and allows us to choose three things:
- How many times will this promotion be valid?
- Which items are discounted first (most expensive or cheapest)?
- Is this promotion exclusive or not? If it is, the discount level below will need to be set to the same level as other promotions that it is supposed to override.
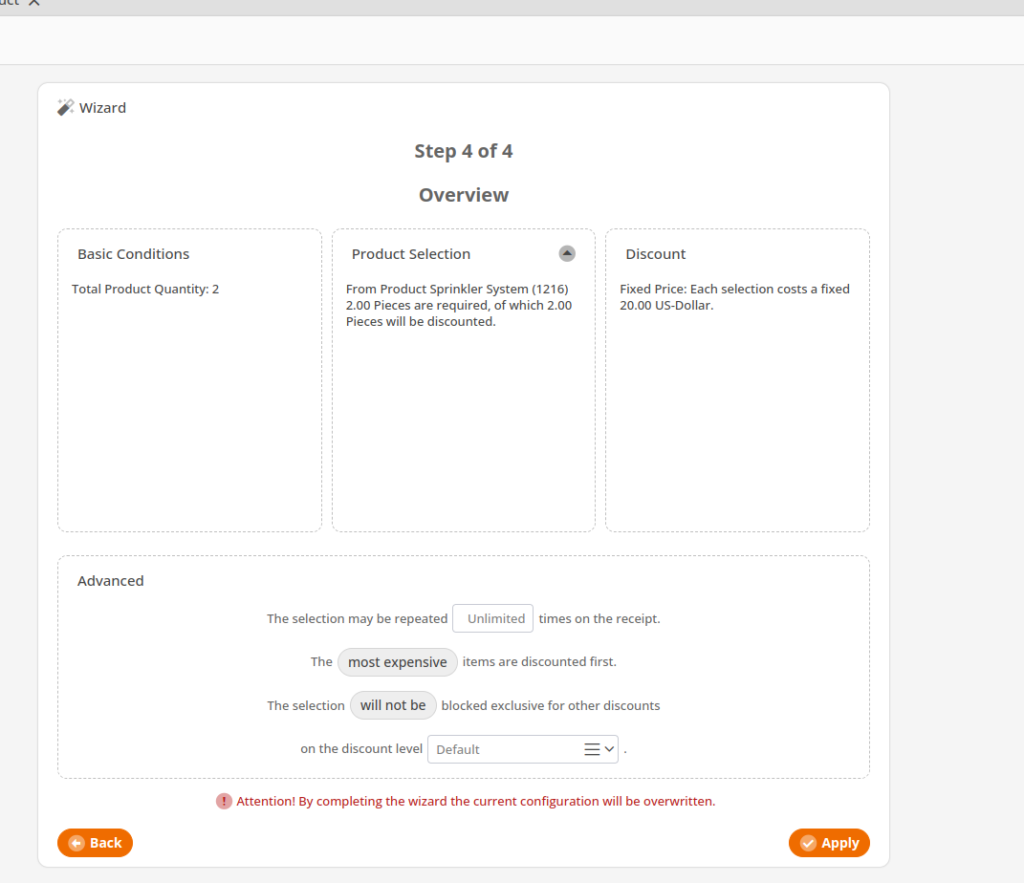
Example of a Promotion
In this example, we’ll build a 2 for $20 promotion. The product is normally $35.00, but due to a recent influx, let’s set up a promo to get this product out the door. The steps are as follows and shown below:
- “Total Product Quantity” is 2.
- The product is selected and will be sold at a fixed price. Therefore, 2 pieces are required, and 2 pieces will be discounted.
- The two pieces together will retail for $20.
- We make no changes to this screen as this promotion applies as long as the customer purchases in this quantity.
- If everything is done correctly, it should now look like the previous image from the overview section.
