
Event Template
An Event Template in KORONA Events is for a recurring event. An example of this would be a tour that has a limited capacity.
Time Pattern
The first step to setting up an Event Template is to set up a time pattern for the Event. The time pattern dictates when it’s possible for someone to book a Tour. Navigate to Services >Time Patterns and select ‘Create New’. Give it a name (the demo account has “Tour Times” as the name) and then set the parameters for the first and last available booking dates.
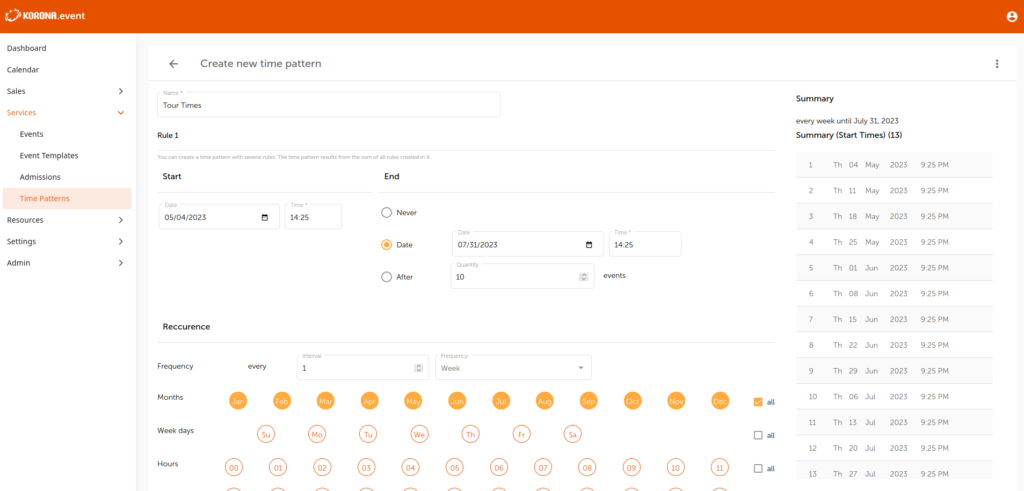
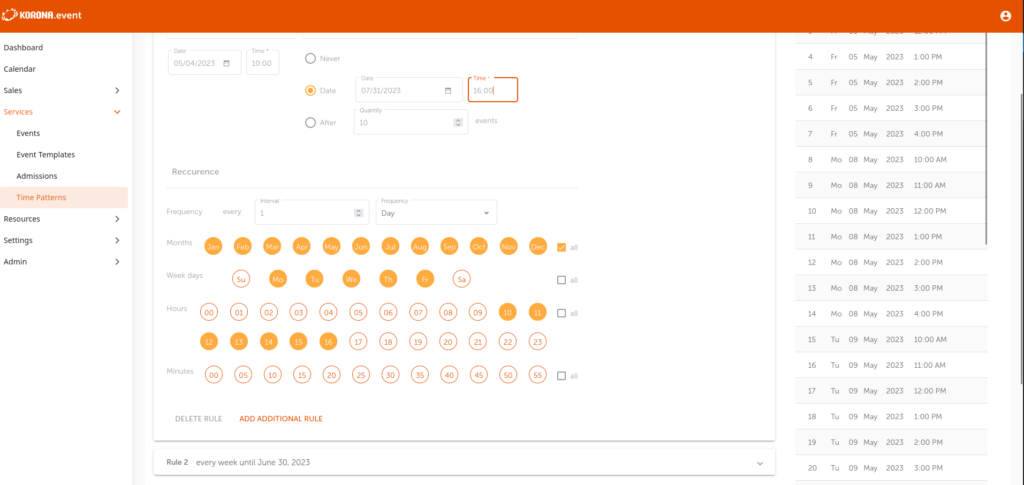
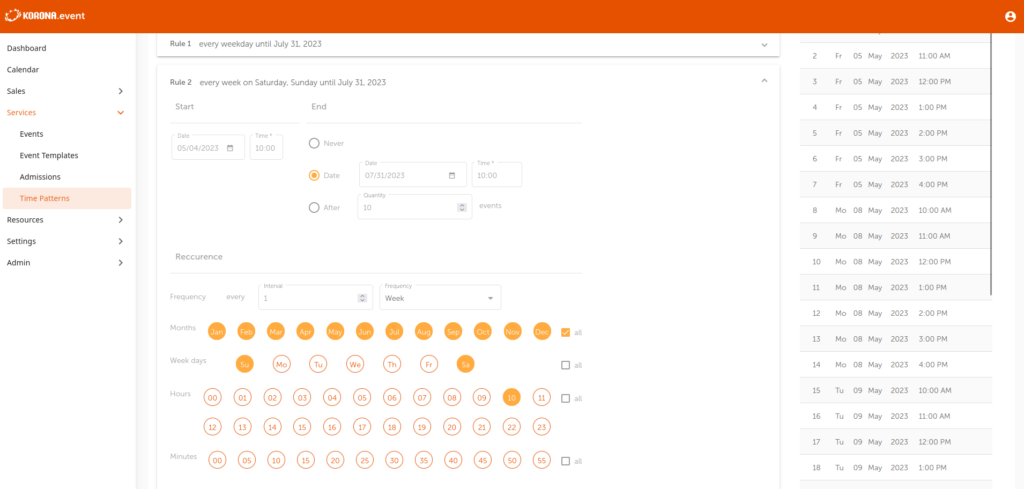
Next, you choose what months, days, and times the tours will be available. You may need to use multiple rules to select all available times as shown below. The availability of our tours is Monday – Friday, every hour between 12PM and 4PM and Saturday and Sunday at 10AM. You must create two different rules in this instance.
You’ll notice the dates available and times start to change on the right side. When you’re finished adding or editing your Time Pattern hit ‘Create’ on the bottom right.
KORONA Event Template
Now Navigate to Services>Event Templates and hit ‘New‘. Give your event template a title (this will show on the webshop and POS).
Select a duration for the possible event. Below that there are three options:
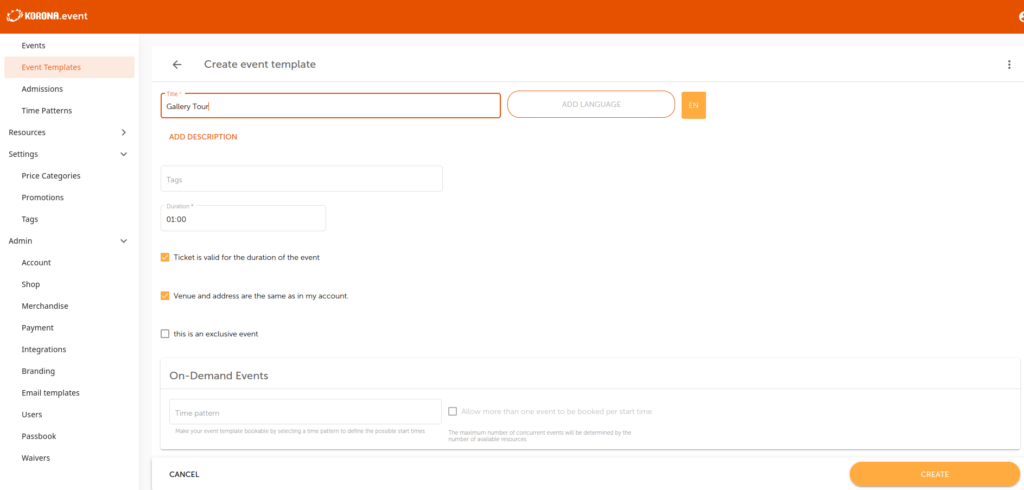
- If the ticket should only be valid for the length of the event template, check the appropriate box.
- If the venue and address are the same as what you have set up in your account, check the appropriate box.
- If someone booking at a time should block off that booking for the duration of the event regardless of capacity, check the appropriate box.
Below that, you will select the Time Pattern that was created above. If the event is tied only to capacity and not to exclusivity, check the box next to the time pattern.
Next, add the products/tickets that are available for purchase at this event. Add the price category that will show on the webshop/POS (if you want to change the options you may do so under Settings>Price Categories).
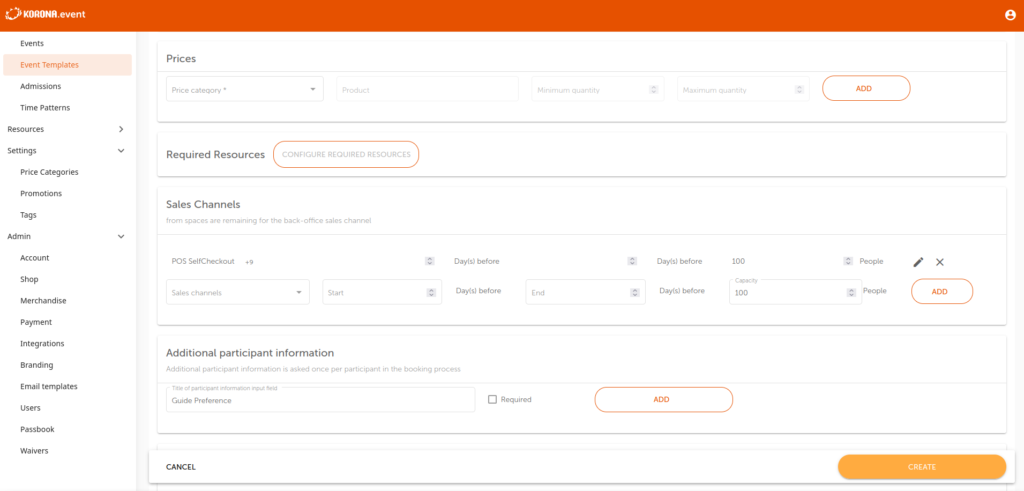
If there’s a required resource for this event template, add it and then move on to Sales Channels.
Sales channels are where you set where this event template is available. If it should only be on the webshop and KORONA Studio, select webshop and telephone.
You’re also able to ask for additional information or additional booking information. On this page, you can adjust the settings to request the customer to enter it. It can be required or optional.
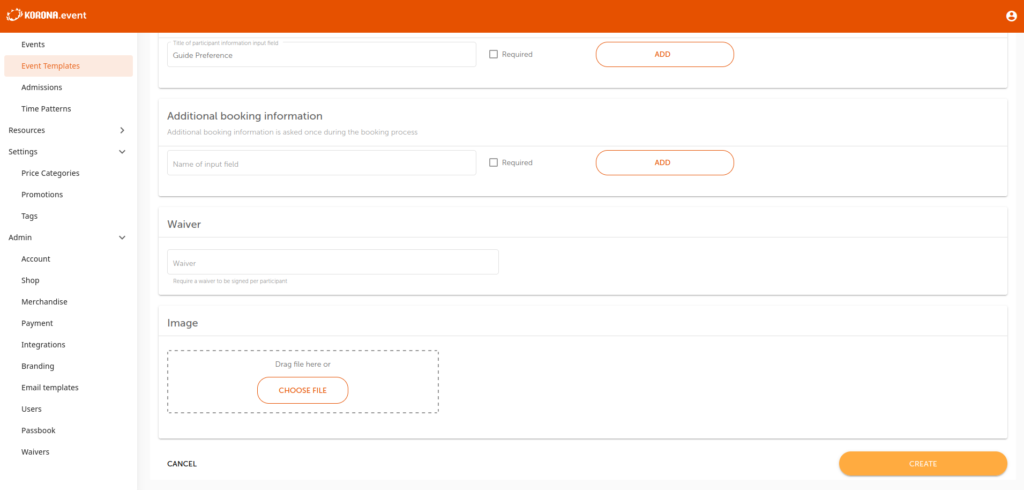
If you’ve set up a waiver (under Admin>Waiver) for the customer to sign you can also add it here.
Finally, you can also add an image to show on the webshop for the event template if you would like.