Event
An Event in KORONA Event is something that is forecast ahead of time and likely to happen. A good example of this would be an Anniversary party. Below we will walk through setting an Event up:
Creating an Event
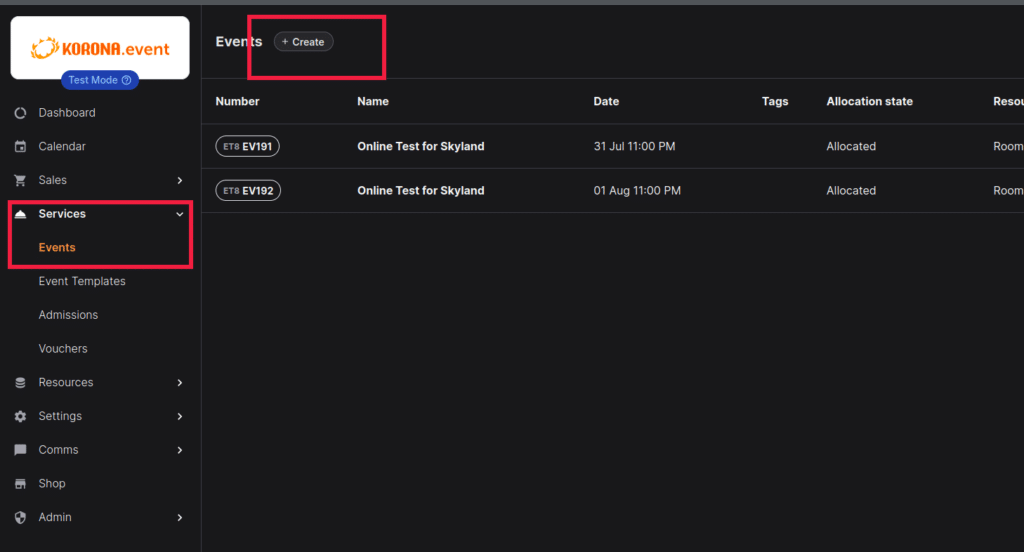
Navigate to Services>Events and select ‘New‘. If you want to create it based off an existing Event Template you can do so. For this example, let’s create a brand new event. Select the date and time for the event to run and check the box ‘Ticket is valid for the duration of the event.’ If the venue and address are the same, that box can be checked as well. If only one group or one person is allowed to attend the event, you would check the box marked ‘this is an exclusive event.’
On the next page we will see the following:
Create from template: if we have saved a previous Event as a template and want to use many of those same configurations we had before, we can create an event from a template otherwise we will proceed with filling out the Event.
Name: This is the name of the Event. Ours is going to be our ‘Anniversary Party’.
Description: Here we can enter a description of the Event.
Date: This is the date and time the Event will be happening.
Tags: You can filter for tags on a lot of screens similar to how you filter products on the Korona Cloud.
Time: Define the time of the Event.
Exclusive: if this should only allowed to be booked by one customer, you would check this. For our ‘Anniversary Party’ we are leaving this unchecked so many people can book.
Venue Address: Leave this checked if the Event will happen at your account Address.
Ticket Valid: Leave this checked if the tickets for the Event will only be valid for the duration of the Event defined in ‘Time’.
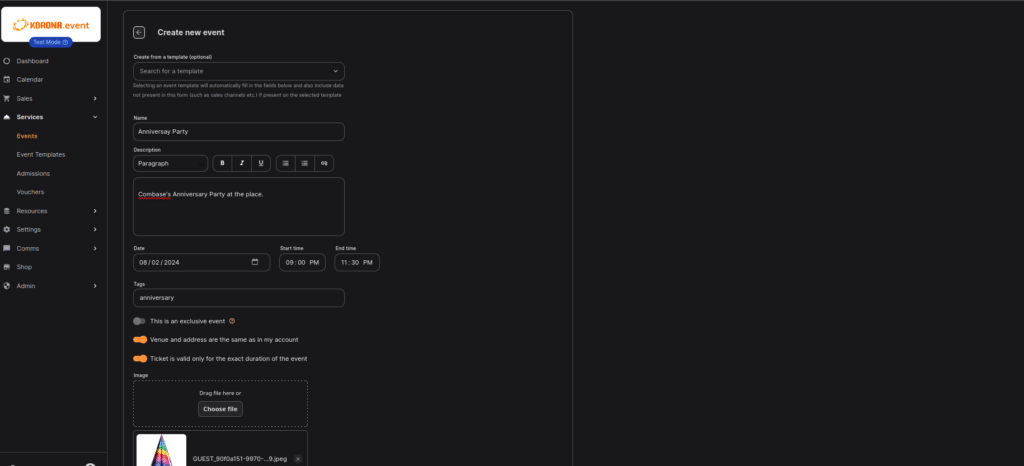
When we’re finished press ‘Create’ on the bottom right.
Prices
The next screen we will see is Prices. Here is where we will add the products from Korona Cloud that we want to use as tickets. If you have not added the product you want to use as a ticket does not appear when you search for it but does exist in Korona Cloud you will need to go to Admin>Integrations and hit ‘Synchronize’.
After hitting ‘Add Pricing’ you will see the screen below.
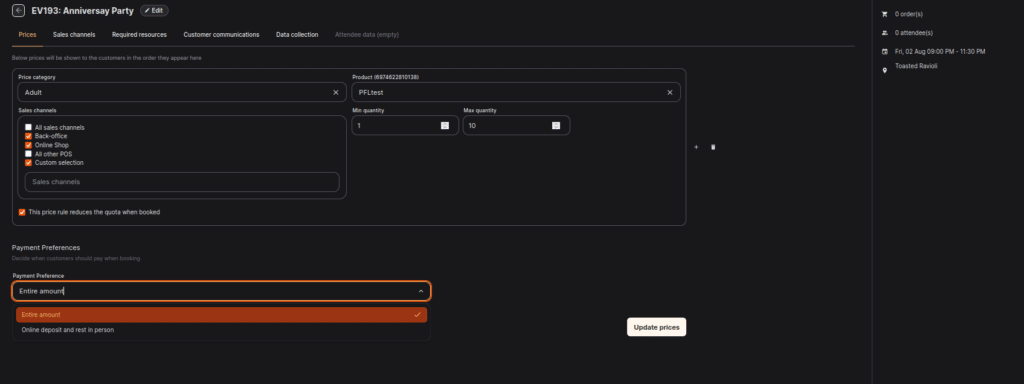
Price Category: Here we will pick the price category. This is what the customer on the webshop is shown so if the Price Category is ‘One Adult Ticket’ the customer will see ‘One Adult Ticket’ for purchase on the Event. If you do not have the verbage you would like you need to set this up under Settings>Price Categories.
Product: This is the product from Korona Cloud that we will use. This product should have a ticket definition. The ticket definition should have an Entry Gate from the Korona Cloud side and the validity dates here DO MATTER. Events will add the timing validity to the ticket definition from Korona Cloud. The product on the Korona Cloud side should also have a production type of ‘Activate’ or ‘Print and Activate’ if it will be sold from the POS.
Sales Channels: This is where the Event will be able to be purchased. We can select All POS , or choose specifically. This is how you could limit certain tickets(say cheaper or more expensive) to be purchased at which locations say if we want to charge more or less if someone is purchasing online as opposed to on site.
Min/Max Quantity: We can set the minimum and maximum allowed to be purchased at one time here.
Quota: Leave this checked if this ticket purchase should reduce the overall quota.
Payment Preference: We can have the customer pay completely up front or pay some now, and the rest on site.
When we’re finished we hit ‘Update Prices’ on the right and move on to the next page.
Sales Channels
Here we can limit either all Sales Channles or by specific Sales Channel(s) how many can be purchased, when the sales start, and when the sales end. If you want to apply specific parameters to specific sales channels you will need multiple rules.

When we’re done hit ‘Update Sales Channels’ and we’ll move on to Required Resources
Required Resources
Here we can set a resource to ensure we do not go over capacity or if this resource is used for another Event or Event Template, that it is available. The capacity of the resource comes from the amount that was set in the resource itself under ‘Resources’. We can also set a ‘prep’ or ‘cleanup’ time under Reservation Offset. Use the sliding bars to set the offset if this resource should not be available for a time period before or after the Event itself has begun/finished.
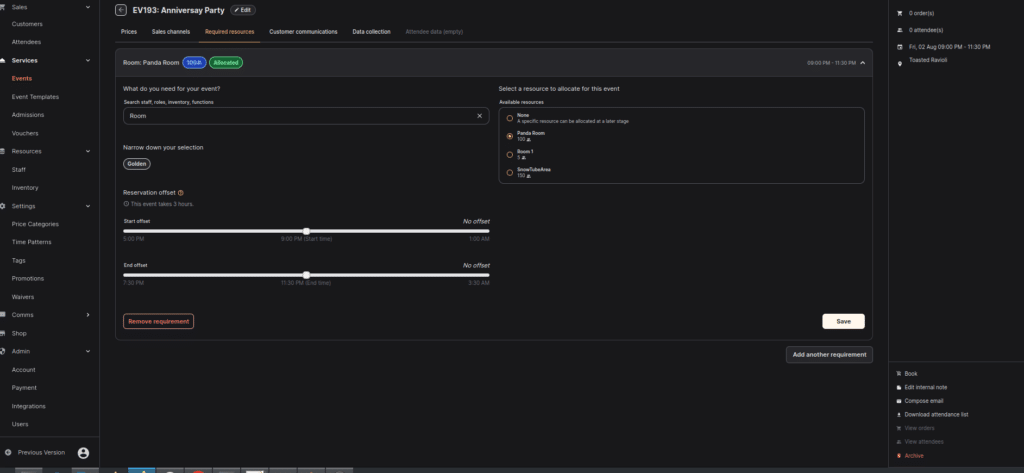
You do not have to set a Resource if your capacity is unlimited. We however want to limit our capacity to 100. That means once 100 tickets to this Event have been purchased it will no longer be available. After we hit save we can move on to Customer Communication.
Customer Communication
Here we can set some custom communication to our Customers that attend this Event when they book it.
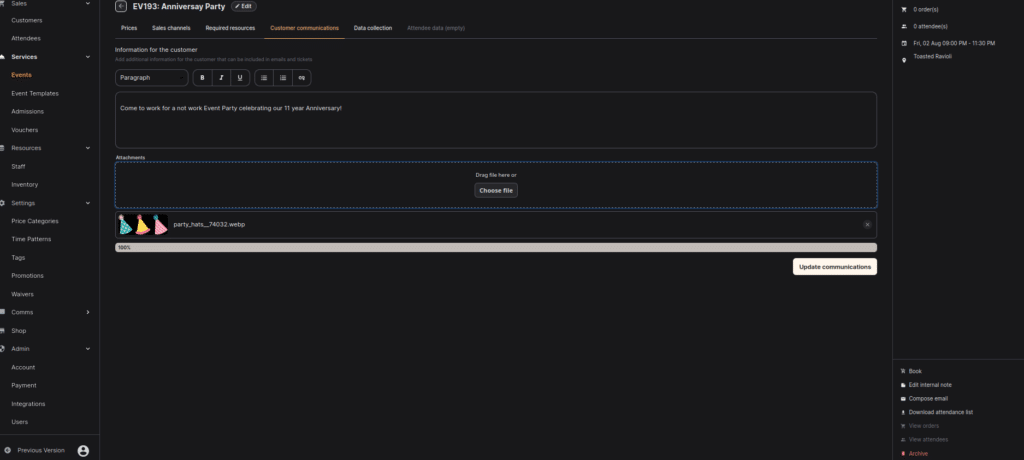
And when we’re ready we can hit ‘Update Communications’ and move on to Data Collection.
Data Collection
Here we can require customers to fill out and sign a waiver online if we like. They’re searchable for future reference under Sales>Attendees. We can also ask for some additional information. This additional information can be required or not.
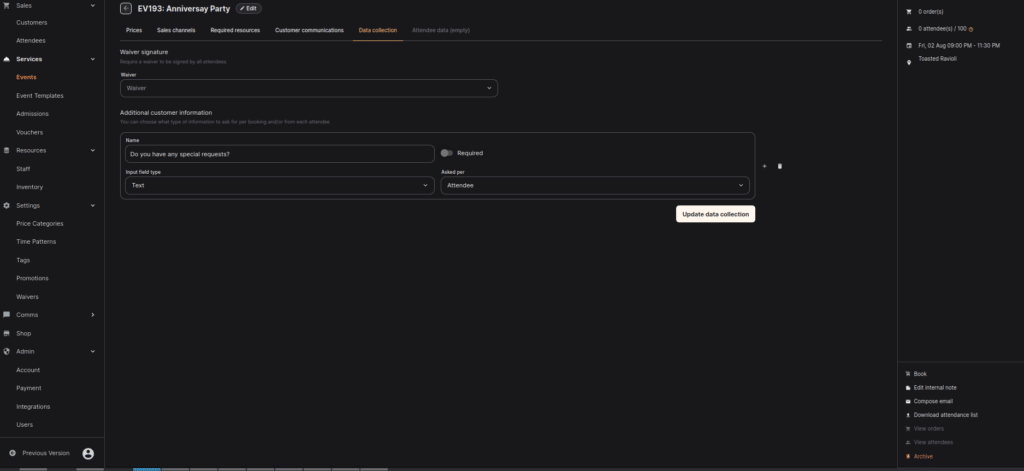
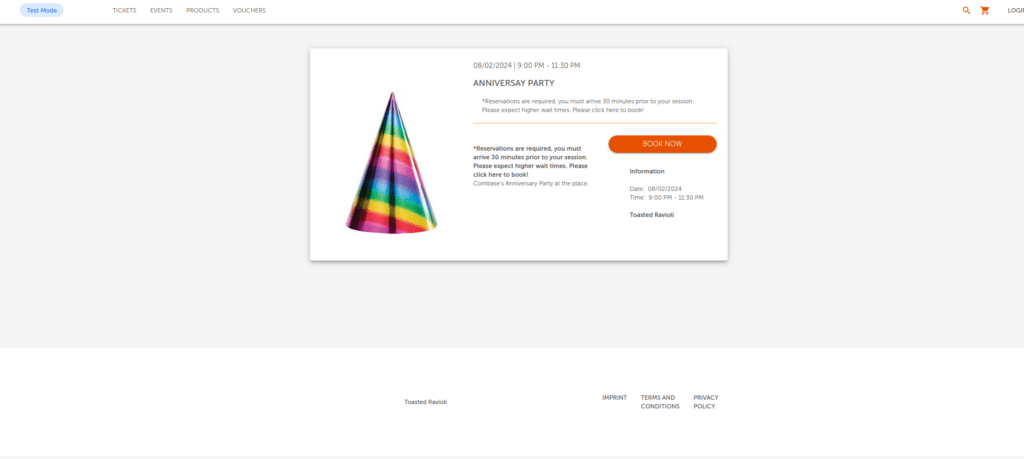
When we’re ready we can hit ‘Update Data Collection’. We’re now ready to take a look at our Event on our Webshop. To get to your Webshop if you don’t know the URL it’s under ‘Shop’ on the left side. On our Events page our Event looks like below and has a unique URL we can send to anyone we like.