You can create table layouts with the KORONA Studio for use with your POS Terminals inside your restaurant. You must have the KORONA.Food package for this menu to be available.
Creating a Table Overview
To access this, select the Hospitality tab and click on Table Overviews from the drop-down menu. You can also use this screen to edit any current table layouts you already have set up.
Click the +New button at the top of the screen. You will be taken to the create table overview screen.

Here, you can set up your dining room layout by dragging and dropping the table(s) you would like to use in your layout. At the top of the screen, you will see that you also have a overview number and a field that allows you to provide a name for your table layout.
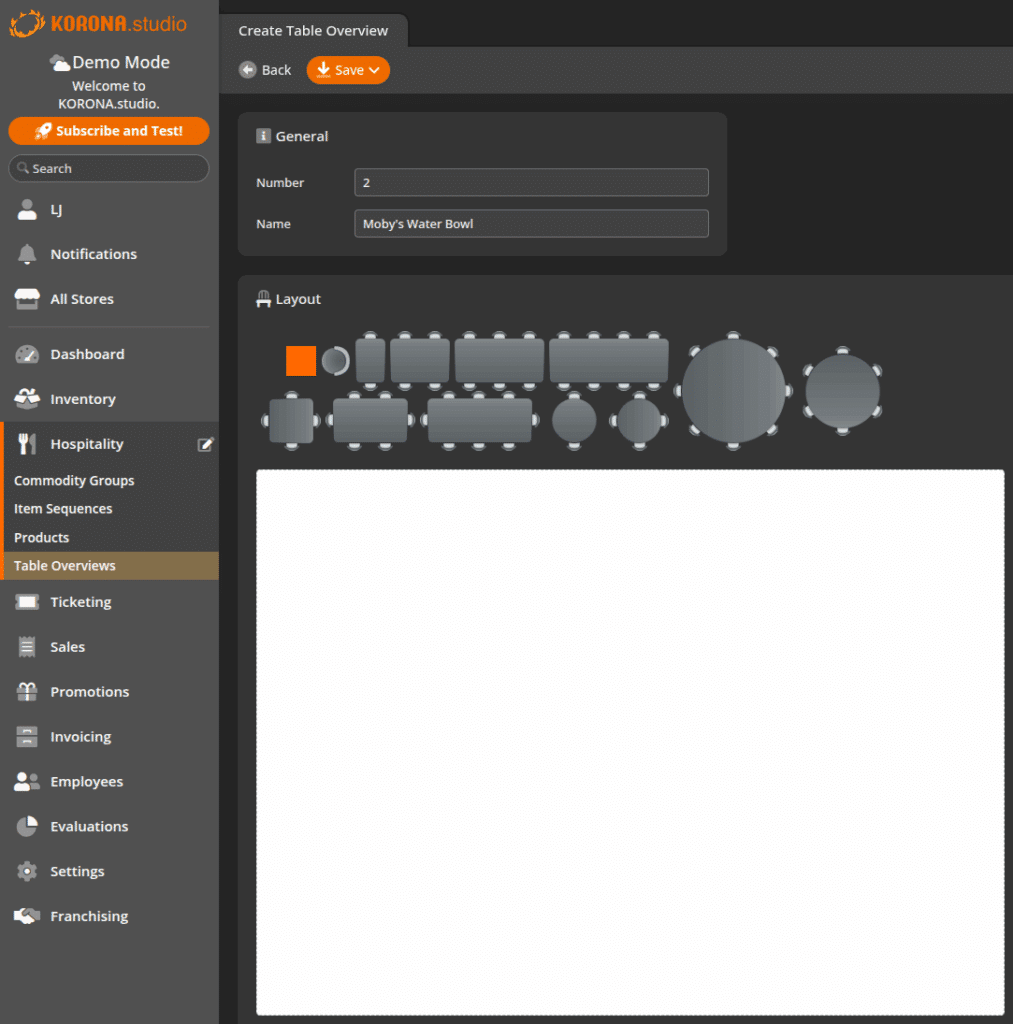
Once you place a table on the floor, you must assign that table a number. That number will be used as the order number when you pull up their receipt when guests are ready to pay. Click Apply to save your table.

Rotating the table is as easy as clicking and selecting ‘Rotate 90’ from the context menu.

To save your table overview, click the Save button at the top of the screen.
You can click any table once it’s on an overview to re-assign the number anytime. You can also rotate from within this menu.
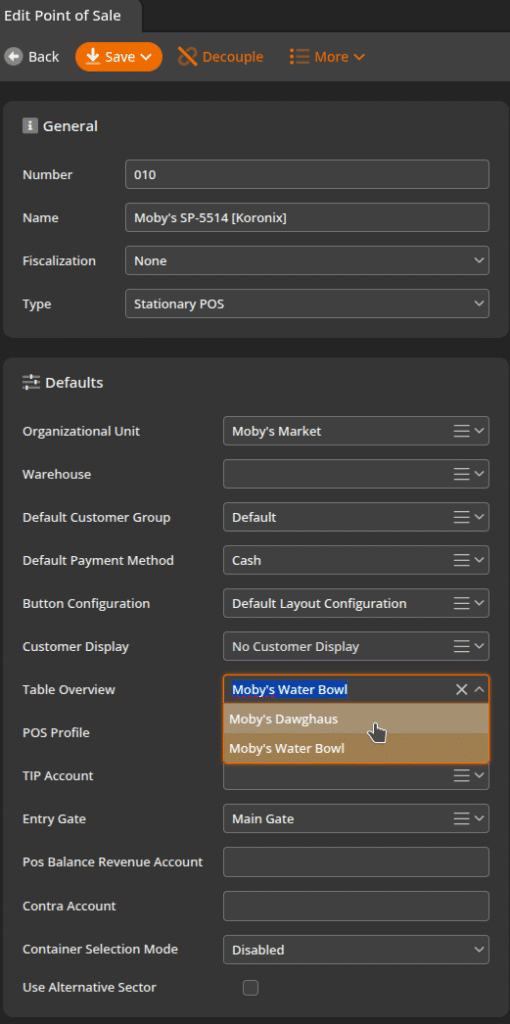
Once that is complete, you activate this layout by going into Sales > Points of Sale. Select the point of sale you wish to have the table overview displayed on.
Once you have the POS selected, go to the ‘Table Overview‘ field, select the table layout you wish to use, and click the Save button. You will also need to do the same to the POS Terminal; synchronize it so it displays the layout.
*Note: You may only associate one table overview layout with one POS at a time.
Viewing a Table Overview from the Point of Sale
You and your cashiers can access the Table Overview screen from the point of sale terminal. To do this, you will need to have the Table Overview button placed on the terminal. Please see our Creating POS Buttons manual page for more information.
Tap on the Table Overview button. You will be taken to the table overview screen, where you can view your created layout as well as any tables that have assigned orders. Tables that have orders assigned to them will appear highlighted on the screen.
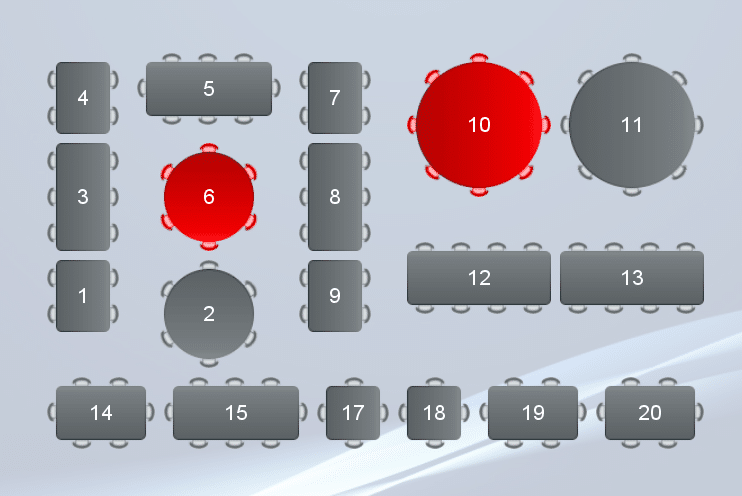
Table Service Intervals
With KORONA, it is possible to determine the amount of time that can be spent on a specific table. This is done by setting the Table Service Interval timer in the back office. The Table Service Interval determines the amount of time between two servings by the waiter for one table. Once this time has passed, the table will appear highlighted in the table overview screen on the point of sale terminal.
Using the Order/Table Number Required setting will specify whether the cashier is forced to assign a table before ringing any items, i.e., open the table layout by default instead of a blank receipt.

You can set this interval timer by navigating to the point of sale profile screen. Go to Settings > POS Profiles and select the Profile for which you wish to set the time. Once you have set the time, click Save. Remember you will need to Retrieve Master Data and then restart the point of sale for these changes to take effect.
Once complete, you can select a table you wish to assign the order to. In this example, we are using table 10.
Table 10 is given its order. Once the order is set up, select Park Receipt, and the timer starts. The timer here has been set to 10 minutes. After 10 minutes have gone by, the table will turn yellow. If the table is allowed to go another 10 minutes without any intervention, the table will turn red.
*Note: Anytime you open the receipt, the timer re-starts.


