
Cash Discounting (Alternative price group per organization)
(NOTE: This function requires your POS to be on version 2.4.30 or higher.)
**WARNING**: When using Dual-Pricing or Cash Discounting, you must enter both a Cash and a Credit price for each product. If a product without a credit price is rung up and credit is selected the product’s price will be changed to 0 after selecting credit on the payment screen as no price is present for that product for credit.
KORONA POS has the ability to handle two separate price groups at the same time, which is perfect for Cash Discounting.
This manual page will explain the initial setup to allow the POS to handle dual pricing, as well as how to copy your cash price to an increased credit price.
Creating a Credit Price Group
The first step of the process is to create your Credit price group. You can create new price groups in Sales > Price Groups. Create a new price group, give it a name and select the box “Net Prices”.
Note down both your default/cash and credit price group numbers, as you will need them later on.

What this does is add an extra price column in your product page. When it is first created, your credit price will be empty. At the end of the guide there will be steps to copy your cash price to your credit price with an increased percentage.
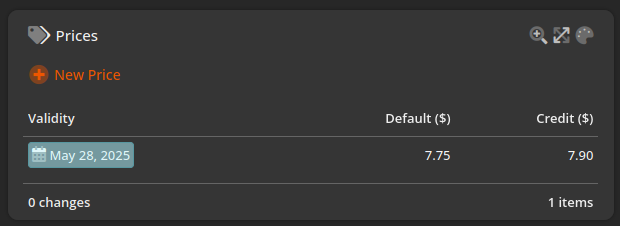
NOTE: Both price groups must have a valid retail price entered for this function to work. You can either follow the steps later in the guide to copy the price over with an increase for multiple products, or you can manually enter the credit price in the Credit price group column.
Enabling Dual Pricing on the POS
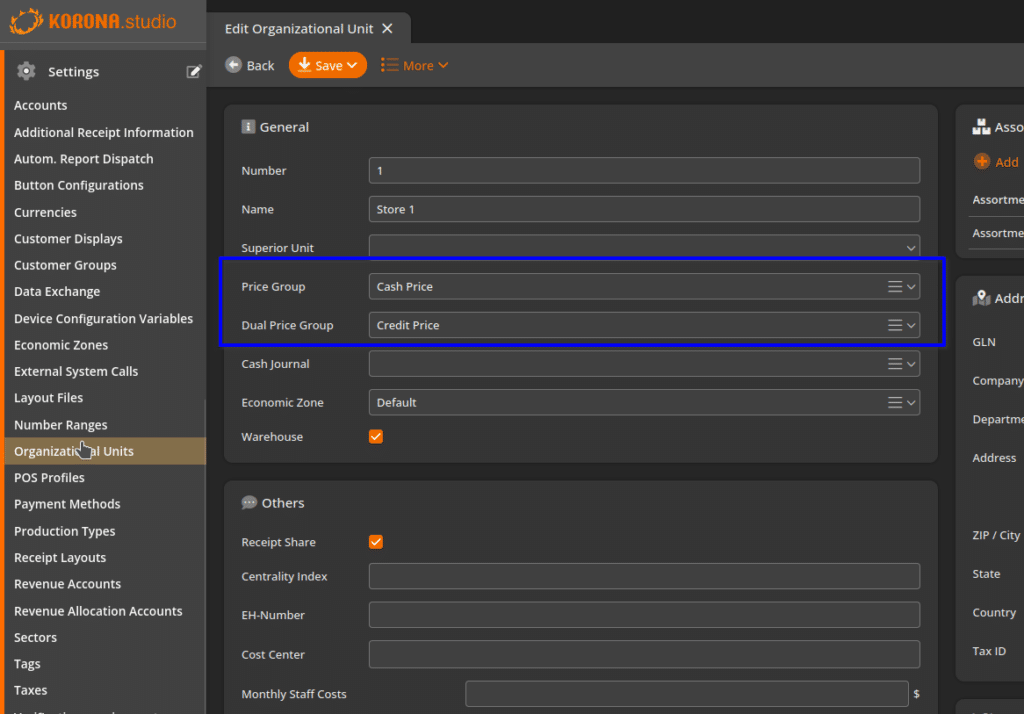
Next, choose which set of prices are correct for that location in Settings > Organizational Units. The first Price Group will be the default price that shows on the POS units in that location, the Dual Price Group will show up under the default as a second line. Both price groups will be displayed on receipts and customer facing displays.
Now go to Settings > Button Configurations. Edit the button configuration for the POS that will use dual pricing (if you have multiple locations with different price groups already and need help to set this up, reach out to KORONA Support via phone or email).
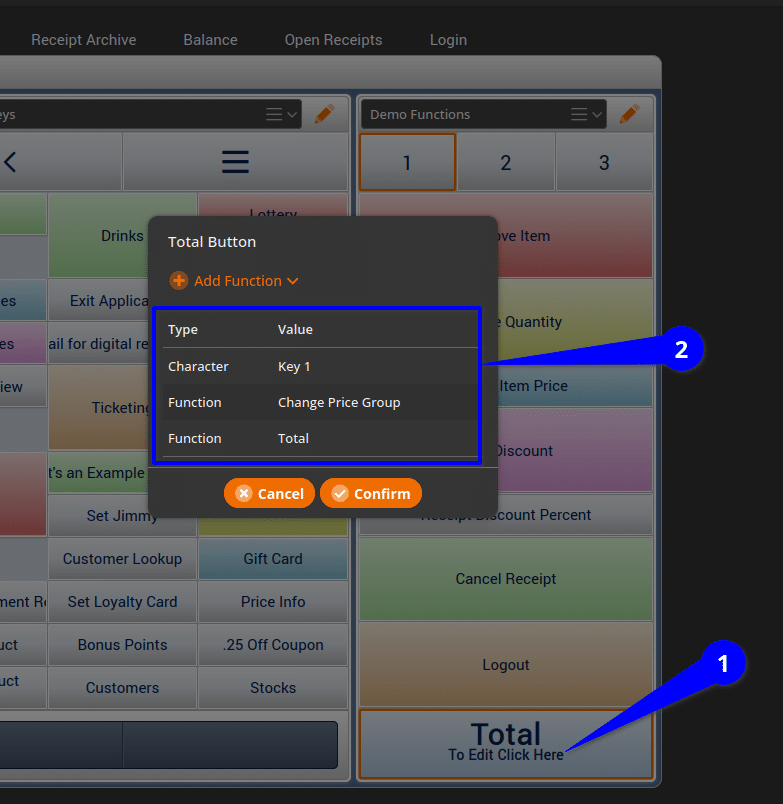
In the following examples, the Cash group is 1, and the Credit group is 4. Now click on the Total button to edit it. You will need to add Character: Key #, where the # is the Number for your Cash Price Group, and then Function: Change Price Group.
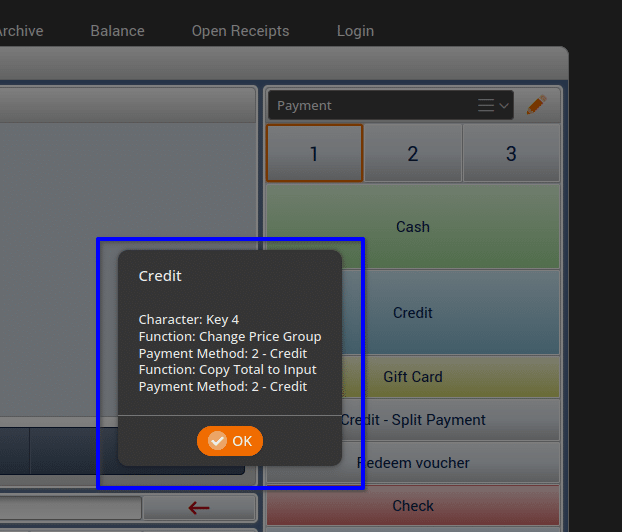
Now click on the Payment tab on the top and use the orange pencil icon to edit your Payment button layout. Click on your Credit button to edit it. In the example, we’re going to add Character: Key 4 (remember that is the Number of the Credit Price Group, and your number will likely be different), and then Function: Change Price Group. This will apply the Credit Price Group to the sale whenever you press the Credit button.
Examples on the POS
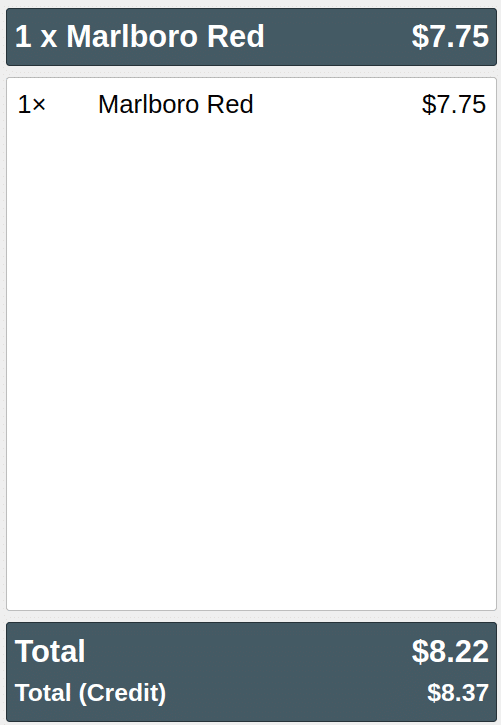

This TOTAL is for the Cash price.
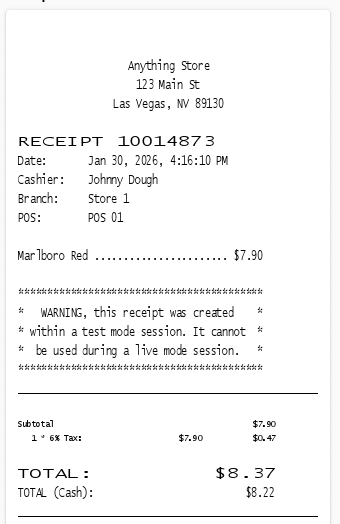
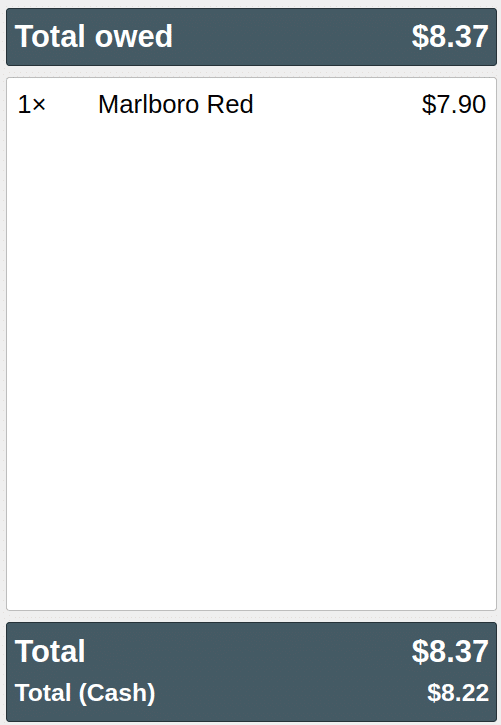
Restart your POS to make all the changes take effect. When you ring up a product on the POS screen, you will now be able to see both the Cash and Credit totals at the bottom of the receipt. If you have a custom-facing display, both totals will also display for your customers on that screen.
Adding Your Credit Price
To add in your Credit price with an increased percentage, you will use the Set Prices tool. You can use this tool to copy your cash price to your credit price for all your products or for a set of new products.
Step 1 – Product Selection
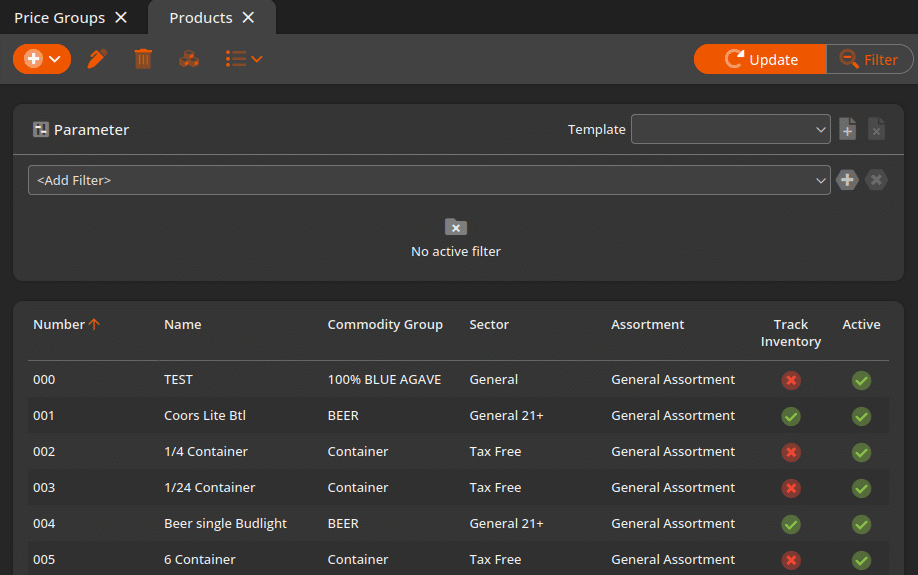
Go to your Products page.
- If you want to make the change for all products, press the filter button at the top and do not select a filter:

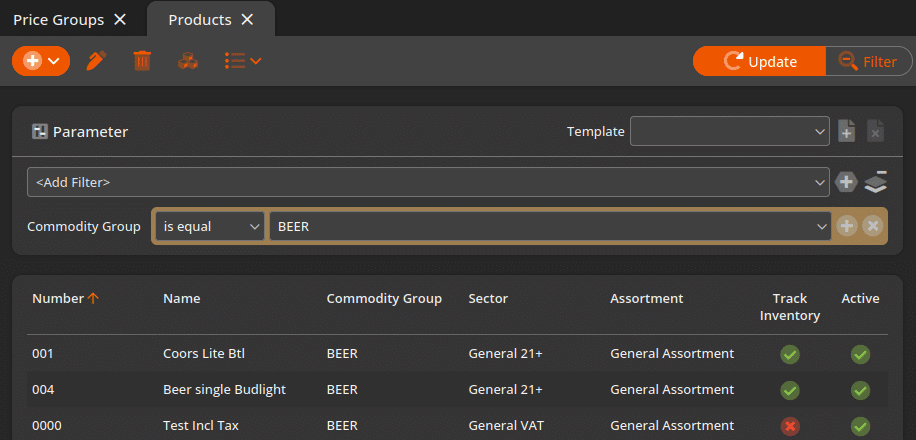
- If you want to make the change for a specific selection of products, press the filter button at the top. Then select a filter, such as tag or commodity group, and fill in what you are filtering for:

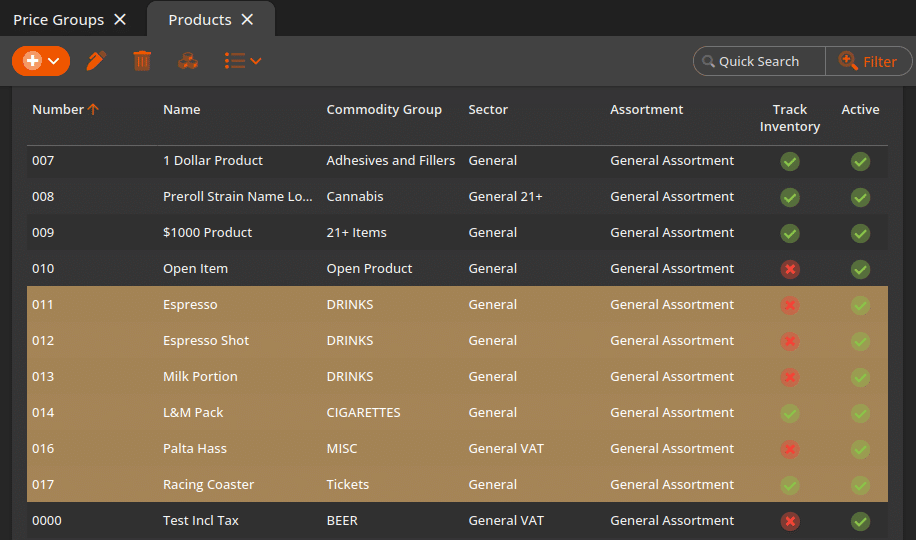
- If you want to make a selection of specific products, you can highlight the first product in your selection and then press the shift key and select a product above/below your initial selection to highlight all those products:

Step 2 – Opening Set Prices Tool
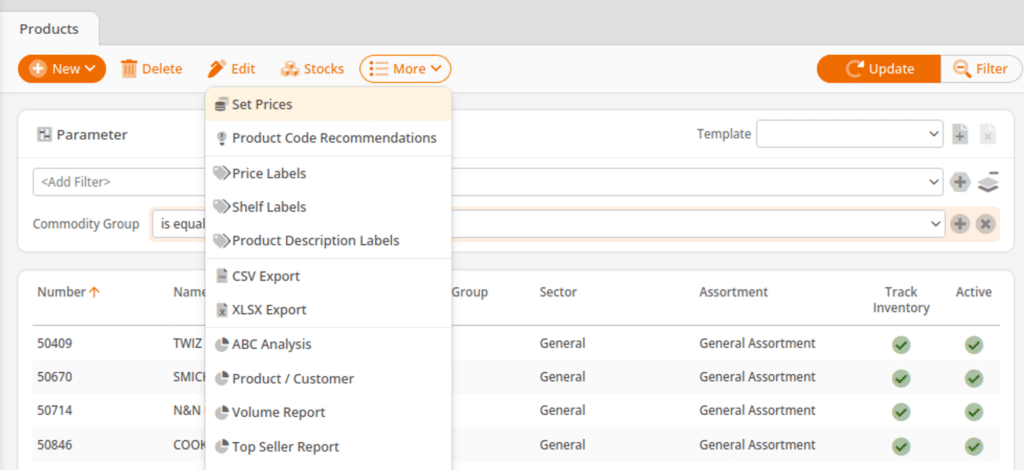
After your filter or selection has been applied, go to More at the top and select Set Prices.
Step 3 – Configuration
In the Configuration section on the top left, select your Cash Price Group under the Template section first. The template is for the price group that already has prices entered and is the source being used for the Credit price group.
In the Target Value section, select your Credit Price Group. The target value is for the price group that will have a new price copied into it.
On the right side, in the Price Modification section, fill in the multiplier with your increased percentage. This is a multiplier, so you must enter 1. in front of your percentage. If you are doing 4%, your multiplier will be 1.04. If you are doing 3.75%, your multiplier will be 1.03 (or 1.04 if you want to round up).
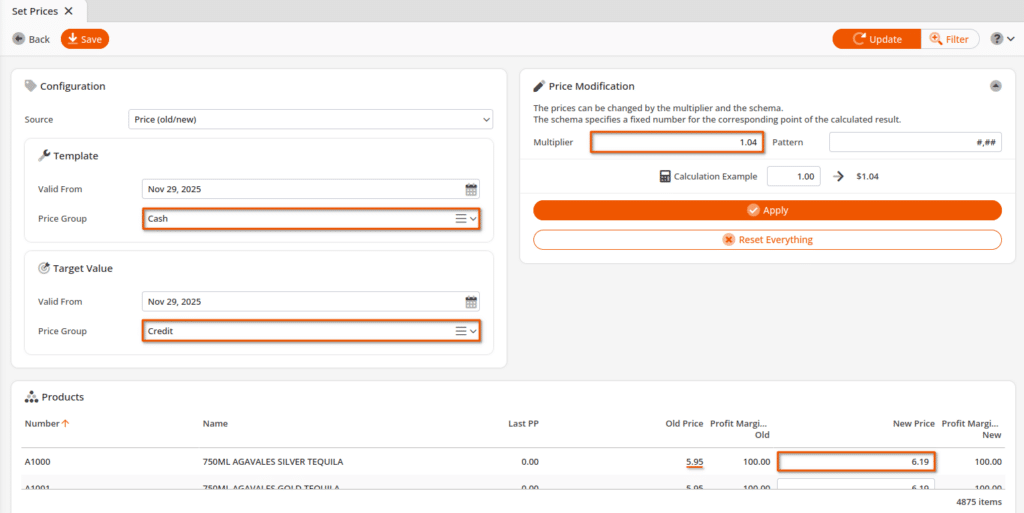
Then, you can press Apply to preview the changes. Once it looks correct, press the Save button to permanently save the changes.