Vouchers is an additional package that can be added to your Korona CLOUD account. Vouchers work similar to how most systems use gift cards. After adding Vouchers as a package they are available under Promotions.
Production Type
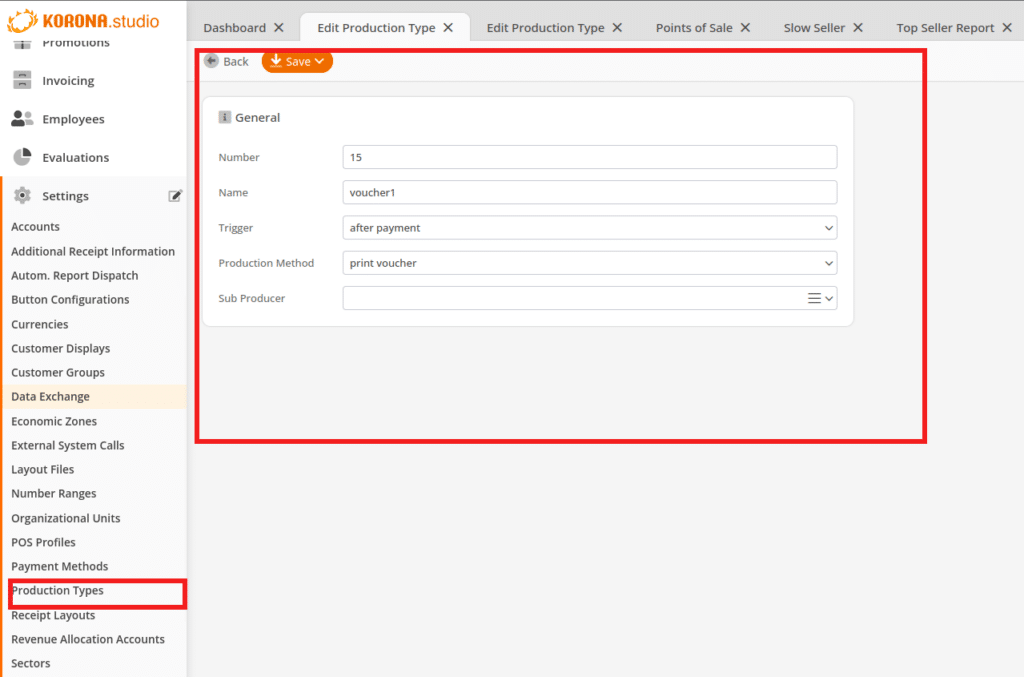
The first step is to create a production type for print voucher under Settings>Production types:

Keep in mind this production type also needs to be assigned to the requisite printer in the POS Profile.
Voucher configurations
The first step to creating vouchers would be to create a voucher configuration. Number will be auto assigned but you can change it as long it remains unique to other voucher configurations. Then give it a name. There are three types of voucher configurations:
Multi-purpose voucher: these can be topped up with an amount when sold and then can be used for purchase of any products.

Single-purpose voucher: these are also loaded with an amount when sold but can only be used for specific products or products with a certain tag. It can also be sold for less than it is worth(for example you can sell it for $5 but it can be redeemed for $10). They can also be sold for item related discounts(percentage or dollar amount off).

Deposit voucher: these are also loaded with an amount when sold and can be redeemed by scanning the printer code. A number range under Settings>Number ranges will need to be set up for these. They can also be used offline.

If you specify a period of validity for the voucher, you can set whether that period is strictly interpreted or not. If not, it will still be redeemable after the validity period however on the voucher report it will show that it had already expired.
If you plan to use pre-printed vouchers, you will check ‘Require serial number’. The POS will ask for the number of the voucher which the cashier will scan from the pre-printed voucher.
If a credit amount is defined, a voucher can only be sold for that amount. If it is not defined, then they can be sold in any amount and the cashier is prompted to enter it.
A sector will need to be selected for singe-purpose and deposit as these are already taxed when sold.
Buttons
A few buttons will have to be added to use vouchers at checkout.
The ‘Create Voucher’ function will require the number of the voucher configuration to be pressed prior to pressing this button. You can create multi-function buttons as shown below if you don’t want to press the key for the voucher configuration each time:

Multi-purpose and single-purpose vouchers are redeemed using the ‘Redeem Voucher’ function.
Deposit vouchers would be redeemed just by scanning the barcode(remember the number range needs to be set up).
Vouchers are not shown as items on a receipt. Therefore in order to cancel a voucher, a button with the function ‘Cancel Voucher’ would need to be used. Press the button, and then enter or scan the voucher to do so.
To see the status of a voucher the ‘Show Voucher’ function would need to be used. Press the button and then enter or scan the voucher,
Redeem
To redeem single and multi-purpose vouchers use the ‘Redeem Voucher’ button and enter/scan the voucher number. The redemption is noted on the receipt.
For deposit vouchers the cashier would scan the voucher. THE CASHIER MUST COLLECT THE DEPOSIT RECEIPT AFTER SCANNING OR IT CAN BE REDEEMED AGAIN.
Mass Creation
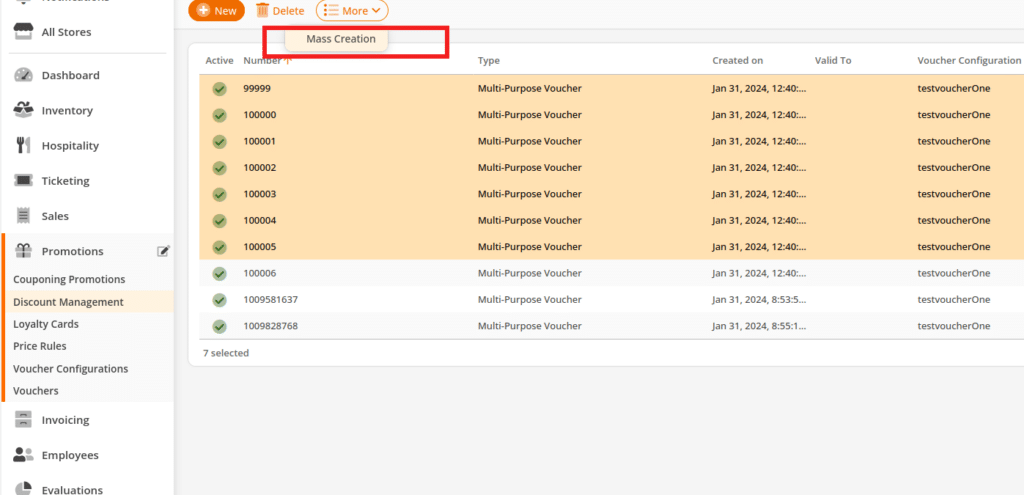
If you want to create a large amount of vouchers at once under Promotions>Vouchers, mouse over ‘More’ and select ‘Mass Creation’:

Then choose the desired voucher configuration, the amount, the number to start iterating at, and the amount you want to create.


