This guide will walk you through setting up your KORONA POS terminal. Please follow this guide closely to avoid damaging the equipment or peripheral malfunction.
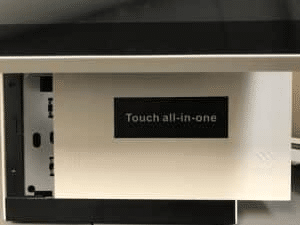
1) Remove the Sliding Cover
To remove the cover, locate the arrow under the customer display screen under “Touch all-in-one”. Slide your cover in the direction of the arrow to uncover.
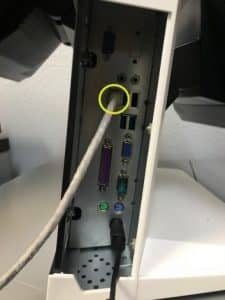
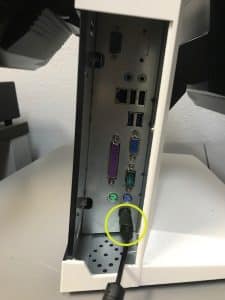
2) Plug In the Ethernet (LAN) Cable to POS
Plug in the Ethernet cable on the side of the terminal as shown.
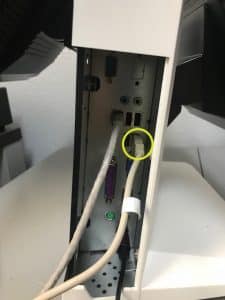
3) Plug In the Printer and Scanner via USB
The USB slots are next to and below the Ethernet (LAN) slot.
Also, ensure the printer’s power cord is connected and plugged in.
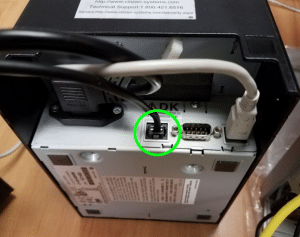
5) Connect the Cash Drawer to the Printer
Locate the phone type jack on the printer and plug the cash drawer into that port.
*Note: Location of the port may vary by make and model. Please consult your manual or call us if you experience any issues.
6) Plug In the Ethernet (LAN) Cable to Credit card terminal
Use a different Ethernet cable to connect the credit card terminal.
Both POS and Credit Card terminal should be plugged into their own separate Ethernet outlets.
7) Connect the POS to the Power Outlet
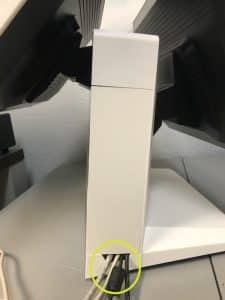
Put the covers back on the POS and run the cords through the opening on the bottom. (Please refer to the picture) plug it into a power outlet. Then press the power button. Once the Korona POS Login Screen appears, you can log on using the code 1 (one).
8) Place the sliding cover back on
When done connecting all the equipment needed, collect the cables and run them through the small opening in the bottom of the cover. Please refer to the picture.