The Create Customer Order button function is used to schedule customer orders for pickup at a later date and time and allows you to collect any deposits associated with the order.
If you want to collect Order Deposits at the POS, you will first need to create a deposit account from the back office. to do so please refer to our Customer Orders manual Page under the Deposit section.
Next, you will need to add the Create Customer Order button to be able to create orders at the POS. To do so, navigate to Settings> Button configurations.
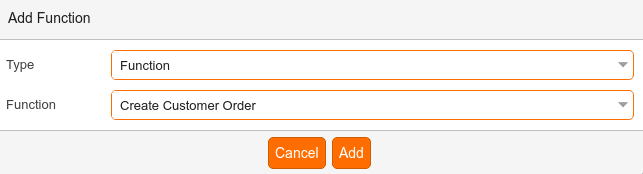
For more information on creating buttons please navigate to the Create POS Buttons / Button Configuration manual page.

After creating your Create Customer Order button you will need to add a Character String for the deposit to be available when you are placing a customer order.
To do this click +Add Function, select Character String from the Type drop-down menu, and enter your Order Deposit account number into the String field.
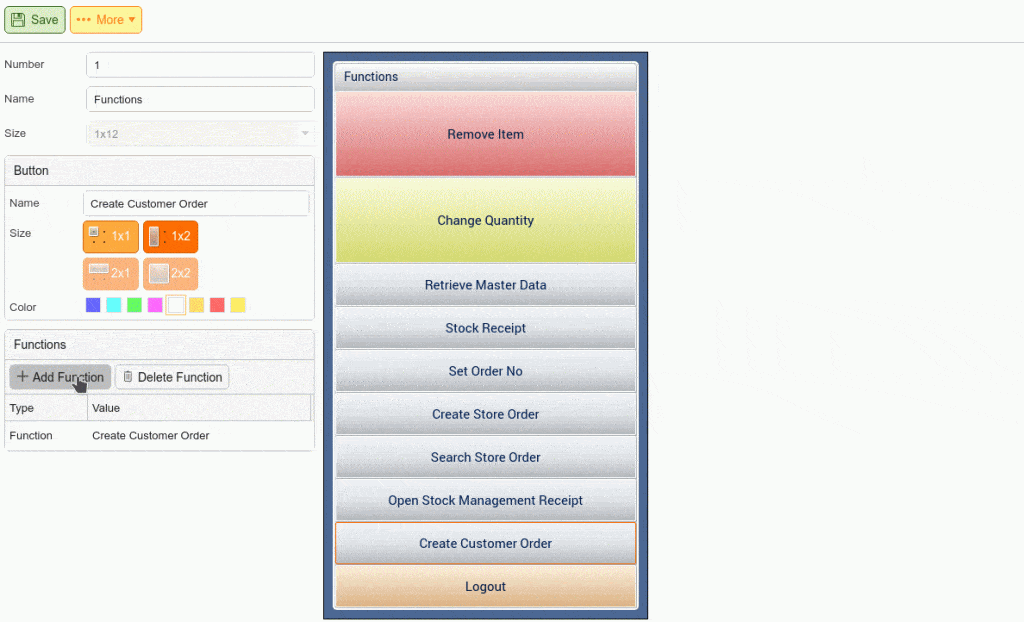
At this point, You should now have 2 functions listed under your Create Customer Order button. However, for the deposit line to appear at the POS, you will need to drag the Create Customer Order function under the Character String and click Save.
NOTE* if you miss this step the deposit line will not show up at the POS.

Use at the POS:
At the point of sale, the cashier simply adds products to the receipt with the desired quantities just like it is done when selling items. Once all desired items are added to the transaction, perform the Create Customer Order function instead of using the total button. This will close the transaction and create an order request in the back office.
Customer Orders can be viewed under Inventory > Customer Orders.
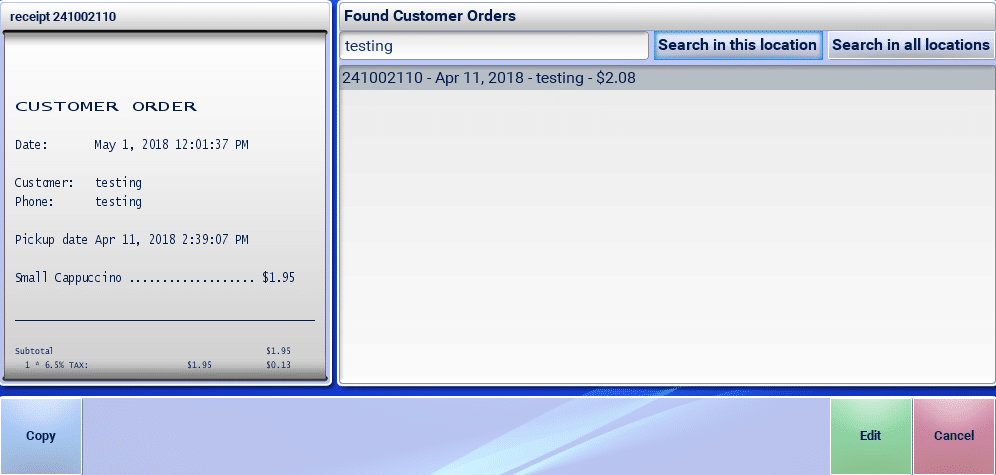
Search Customer Order (POS)
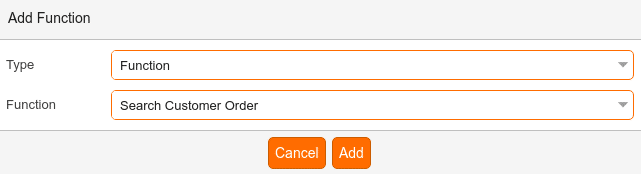
The POS function Search Customer Order will pull up all existing open orders and allow you to edit an order directly without going through the search process. You will need to create another button and add the function Search Customer Order.
Note: you can also use this function to filter for specific orders based on:
- From Today
- Not picked up
- With Deposit
- Order: Ascending or Descending
The following article explains how to set up POS buttons: “Create POS Buttons / Button Configuration”
Use at the POS:
Choose the menu where you have created the button, select the Search Customer Order Button, and you will be taken to another screen. The cashier can enter a description (which prints on the receipt) or a comment (for internal use only). They can also change the pickup date and time and can touch “Pay” which loads the order to the POS and allows the cashier to add items or close the ticket.
Customer order numbers can be found on the customer receipt or from the back office via Inventory > Customer Orders.