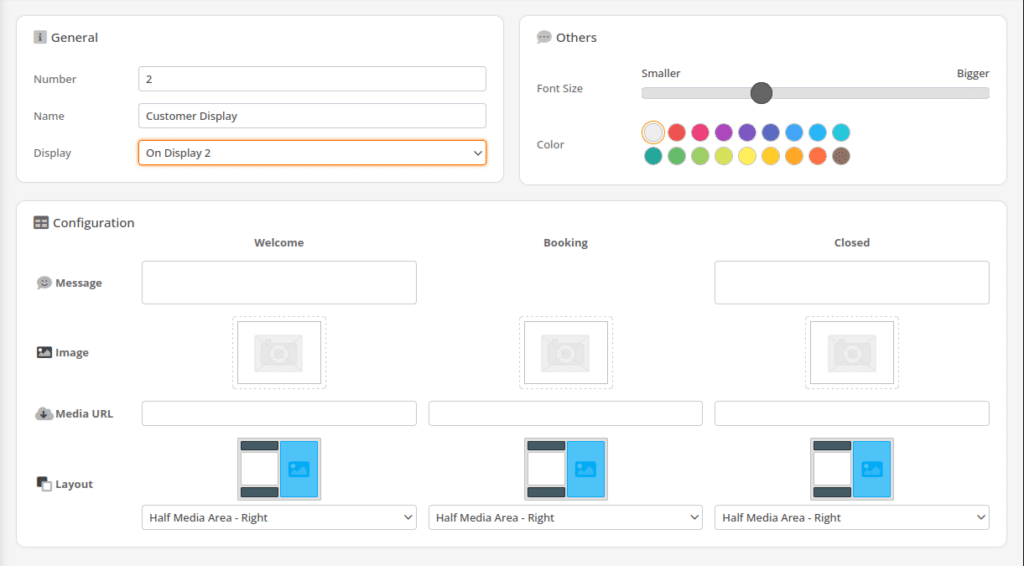
Customer Display Setup has changed and it is now its own individual section under the Settings Tab.
*Note: This section only aids in customization. The customer display will still need to be configured under the individual POS under Sales > Points of Sale.
Customer Display has changed in KORONA Studio and may now be found under the Settings tab. If you cannot locate it there, you must Edit Menu Entries.
Navigate to customer display, and click +New from the top of the screen. On the following page, you may enter a Number for the layout and give it a Name. Next, select the screen you want the images and texts to Display on from the drop-down menu.
You may change the Font Size to your liking by moving the slider to manipulate the size. Bigger/Smaller is shown on each end to help indicate where you are on the font size. Below, you have the option to change your Font Color.
On the right-hand side is a visual aid to guide your selecting of the placement for the text and image shown on the customer screen. Below each layout is a small circle. Tick the circle below to select the screen layout that is preferable to you. Once you have done so, click Save from the top of the screen to save all your progress.
Located beneath that is a Message textbox. Text may be entered in the fields titled Welcome (Message will display during business hours) and Closed (Message will display during non-business hours). The“Booking” image will appear at any time of booking at the POS. Once you are satisfied with your selections, click the Save button at the top of the screen.
Below this section, you may choose an Image to upload. These images will also be displayed along with any text you opted to include.
To do so, click the Empty Picture Area and select +Upload Image. Select Browse to look for the image. Once done, click the Upload button. When you are satisfied with your selection, click Apply.
Finally, you may add a Media URL (website) that you’d like to display for the customer during checkout.

Accounts Configurable for Display
Change deposits and withdrawals were previously shown on the customer display like normal bookings. From a security point of view, this is less than ideal. Therefore, there is now an option to “show booking on customer display” on the account.
All existing accounts keep the previous behavior. Deactivate the option for accounts that you no longer want to show on the customer display.
*Note: You must save your customer display configuration (Settings > Customer displays) once and Retrieve Master Data at the checkout so that the new function works.
Setting up a Video on the Customer Display
The most common setup is to host a video on YouTube and then format the URL to auto-play and loop.
Let’s take this as an example of a regular video URL on YouTube:
You can add instructions in the URL that will allow it to play and loop automatically.
Hosting a Video Locally for the Customer Display
This will be most commonly used on a Windows-type PC. If you have a local video file that you wish to play on the customer display, it should be possible by creating a small HTML script seen below:
<html>
<body>
<video autoplay muted loop width=”100%”>
<source src=”file:///<path to video>”
type=”video/mp4″>
</video>
</body>
</html>
Once that html file is created, you can put the path for that file on the appropriate URL line.


