Certain barcodes have embedded prices. For example, you may sell products such as magazines or newspapers with a fixed price from the manufacturer. On the other hand, you may sell products with a variable price depending on weight, length, etc. You can set up KORONA POS to deal with these circumstances.
How Do These Barcodes Work?
First, you need to determine which type of in-store code is used. There are three types that KORONA POS can recognize: In-store EAN / GTIN with 4, 5, or 6-digit prices.
The barcode is always divided according to the following scheme: [leading digit] [item number / in-store code] [price] [check digit]
Example 6-digit price barcode: 2123450015955
The above barcode is divided into the correct scheme: [2] [12345] [001595] [5]
- 2 – The leading digit on the labels does not include in the product code
- 12345 – The product number or the product code
- 001595 – The six-digit price – in this case, $15.95
- 5 – This is the check digit, which checks whether the entire barcode is valid (note: the check digit is unique to every barcode and will differ depending on the other digits)
| Number Range | Distribution in the EAN Code | Area Product Numbers | Number of Possible Products | Maximum Price |
| Barcode 4-digit price | 2AAAAAAAPPPPX | 20000000 – 29999999 | 9999999 | $99.99 |
| Barcode 5-digit price | 2AAAAAAPPPPPX | 2000000 – 2999999 | 999999 | $999.99 |
| Barcode 6-digit price | 2AAAAAPPPPPPX | 200000 – 299999 | 99999 | $9999.99 |
(Legend: 2 = start digit for in- store EAN, A = item number, P = price digit, X EAN check digit)
Creating the Number Range
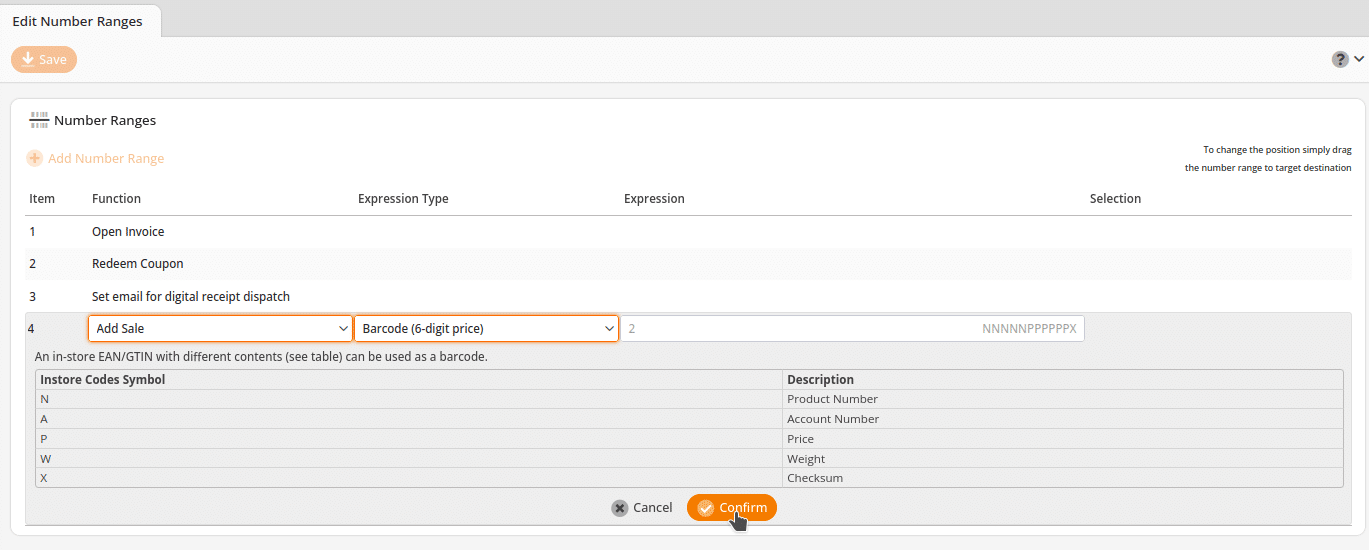
To set up KORONA POS to work with these codes, you will need to configure number ranges and products. First, navigate to Settings > Number Ranges.
Once at the number ranges screen, click Add Number Range and select “Add Sale” for the function. Then choose one of the following options for the Expression Type:
- Barcode 4-digit price
- Barcode 5-digit price
- Barcode 5-digit weight 2-decimal places
- Barcode 5-digit weight 3-decimal places
- Barcode 6-digit price
Note: you can only have one of these options active at a time.
When ready, click the Save button at the top of the screen.

Configure Product
The next thing we need to do is configure our products.
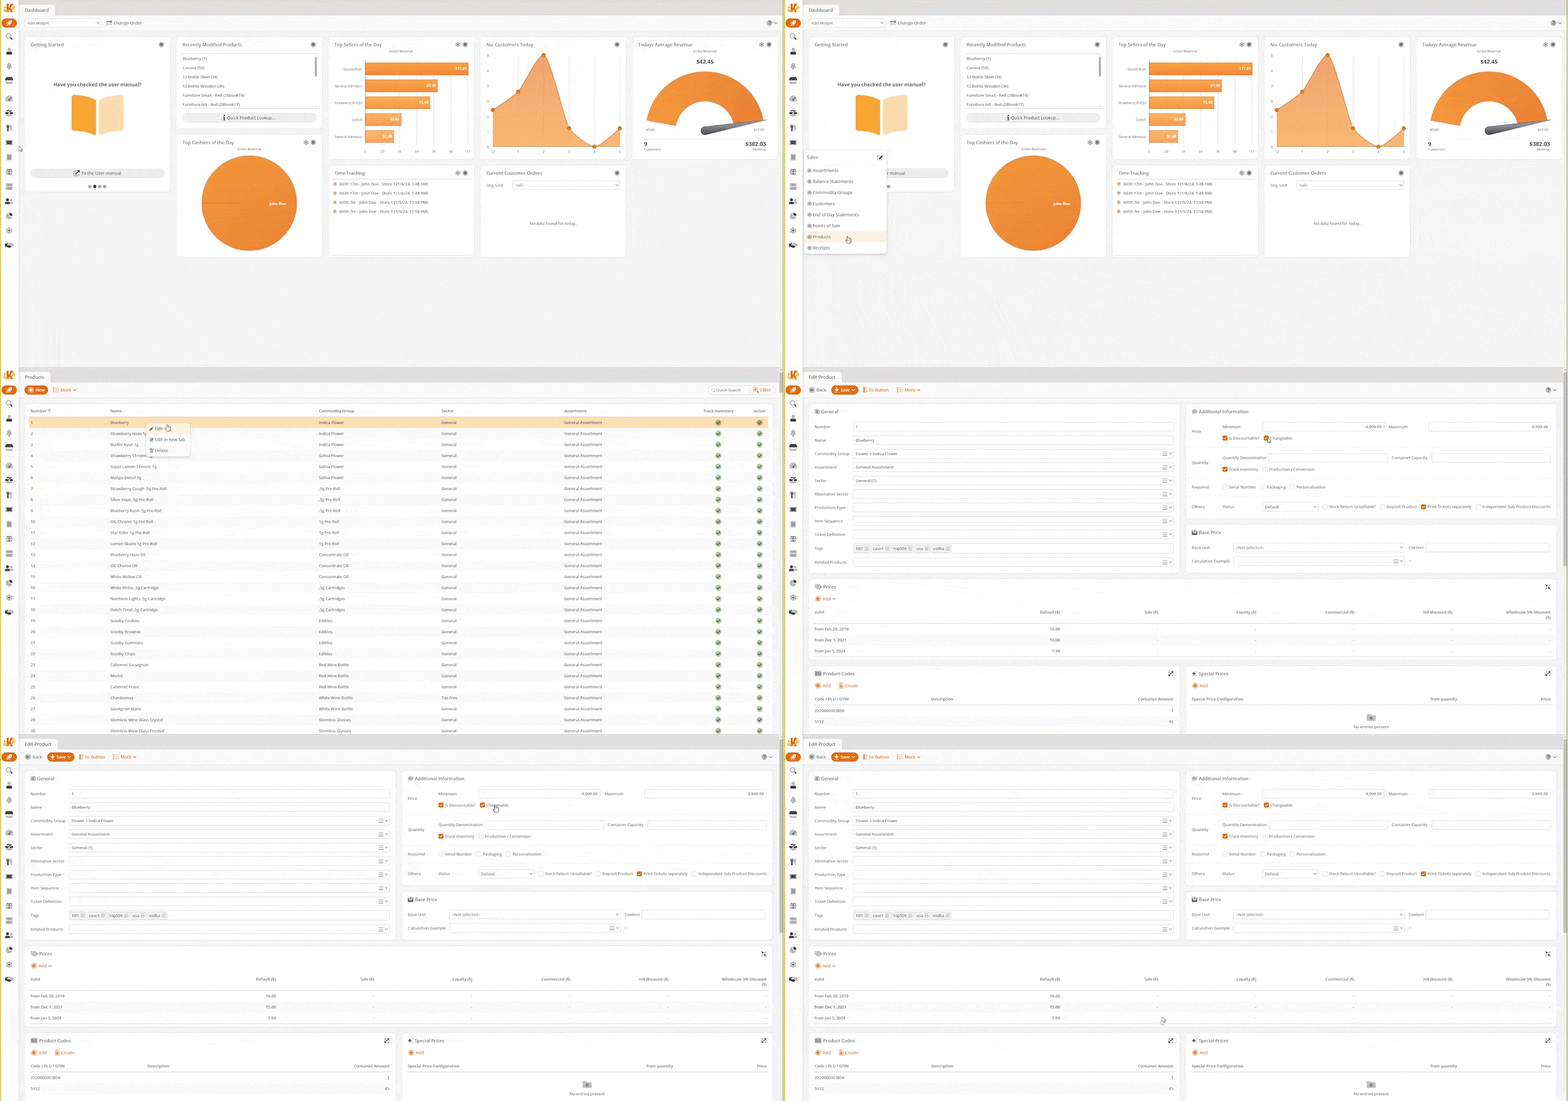
Begin by going to the products page and navigating to Sales > Products. Here, you can create a new product or edit an existing product.
Within your product, you must ensure a couple of things are set correctly. First, enter the appropriate product code. For example, if you use the Barcode 5-digit price code, you must type in the first six digits of the barcode, including the number 2 that the code starts with (see the example below).
Next, you will want to mark the item as “Price Changeable.”
Once complete, you must Retrieve Master Data at the point of sale and restart the software. However, you only need to restart the software after adding the new number range. You can safely add more products whenever you want and retrieve the master data when finished.
Note: The check digit at the end of the code is necessary when scanning these items into the point of sale. Please make sure that your barcode scanner settings for check digits are enabled.


