How to Add Merchandise and Setup Shipping in KORONA Event
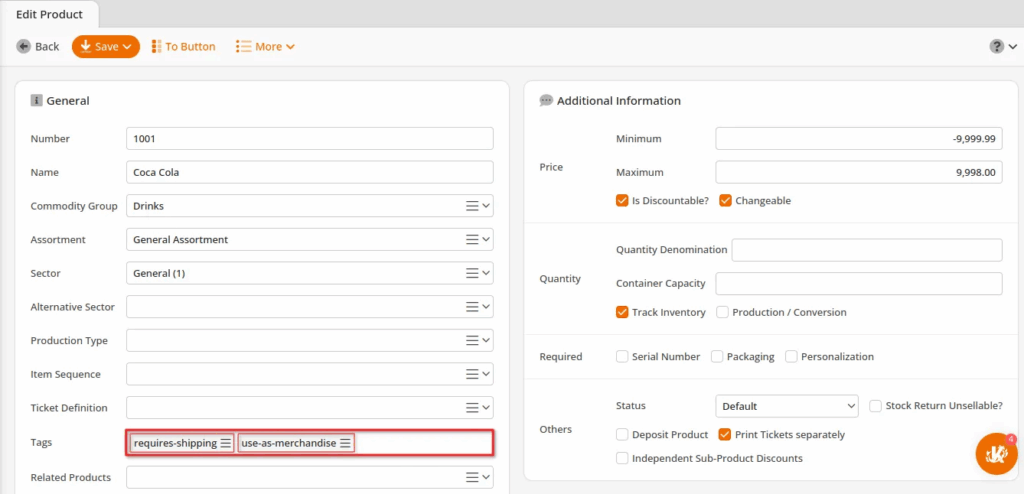
In KORONA Studio, you can use the tag “use-as-merchandise” to add products as merchandise and “requires-shipping” to be shippable in KORONA Event.
Note
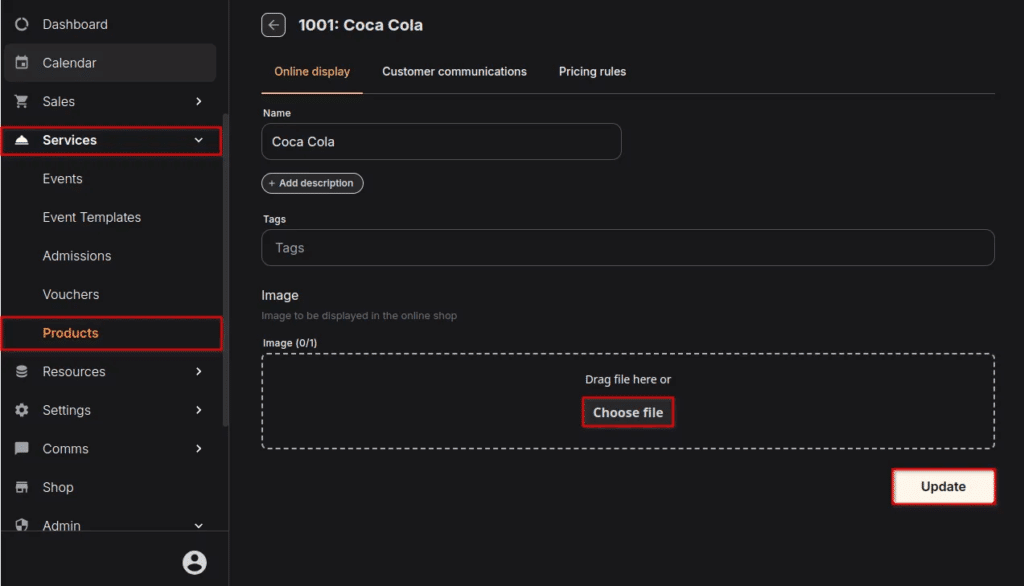
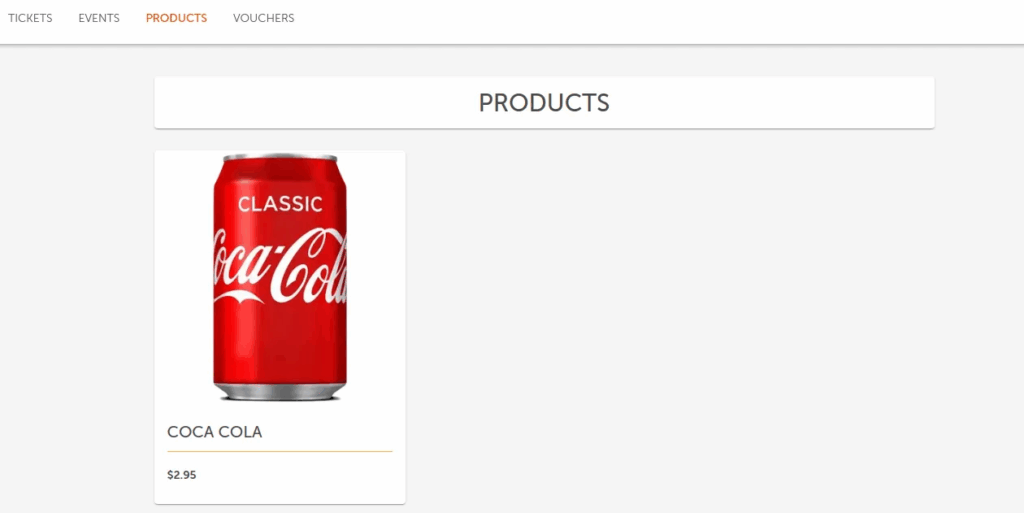
Under Services and on the Products page, you will find your list of products, where you can edit their details and upload an image. This image will appear on the KORONA Events shop.
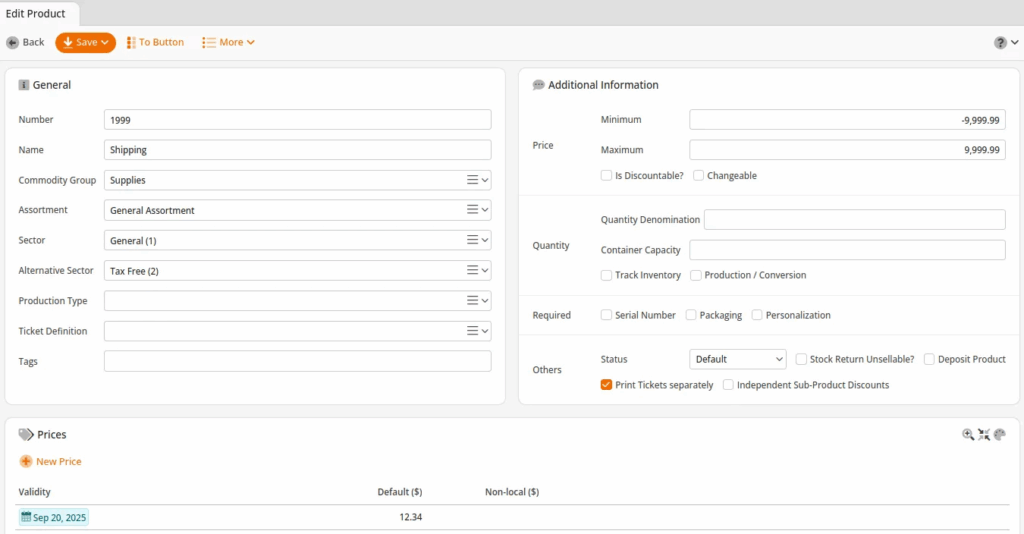
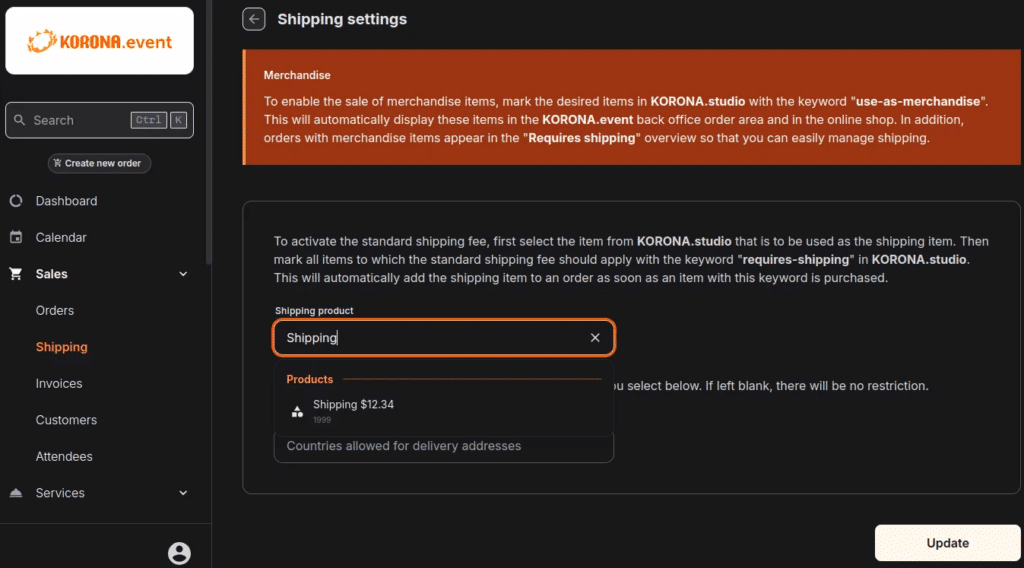
If you want to use shipping, you must create a shipping product in KORONA Studio.
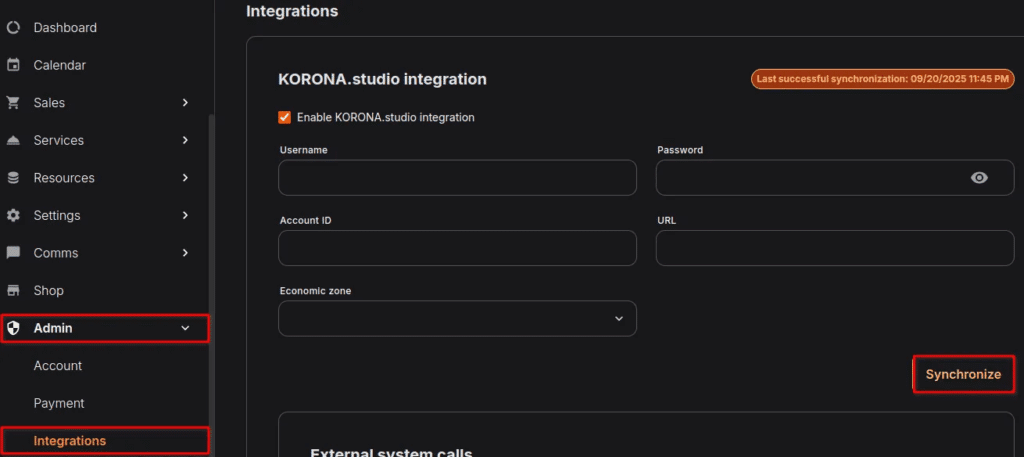
To synchronize the configured information, navigate to Admin> Integrations in the KORONA Events back office and click Synchronize.
To set your shipping product go to Sales > Shipping. From that page, click the Shipping Settings button at the top and select the shipping product and click Update.
Now, in your KORONA Event shop you will find your products.
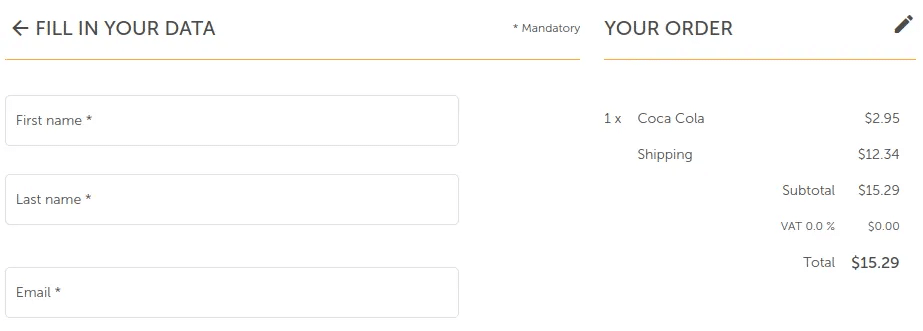
When a customer checks out, they will now get an option to select a shipping address.
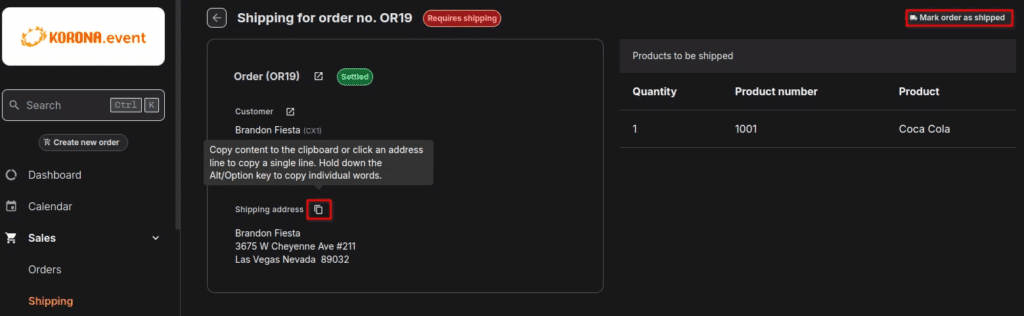
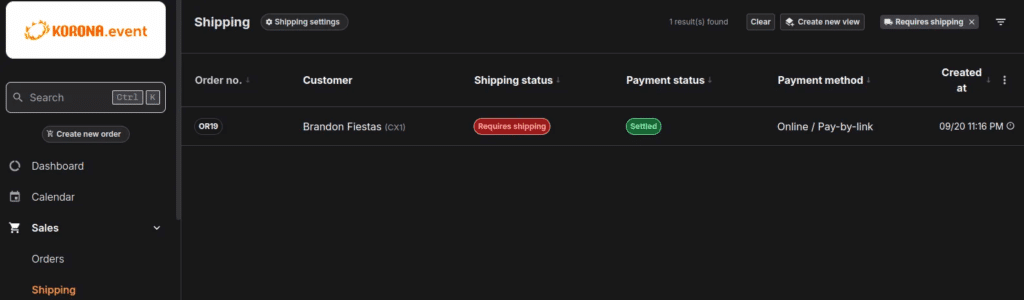
In the KORONA Event back office, you can see what needs to be shipped under Sales > Shipping.
After selecting a product, you can click the icon with two overlapping sheets of paper to copy the shipping address to your device’s clipboard, allowing you to paste it where needed. A “Mark order as shipped” button will also be found in the top right corner.