
Importing and Exporting Custom Data Files with KORONA POS
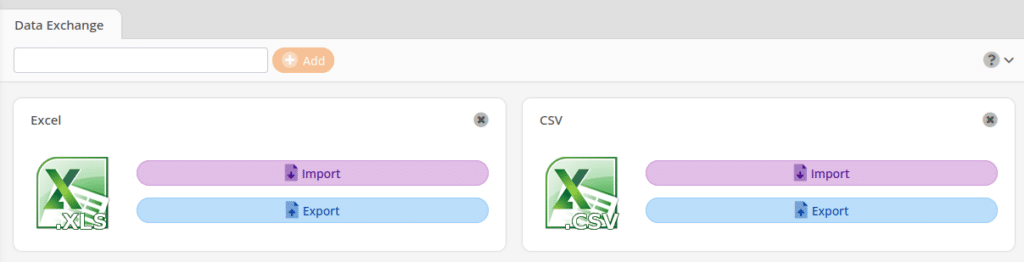
First, we must ensure KORONA POS is set up to import CSV or Excel files. Go to the data exchange panel by navigating to Settings > Data Exchange.
Here, we will need to add the type of file you are planning to import. If you are using .CSV files, type “CSV” into the text field and click the +Add button. You can also follow this process for Excel (.XLS) files. Just type “Excel” into the line instead.
You will now be able to import and export CSV and Excel files from KORONA.
*Note: If you are going to be repeatedly importing the same fields, either for new products or existing products, please feel free to contact support. We can make a format file for you so that you do not have to select the mapping each time you import manually.
Importing Data Files into KORONA POS
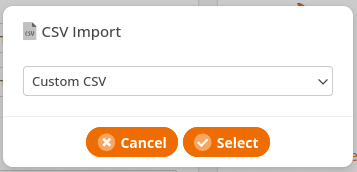
Click the Import button on the box for the file type you want to import. If the import option is unavailable, you must make it so. This is explained in the section above.
You will be presented with a selection drop-down popup box. Select “Custom” and click the Select button.
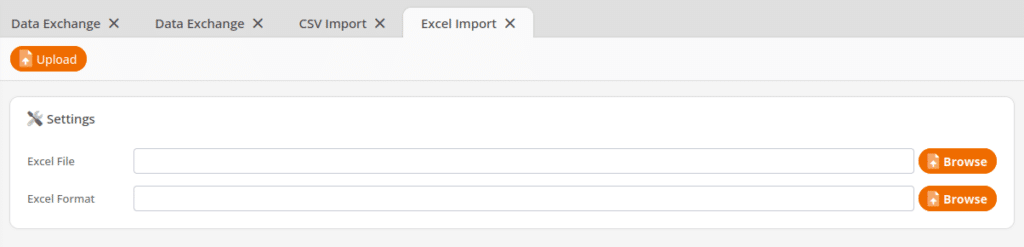
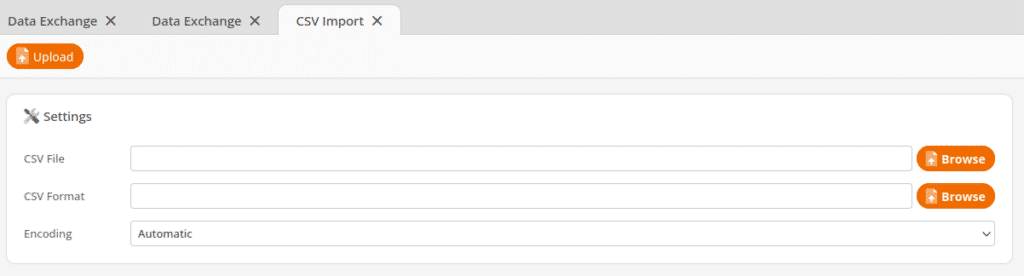
You will be taken to the import screen. Click on the Browse buttons on both the File and Formatting fields and select the file that you want to import. If you are importing a CSV, you will see a third field for Encoding. Leave the Encoding drop-down to “Automatic” to reduce the possibility of importation errors.
Once you have selected your file, click the Upload button at the top of the screen.
Next, you will be taken to a screen where you can determine how KORONA POS imports the data from your File.
Running Import and Available Data Category/Fields
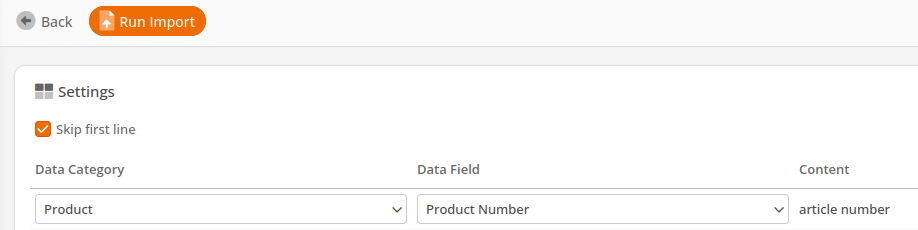
*Note: If your import file has column headers, you will need to tick the Skip First Line check box to ensure that there are no errors with the import.
On this screen, you will want to choose your Data Category and Data Field. We will cover a few of those data selections in this section. When finished, click “Run import.” You will see a popup box saying “Loading data.” When it is completed, you will see the results of the import.
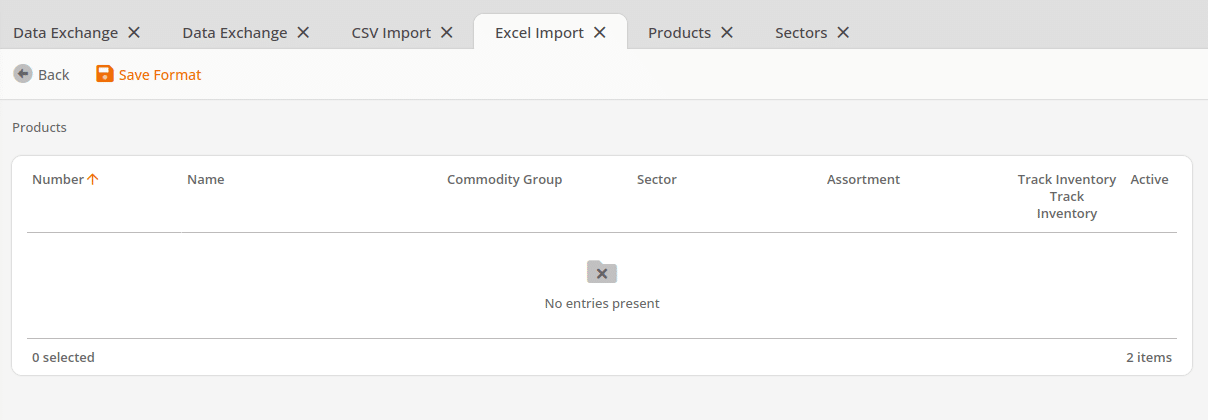
Click on any of the headers to expand the information on what has been imported. There are a few additional things to go over.
If all of the products in the file are new, there’s no need to create/map product numbers, as KORONA POS will auto-generate new numbers at the end of the product file, ensuring no products are overwritten. However, it is still recommended that you add Product Numbers anyway, as the system-generated numbers start at 1 and can often be easily accidentally rung up by cashiers.
Minimal/First Time Product Import: To view the minimum requirements for importing products into KORONA POS, please visit our Minimum Product Import manual page.
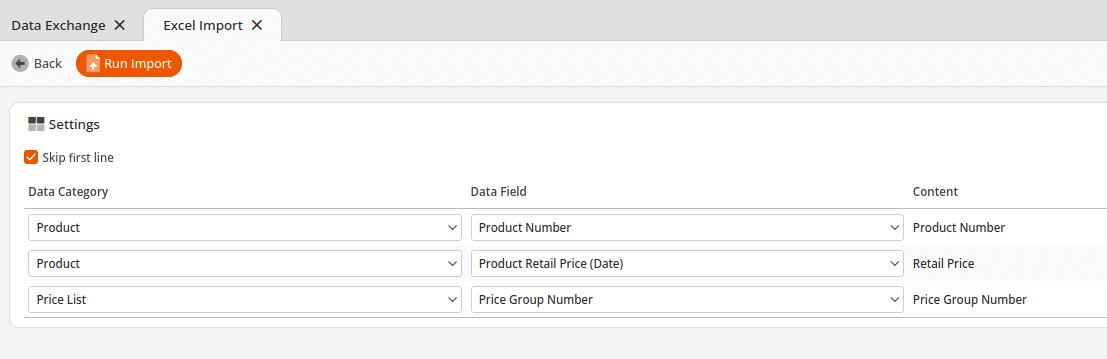
Import Prices into Specific Price Group: Before importing prices, especially if you have multiple pricing for your stores or customers, you will need to specify which price group these prices are under. You will need to create a new column in your Excel/CSV file. It is recommended that you use and name that column Price Group Number. That way it will filter the prices into the designated price group by their assigned number instead of the name.
*Note: If you have multiple price groups for your products, you will want to do multiple imports for those specific price groups.
Product
Product Number: The number listed under the item and found at the checkout can be this number. This number is already in correspondence with the product and will be updated when the product is updated. If the number is unavailable, the product is displayed using the created or last known version.
Product Name: Item Name
Product Code: Additional code next to the item number, which can be an EAN, a PLU, or any other number with which items can be found.
Product Code Quantity: Belongs to the product code and describes the set of multiple packaging for which there is an EAN. Ex .: Cigarette rod with 10 boxes.
Product Retail Price (Date): The selling price of the product as of the date of import.
Store Price: Your store’s selling price (overrides retail price) of the product
Product Code Price: If the bulk item price is not equal to the individual item price, this is where that price is located
Product Code Description: Sets the description for the particular product code, such as 12pack, Single, etc.
Price Changeable: Indicates whether a price can be changed if there is no price. This product becomes an “Open” product where the price must be entered by the cashier.
Min Retail Price: If the price can be changed, this value specifies the minimum price.
Max Retail Price: If the price can be changed, this value specifies the maximum price.
Discountable: This is a yes / no field whether this product is manual or by price rules. Alternatively 0 = No, 1 = Yes
Product Description: A description text for the item. This can be on the checkout if desired.
Receipt text: If this field is imported, this text will appear on the document instead of the product name.
Allergens: Potential allergy triggers
Additives: Artificial flavors or dyes
Manual: How-to guide
Order Text: This will print on your production receipt.
Ingredients: List calories, fat, cholesterol, etc., per serving.
Nutritional Value: Text field containing
Care Instructions: Any product-specific instructions for best care
Recipe: You can list the necessary steps to cook a product.
Certificate: FEC, FDA approval (milk has these a lot of times), or other sign of approval.
Warranty Text: Warranty terms on customer receipt
Information URL: Any URL containing images or information about your product should be entered here.
Manufacturer: Information about the device manufacturer or supplier to display on customer receipt.
Product Purchase Price: This will be the Last Purchase Price, located above the supplier line inside of the product “Last PP.”
Product Cost: This will be the Additional Costs field for any additional charge on top of the product purchase price. This is located above the supplier line next to “Last PP,” called “add. costs.“
Product Listed: Use 0 = No, 1 = Yes, or you can just input the text no or yes.
Product Track Inventory: Use 0 = No, 1 = Yes, or you can just input the text no or yes.
Product Force Personalization: If you are setting up a gift item you would check this box. Use 0 = No, 1 = Yes, or you can just input the text no or yes.
Product Base Unit: Type of measurement desired (gal, cu. in.)
Product Packaging Quantity: How many products go into a package.
RRP: The manufacturer’s suggested retail price, also known as the MSRP.
Deactivated: 0 = No, 1 = Yes, or you can just input the text no or yes.
Label: Text to be displayed specifically on a label print.
Quantity Denomination: The amount of products are sold per purchase.
Sales Lock: An item that may be received but not sold. It is commonly used for items that have a specific launch date.
Supplier Item Number: The number the supplier uses to pull/identify the product.
Supplier Package Item Quantity: The number of products you receive in a package from the supplier.
Supplier Package Description: Any text information your supplier uses for the product.
Supplier Container Price: The amount paid to the supplier for a case of the product. Must also be used with Supplier Package Item Quantity.
Supplier Item Price: The amount paid to the supplier for the product, sets the price on the Supplier line inside of the product.
Reorder Level: Minimum stock of a product in a warehouse. If this value is below the reorder value, the product is included in the order proposal. Must be imported together with the organization number (warehouse) as the stock per warehouse applies.
Maximum Stock Level: Maximum stock of an item in a warehouse until the item is filled in an order. Must be imported together with the organization number (warehouse) as the stock per warehouse applies.
Bin Location: The code assigned to the location where an excess stock of an item is kept, such as a backroom location or an under/over-stock location.
Assortments
Assortment Number: Each item is assigned to an assortment. If the name is not specified, the product will be included with the assortment To the number 1.
Assortment Name: As an alternative to the number, the name of the assortment can be changed too.
Organizational Unit
Organizational number: Number of an organization. Only for the import of branches. There is no product reference.
Organization name: Name of an organization. Only for the import of branches. There is no product reference.
Inventory Receipt
Inventory Count: This is the total count for the stock level quantity of your products in your inventory. This should be used only for importing inventory counts.
Stock Order
Order Package Quantity: Packaging content at the supplier. 10 for 10 items in a single package
Stock Adjustment
Article Amount: The amount being adjusted in negative or positive.
Commodity Group
Commodity Group Number: Independent second item of the product group. This can be at the use of supplier lists for importing the assignment to the own product group structure. Ex: own Product group 1 = Snacks, supplier category 34 = Snacks; The product group key in the product group configuration is then 34.
Commodity Group Key: Reference number to the product import
Commodity Group Name: Name of product group. The number and the name can also be merchandise categories without products being imported.
Info Text
Import of any info text. The info text can be assigned to both products as well as cash or changed manually.
Producer
Producer Number: Number assigned to the producer
Producer Name: Name of producer
Store Orders
Order Quantity: The amount of orders you are placing through the store order.
Ticket Definitions
Ticket Definition Number: Number assigned to the ticket
Ticket Definition Name: Ticket Name
Parent Commodity Group
Parents Commodity Group: The Parent Commodity Group is a top level department. It can have multiple sub-groups of other Commodity Groups, for example, “Liquor” could be the Parent group of Commodity Groups like “Vodka”, “Whiskey” or “Tequila”. When importing, you will need to designate both the Parent Commodity Group, and any Commodity Groups you would like to be a sub-group of the parent. You will need to use one of the below options to designate which group is the Parent. (Note: Parent Commodity Groups cannot share exact names with Commodity Groups.)
Parent Commodity Group Number: Number of the superior department.
Parent Commodity Group Name: Name of the superior department.
Parent Commodity Group Key: Reference number to product import
Supplier
Supplier number: Number of the supplier (no order number)
Supplier Name: Name of the supplier
Company Name: Sets the company name of the supplier / if different from the Supplier Name.
Contact Person First Name: First name of your supplier representative
Contact Person Last Name: Last name of your supplier representative
Contact Person Telephone Number: Phone number of your supplier representative
Contact Person Email: Email address of your supplier representative
Contact Address 1: First address or primary address of your supplier representative
Contact Address 2: Second part or secondary address of your supplier representative
Contact Zip/Postal Code: Zip Code / Postal Code for your supplier representative
Contact City: City where the supplier is located
Contact State: State where the supplier is located
Contact Country: Country where the supplier is located
Price List
Price Group Number: Number of the price list for which a product price is to be imported. If no number or name of a price list is specified, the product is assigned to price list 1. If several price lists are to be imported, a line with the respective price must be inserted for each price list.
Price Group Name: Name of the price list for which a product price is to be imported.
Sector
Sector Number: Number for the sector that is to be imported
Sector Name: Name of the sector that is to be imported
Alternative Sector
Alternative Sector Number: Number for the alternative sector that is to be imported
Alternative Sector Name: Name of the alternative sector that is to be imported
Tag
Product Tag: Importing any tag the product would be under
*Note: you can only do 1 tag at a time. Multiple tags would need subsequent imports
Customer Information
Number: Number of a customer. Customers can be created or searched at the checkout. With the help of customers, documents can be assigned to a customer.
Last Name: Customer Last Name
First Name: Customer First Name
E-Mail: Customer E-Mail address
Address 1: First Address line for the customer
Address 2: Second Address line for the customer (if available)
Postal code: Customer Zipcode
City: Customer’s City
Country: Customer’s Country
Telephone: Customer’s Telephone number
Gender: Customer’s Gender
State: Customer’s State
Birthday: Customer’s day of birth. Valid formats: MM-dd-yyyy and dd.MM.yyyy
Information: Additional information about the customer
Customer Company: Company the customer works for/owns
Accepted Privacy Policy: Any policy the customer has accepted
Permission to contact for marketing: Yes or no to contact for marketing purposes
Customer Group
Group Name: Name of a customer group. With the help of customer groups, price rules can be applied, or evaluations about the turnover of different customer groups can be made. The customer group must be set at the cash desk for each document. Example: Customer group “Tutor” receives a 20% discount on standard prices.
Group Number: Number of the Customer Group
Cashier Information
First name: First name of the cashier
Last name: Here, you can transfer cashiers to the system with the surname. Since the cashier also appears on the receipt, this is often anonymized with a letter.
Number: Number of the cashier
Login: PIN code for registering at checkout or key number. Use of a waiter’s lock.
Email: Cashier’s Email
Role Number: The role number assigned to the cashier
Deactivated: If the cashier has been deactivated/no longer works for the company.
Gender: The gender of the cashier
Password: Any password set for the cashier to use for login
Alias: What you wish to be displayed for the cashier’s name on the receipt other than their full name.
Exporting Data File from KORONA POS
To export a file, you will need to click on the export button in the file type you wish to create. Once you have clicked on that button, you have the option to select what data you would like to have exported. After you have made your selection in the drop-down menu, click continue. Your browser will then download the file containing the data.