Payment methods are the various ways customers pay for their products or services. The common methods are cash, check, credit or debit cards.
Creating a Payment Method
KORONA POS allows you to set up multiple payment methods as needed and customize them for your business needs.
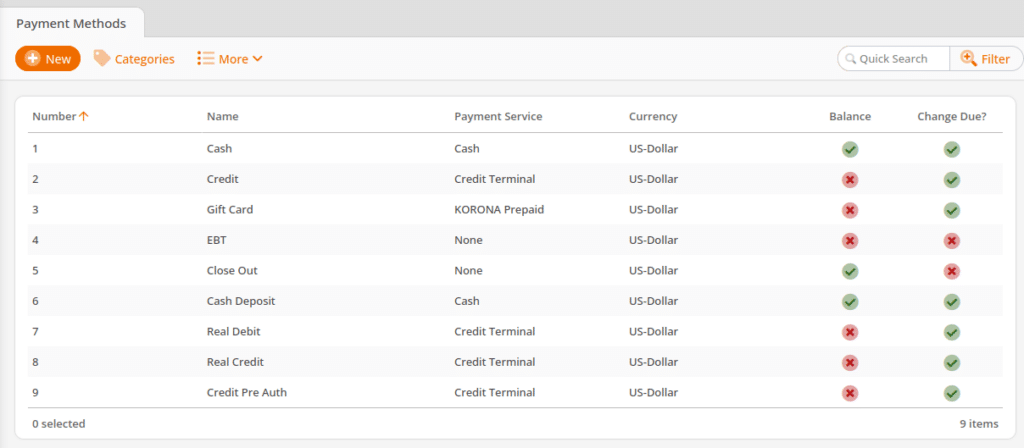
To access your payment methods, you must go to the payment method screen. Go there by navigating Settings > Payment Methods. Select the payment method and click the Edit button at the top of the screen. You will be taken to the edit payment method screen.
Once you enter the edit payment method screen, you will be presented with various fields. These allow you to set up your payment method for what your business needs. For example, you can set a payment method to be exact change only and not allow change to be handed back to the customer. You can also have multiple receipt copies printed. This is good for credit and debit payments to keep track of transactions.

Payment Method Fields
| Number | Payment Method number assigned by KORONA POS |
| Name | Name for your payment method, such as “Credit” |
| Currency | Accepted currency unit, such as USD, GBP, etc. |
| Payment Service | How the payment is received, such as cash, credit terminal, etc. |
| Service Parameter | Additional options that the payment service might need, such as pre-auth, debit, and more. For example, EBT transactions require that the payment method include the service parameter ebtfood or ebtcash |
| Processing Type | How it is processed, such as Genius, keyed, swiped, or pre/post auth |
| Receipt Print Copies | How many additional copies of the receipt are printed after payment has been processed by the point of sale |
| Revenue Account | The revenue account to which the Payment Method is attached – revenue information for this account can be found under Evaluations > Revenue Allocation Account Reports and selecting that account |
| Advice | This text is displayed under the total sum for billing invoices. You can enter the bank account the customers should use for the invoice amount. The text also appears in the PDF document, which you can create by clicking the PDF button at the top of the screen for that invoice |
| Balance | Whether or not the payment method needs to have a closing balance entered |
| Denominated Balance | Determines if the balance can be entered denominated |
| Allowed Balance Difference | This allows the acceptable difference if the count is off that day. If the amount entered is within the allowed difference, then the point of sale will accept the entered amount |
| Change Due | When activated, the amount can be exceeded due to means of payment. This allows the payment method to create change |
| Use Cash Drawer | If activated, the cash drawer will open upon payment completion |
| Force Printing | Forces the receipt to print even if it is turned off at the point of sale |
| Force Customer Number | When activated, receipts made on this payment method must have a customer number set. |
| Maximum Payment Amount | To comply with legal restrictions, a permissible maximum amount can now be stored in the payment methods |
Once you have made your changes, click the Save button at the top of the screen. To use the payment method, you will need to add it to the terminal via a button under Settings > Button Configurations and click on the Payment Method tab.
Adding the Payment Method to the POS Terminal
Navigate to the button layout page by clicking Settings> Button Configurations. Select the configuration you wish to edit. Once you reach that screen, click the layouts button at the top.
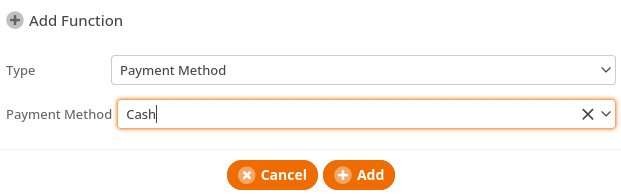
Select the layout to which you wish to add that payment method button. Once you are at the layout you wish to edit, select the area to place the button. Right-click on that square and click “Select Payment Method” from the context menu.
The Add Function dialogue box will appear with the Type already selected as “Payment Method.” Select the payment method and click Add. After adding the button, save the layout by clicking the Save button at the top of the screen.
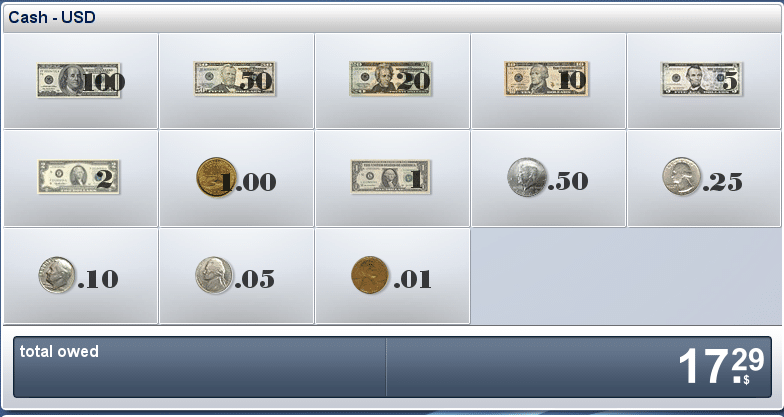
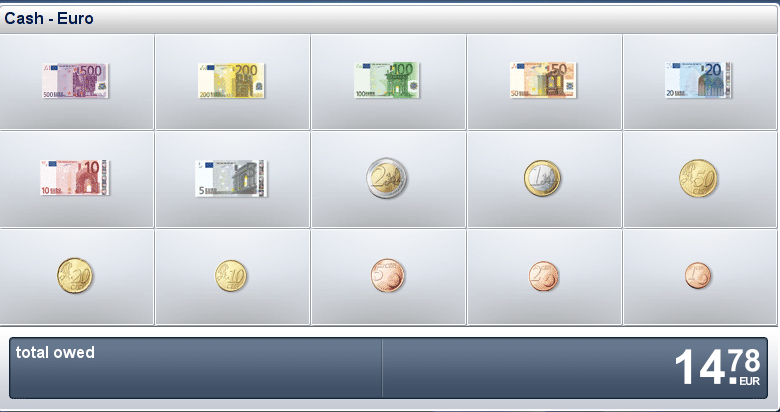
Payment Methods (Using Multiple Currencies)
It is entirely possible to use more than one currency when using KORONA POS. This works great for shops that are located inside airports or tourist gift shops.
To learn more about setting up a new currency, please navigate to our Currencies manual page.
Once you finish, you can accept that currency by attaching it to a payment method. Detailed instructions on how to do this are at the top of this page. Remember to Retrieve Master Data and restart any terminals to which this change applies. Ring up a transaction as you would normally. Select Total. If you have set up an exchange rate amount from USD to Euro, you will notice how the amount differs between the two currencies.
You can also switch back and forth between the currencies on your point of sale by selecting the default payment method under Sales > Points of Sale. This will show up on the receipt as you process the payment.