Checks for errors in cashier balances and allows for manually completing missing balance statements. For more on reviewing balance statements, please refer to Balance Statement.
To view the Difference Check report, navigate to your Evaluations tab. If you don’t see it there, you must Edit Menu Entries. This report may be filtered by Organizational Unit, Point of Sale, Cashier, and Date.
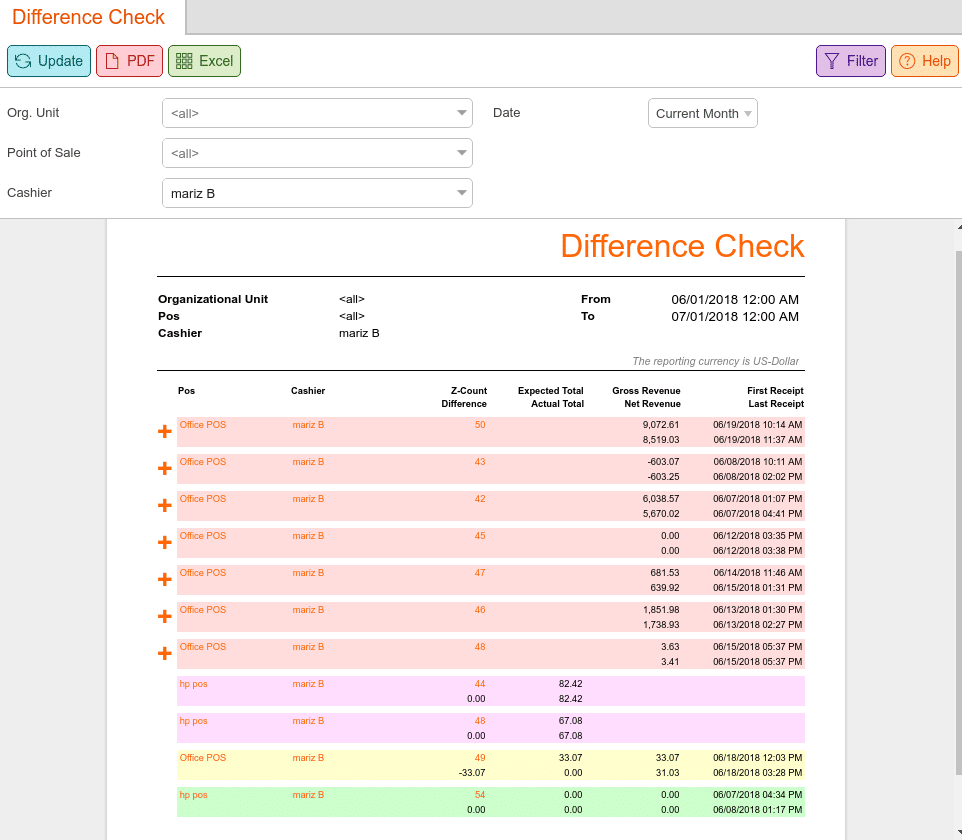
Once you have made your desired selections, click Update at the top of the screen. The report should load and list the POS devices, Cashier, Z-count Difference, Expected Total vs. Actual Total, Gross Revenue vs Net Revenue, and Date and time of first receipt vs. Last receipt.
Clicking the (+) next to the POS names will give the option to complete the selected missing balance. Once you have chosen the option a “Complete missing balance“ text box will appear. Choose the Point Of Sale, select a cashier, date, and z-count, and click Create. You will be taken to the Edit Balance Page. Here, you may adjust the actual balance and put in any comments. Once finished, click Save and exit.
Balance Difference Color Highlights
There are a few different color highlights on this page, and their meaning are as follows:
Green: it’s all ok, no differences
Yellow: differences between actual/expected total
Red: within the date range, there is no balance in the system for receipts
Purple: within the date range, there are no receipts in the system for balance
Finally, this report may be exported via Excel or PDF simply by selecting one from the top of the page.