Additional receipt information is a great way to prompt cashiers for text selection on specific Receipts/Transactions.
Creating and Applying Additional Receipt Info Text
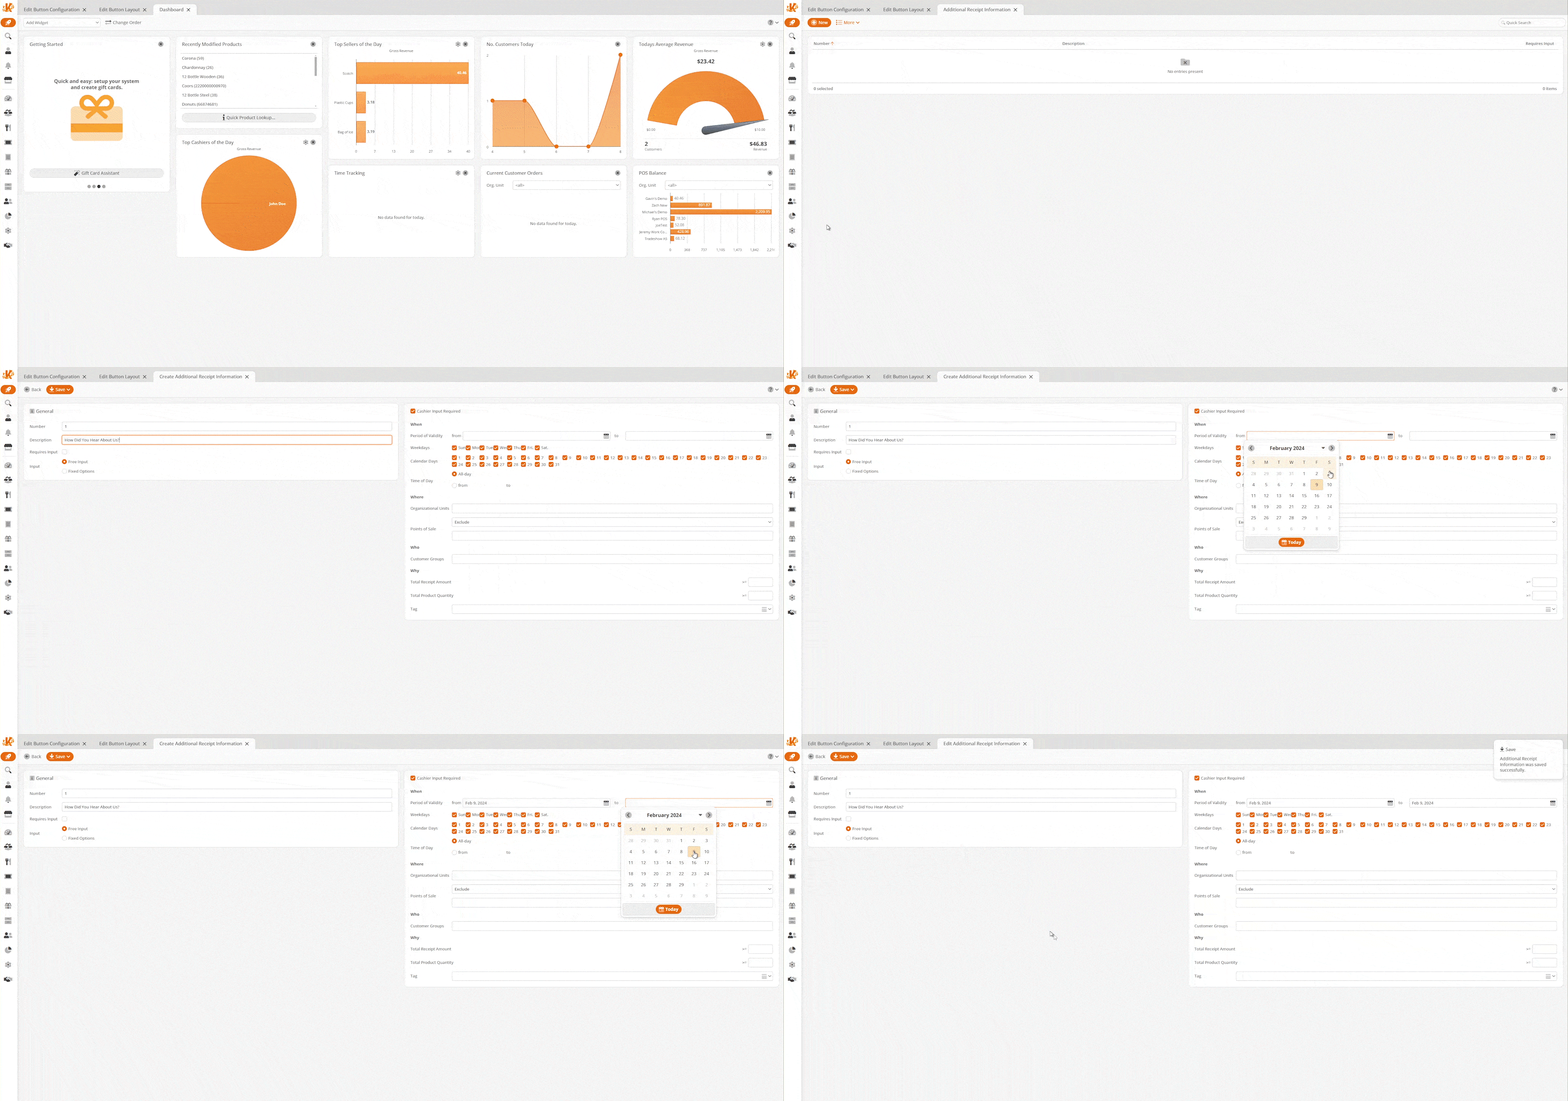
Please navigate to Settings > Additional Receipt Information, and from there click on +New.
On the following page, under the Defaults box, fill in a Description and specify if the text will Require Manual Input by ticking the corresponding checkbox. You also have the option to specify if the manual input will be required each time or if it is a fixed Text/Options. If you select Fixed Options, you must prerecord the texts by clicking the +Add under the Options Box.
On the right-hand side of the page, locate the Trigger box. You may have three options for showing the text: from and to a specific Date range, only show on a certain day of the week, or certain calendar days.
You may also specify if the text will appear all day or only at certain time of the day. You may also select an Organization Unit and a Customer Group if one applies.
In addition, you may have a certain dollar amount trigger the text by entering an amount next to Total Receipt Amount, or a number of products sold trigger the text by entering the amount next to Total Product Quantity.
Finally, you may choose a Tag associated with this text. The text will appear for selection once a product belonging to that tag is selected. Once complete, click Save.

Use at the POS
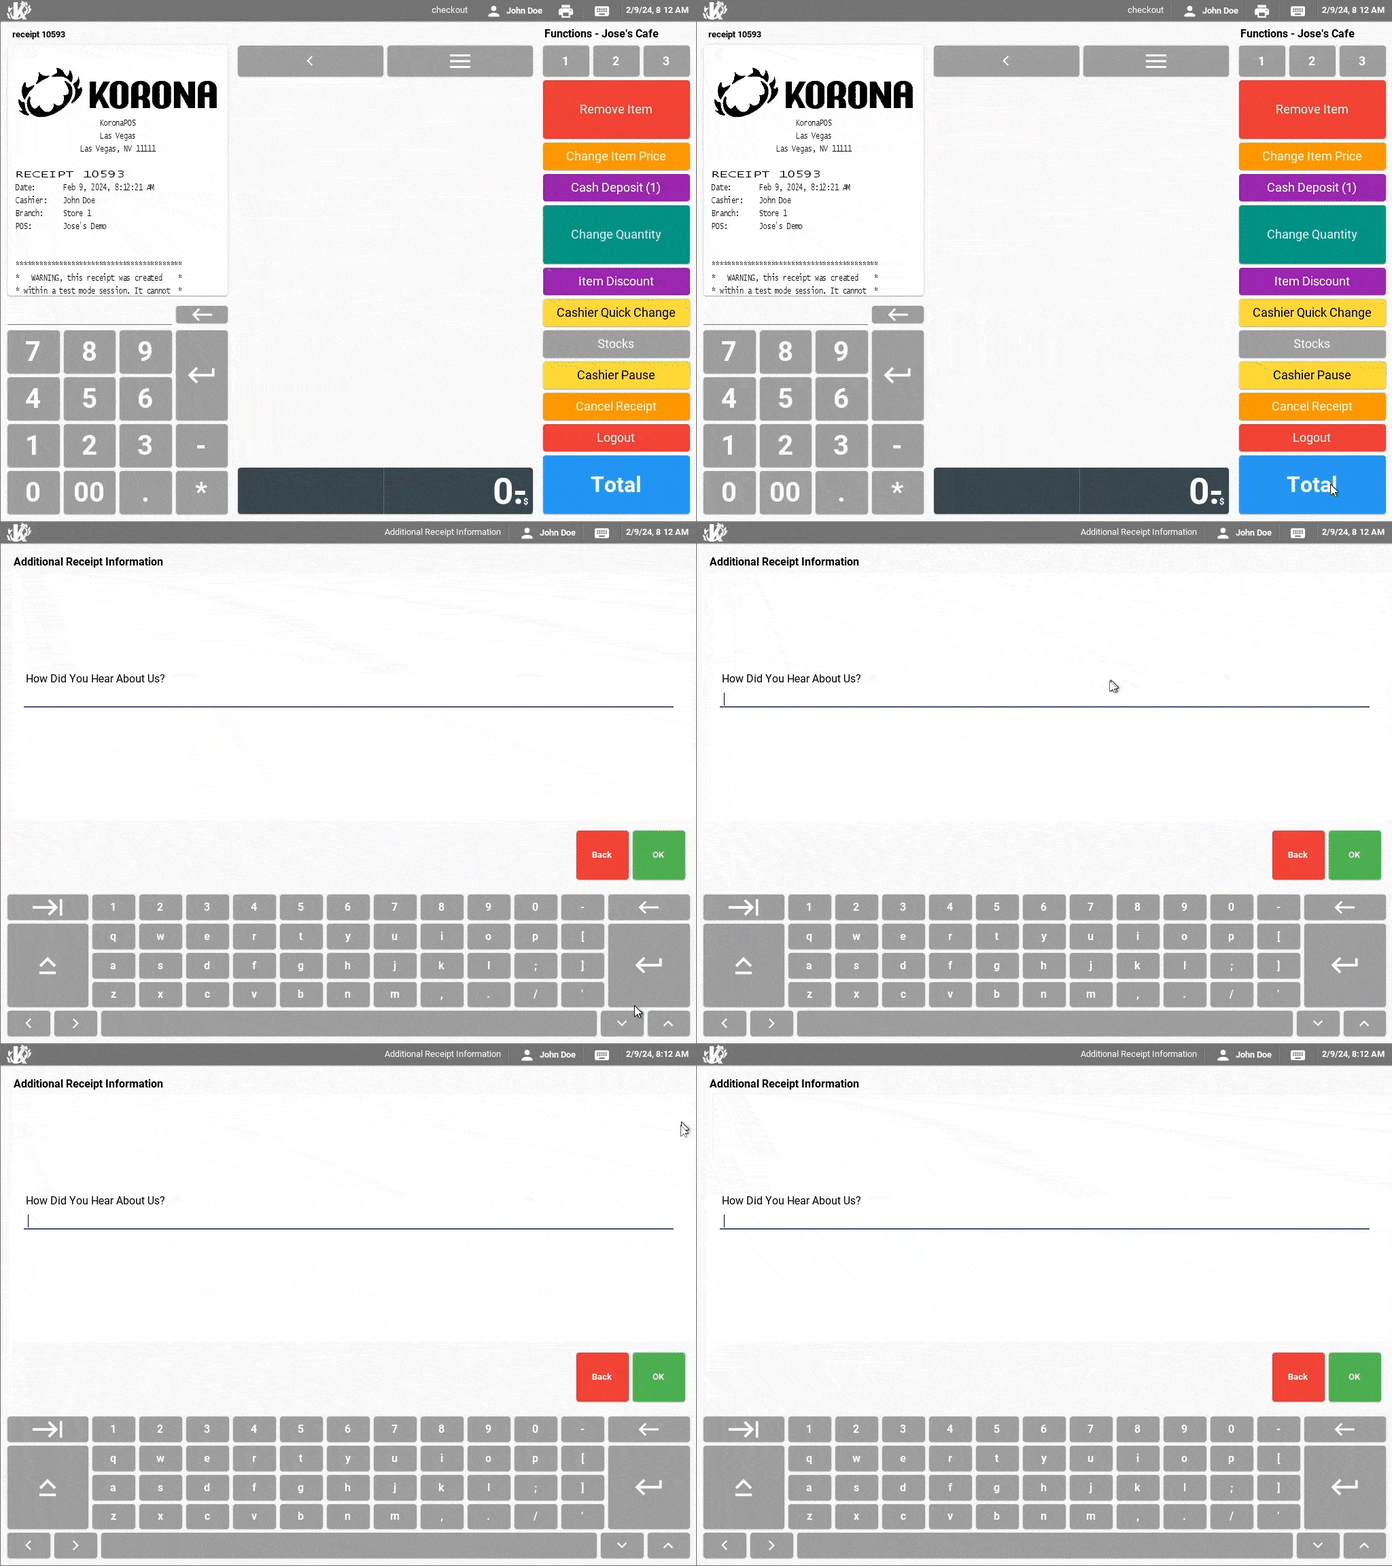
At the POS, if the triggers have been met, upon hitting the total button, the Additional Receipt information screen will launch. You can make a selection from prerecorded options, or you may input free text.
*Note: Please do not forget to Retrieve Master Data at the POS.

Viewing Additional Receipt Info Text Report
To view a report of all additional receipt information, please visit our Additional Receipt Information (report) Manual Page.


