
Import commodity groups into KORONA Studio using the commodity group template.
Step 1: Access the Import Tool
- Navigate to Settings >> Data Exchange.
- In the CSV widget, click the Import button.
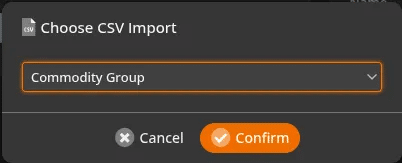
- From the dropdown menu, select the Commodity Group template.
Step 2: Prepare Your CSV File
A pop-up box will appear, allowing you to configure your import settings. To ensure your CSV file is formatted correctly, you can download a template.
- Click on CSV Template in the pop-up box.
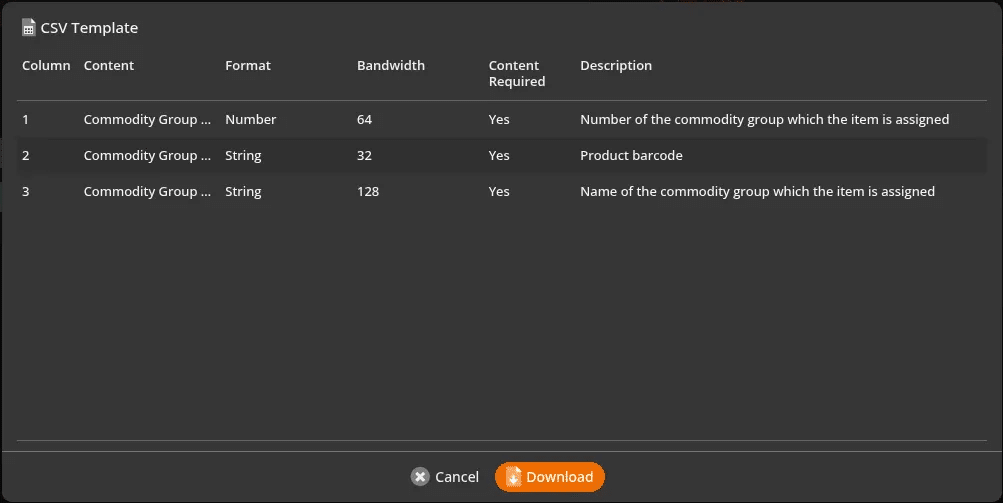
- A new window will show the template layout. Click Download to get the file.
- Your CSV file must have three columns in the following order:
- Number: The unique number assigned to the commodity group.
- Key: The barcode used for the commodity group.
- Name: The name of the commodity group.
- The template also specifies the required data format for each column.

Step 3: Upload and Import
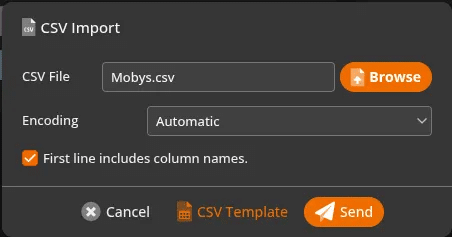
- Upload your completed CSV file. You can also choose the encoding and check the box to ignore the first row if it contains column headers.
- Click Send.
- A pop-up will display if any errors are found. If the import is successful, a confirmation message will appear.
More Info
For more information on other available import templates, you can visit the Import CSV Files page.