Creating Inventory
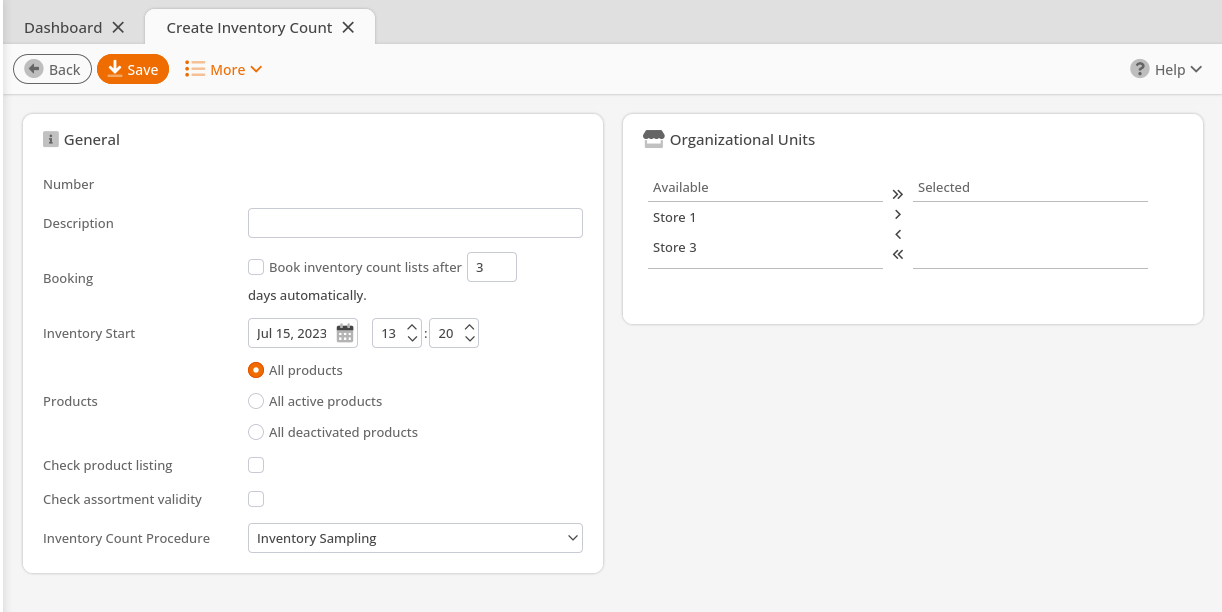
Navigate to Inventory > Inventories. There are three mandatory fields on this screen: the Description (the name), the Organizational Unit, and the Inventory Type, which must be entered for each inventory.
Furthermore, you can specify a category of products. Your options are All Products, All Active Products, and All Deactivated Products. Also, you may specify a Date and how many days the inventory lists should be automatically booked by.
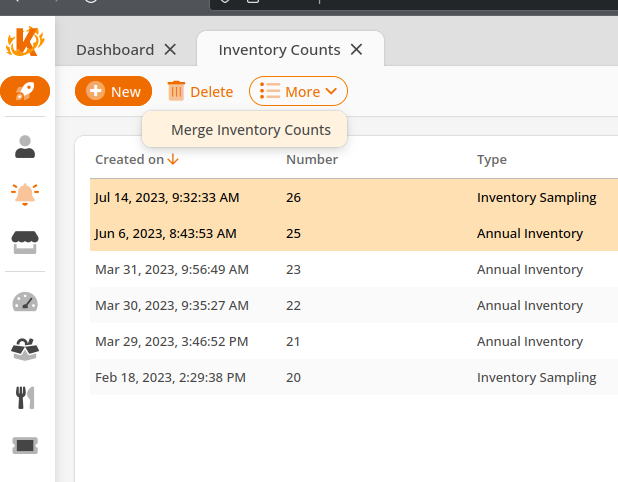
By default, you will only see the open Inventory Counts you have not booked. To view all of the prior completed or booked Inventory Counts, you can use the “Filter” button, and can also apply any available filter to narrow down the list from there.
The 4 Inventory Types
1) Inventory Sampling
The inventory sampling procedure checks the stock of certain manually selected products, assortments or product groups.
An empty inventory list is created automatically, which you can edit.
2) Annual Inventory
The annual inventory procedure is the most intense form of the inventory on which the entire inventory is counted on or after a certain deadline.
Here, you can determine the maximum number of items to be displayed on an inventory list and whether these lists should be department-specific. For example, if you have 1,000 different products and only want your inventory counters to have a list of no longer than 100, the system will create 10 different inventory lists to distribute among your counters. If your warehouse is also divided by product category, this will help to minimize the distances each counter has to travel. With this inventory type, the inventory lists are only created on the set date to guarantee their completeness.
*Note: If you create a deadline date on the start day itself, it can take up to an hour until the inventory lists are displayed.
3) Perpetual inventory
Perpetual inventory is most useful for stores with large inventories.
Rather than counting your entire store’s inventory on one day of the year, perpetual inventory allows you to count a fraction of your inventory on a selected day each week, allowing you, by the end of the year, to count your entire inventory.
You can choose the day of the week you would like the system to create the inventory lists and for which stores, if you have multiple. Once counted, these lists must be booked, allowing you to complete an entire year’s worth of inventory counts separately rather than at once.
Inventory lists are created here only on the set weekdays and cannot be viewed and edited before. This is necessary to include new items that are created during the billing year.
4) Identify Irregularities
This inventory type is similar to the sample inventory, except that the cloud suggests products to be counted. The criteria for the products included on the lists are negative stocks or items that have not been sold for an extended period of time.
Inventory lists are created immediately, as in the sample inventory.
Inventory lists
Once stocks are counted and the corresponding actual stocks have been entered, click the “Refresh” button in the toolbar. If items were sold during the time between creating the inventory list and the actual stock was entered, or a shipment was received and booked, the nominal goods update automatically when you enter or change the actual stock.
This means that differences in the actual stock can only occur if the actual stock changes between the counting and the posting. The nominal goods are always up-to-date.
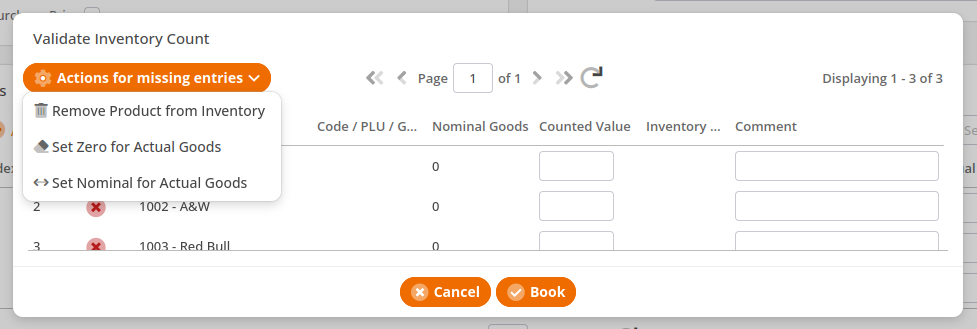
After clicking “Book,” the next page shown will be”Validate Inventory Count.” All the differences between the target and actual stock are displayed here. You can adjust the corresponding counts and specify comments for the individual differences.
For items without a count value, there is a menu titled “Actions for Missing Entries” with various options for processing: remove these items from the inventory, set the count value to 0, or set the count value to nominal goods. The option selected is immediately applied to the page for all articles without a count value.
Clicking “Book” on this page posts the final inventory list, and the stock levels are adjusted to the counted value or actual stock.
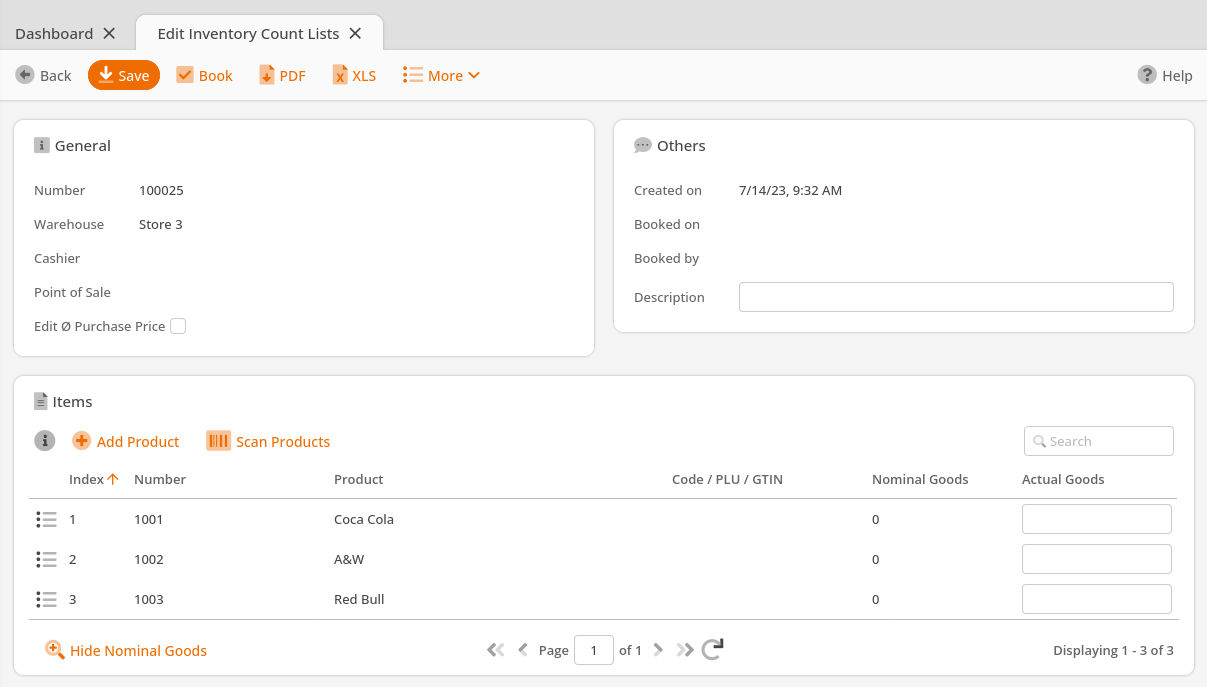
Double-click on the line in the corresponding list to open or select it and click Edit Inventory Count list. The products displayed depend on the selected inventory count type.
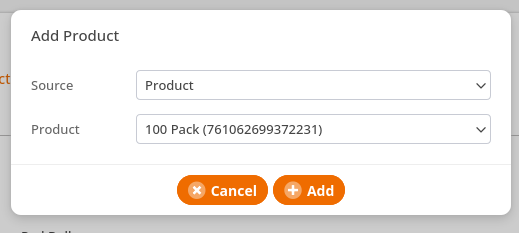
In addition to general information on the inventory list, the list of items to be counted is displayed here. Directly above the list of products is the button “Add Product,” with which you can add individual products or entire commodity groups and assortments to the list. You can use the “Scan Products” button to add items using a hand scanner.
If you want to delete one or more articles from the list, select the appropriate line(s), click the orange drop-down menu next to the product, and click the “Remove Item” button. By clicking the button “Show Nominal Goods” on the right side, you have the ability to display the target stock.
You can also export this list to a PDF or Excel spreadsheet, which can be printed for hand inventory counts.
Edit Inventory Lists
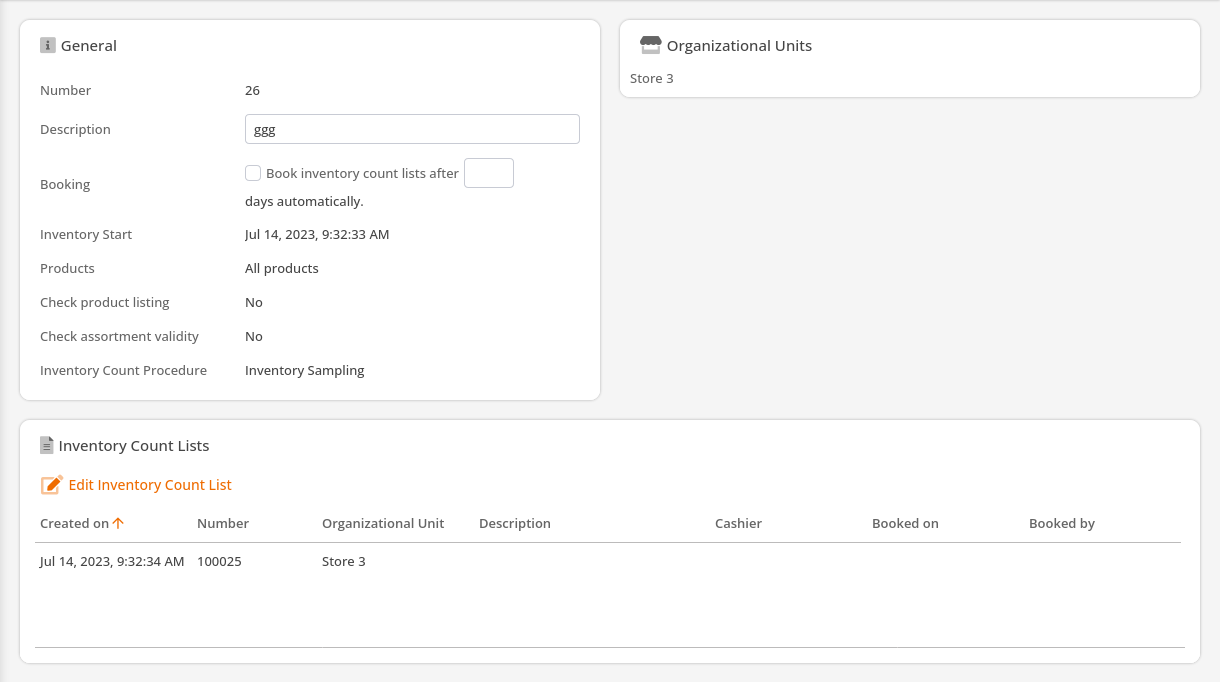
Once you click Save, the inventory is created, and the “Inventory counts lists” window appears in the lower area.
*Note: The time in the section “Inventory Types” when inventory lists are generated will vary depending on the type of inventory count you choose.
Evaluating Inventories
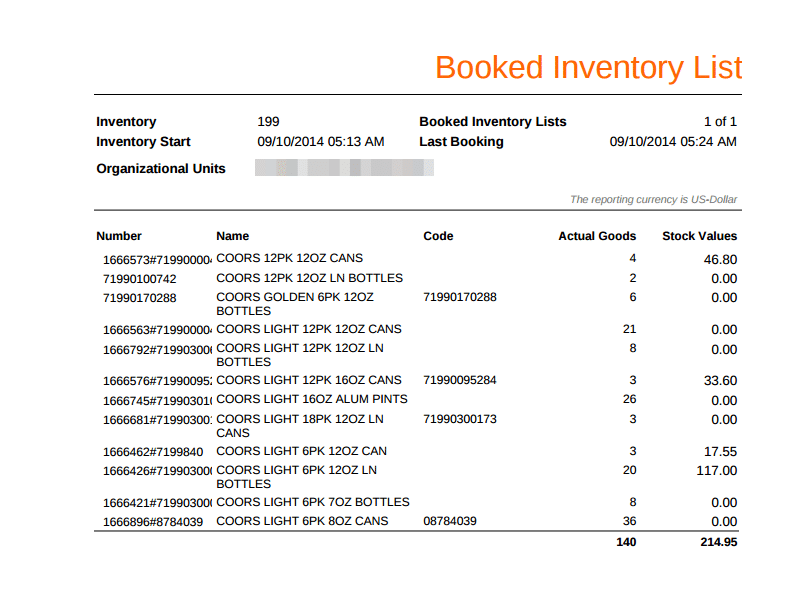
If you are in the “Create Inventory” or “Edit Inventory Count Lists” screen, you can export a “Booked Inventory Count List” as well as a “Difference List” in PDF format using the “More” drop-down menu. The stock value of your inventory shown is for the new count or “Actual Goods.”
The current value of the goods is calculated from this, as well as the purchase price.
The difference list gives you an overview of all the toolbar differences between the target and actual stock determined in the physical inventory.
We have a more detailed guide on the Inventory Difference List available here.
Inventory at the POS
Create inventories at the POS
You can also use the Inventory function to create inventories at the POS terminal. Instructions for creating this button can be found on the following page: Create POS Buttons / Button Configuration
To create an inventory at the checkout, first add items with the appropriate number to the receipt. The receipt can then be completed with the Inventory Receipt button (it is unnecessary to switch to the payment screen). The receipt is automatically finalized, and a sample inventory is created in the cloud. The quantity of items posted is automatically entered in “Actual stock,“ and the inventory can be posted immediately.
Access inventory from the POS
The Open Stock Management Receipt button function is required, as well as a button with the Save Stock Management Receipt function.
If the Open Stock Management Receipt button is pressed at the POS, a window opens with a list of all your open stock receipts. In addition to the counting lists of inventories, the system also displays goods receipts and purchase orders. In this window, you can create a new purchase order, receipt of goods, return, or inventory. The creation of an inventory here corresponds to the above-mentioned sample inventory. Alternatively, select an available document by tapping it and press “Load Receipt.”
Once you have loaded an inventory receipt, a list of products corresponding to a count list is displayed in the receipt window. Now, you can either use the Quantity function to adjust the number of items or add items to the receipt, as previously mentioned.
*Note: If an item is listed on the receipt, only the quantity of the last item is transferred to the cloud as a count value. In addition, you cannot book any inventories from the POS directly. That step will have to be finalized in the Korona.Cloud
After quantities have been correctly added to the receipt, you can complete the inventory with the Save Stock Management Receipt button. The entered quantities are transferred to the cloud and entered as actual stock in the appropriate inventory. No counts are transferred to the cloud for items canceled on the receipt. Non-adjusted quantities are transferred with the counted value of zero.
Merging Inventories
Many stores will perform inventory by giving each employee a section to count. To prevent issues, we recommend that each employee have their own inventory, and then, in the end, all inventories can be merged into one. This prevents issues with merging. If you have a product present in multiple parts of your store, the counts are all honored in the final count.